Using path: locator strategy with Windows library
Using the path locator strategy with the `windows` library to access elements using indexing.
This Robot demonstrates how to use a path: locator strategy with robocorp libraries.
(although we recommend you to update to the latest version to benefit from all the fixes and features we brought lately)
The element path is the last resort method of accessing a Windows application's element structure, when normal accessibility properties are not available or do not contain enough information to properly identify elements.
Understanding the window element tree and element paths
Main idea
The Basic idea of the element path is that any element in the application's element structure can be indexed in a set state given its structure. If the application's element structure is changing unpredictably, then even the element path itself can't be used to identify elements.
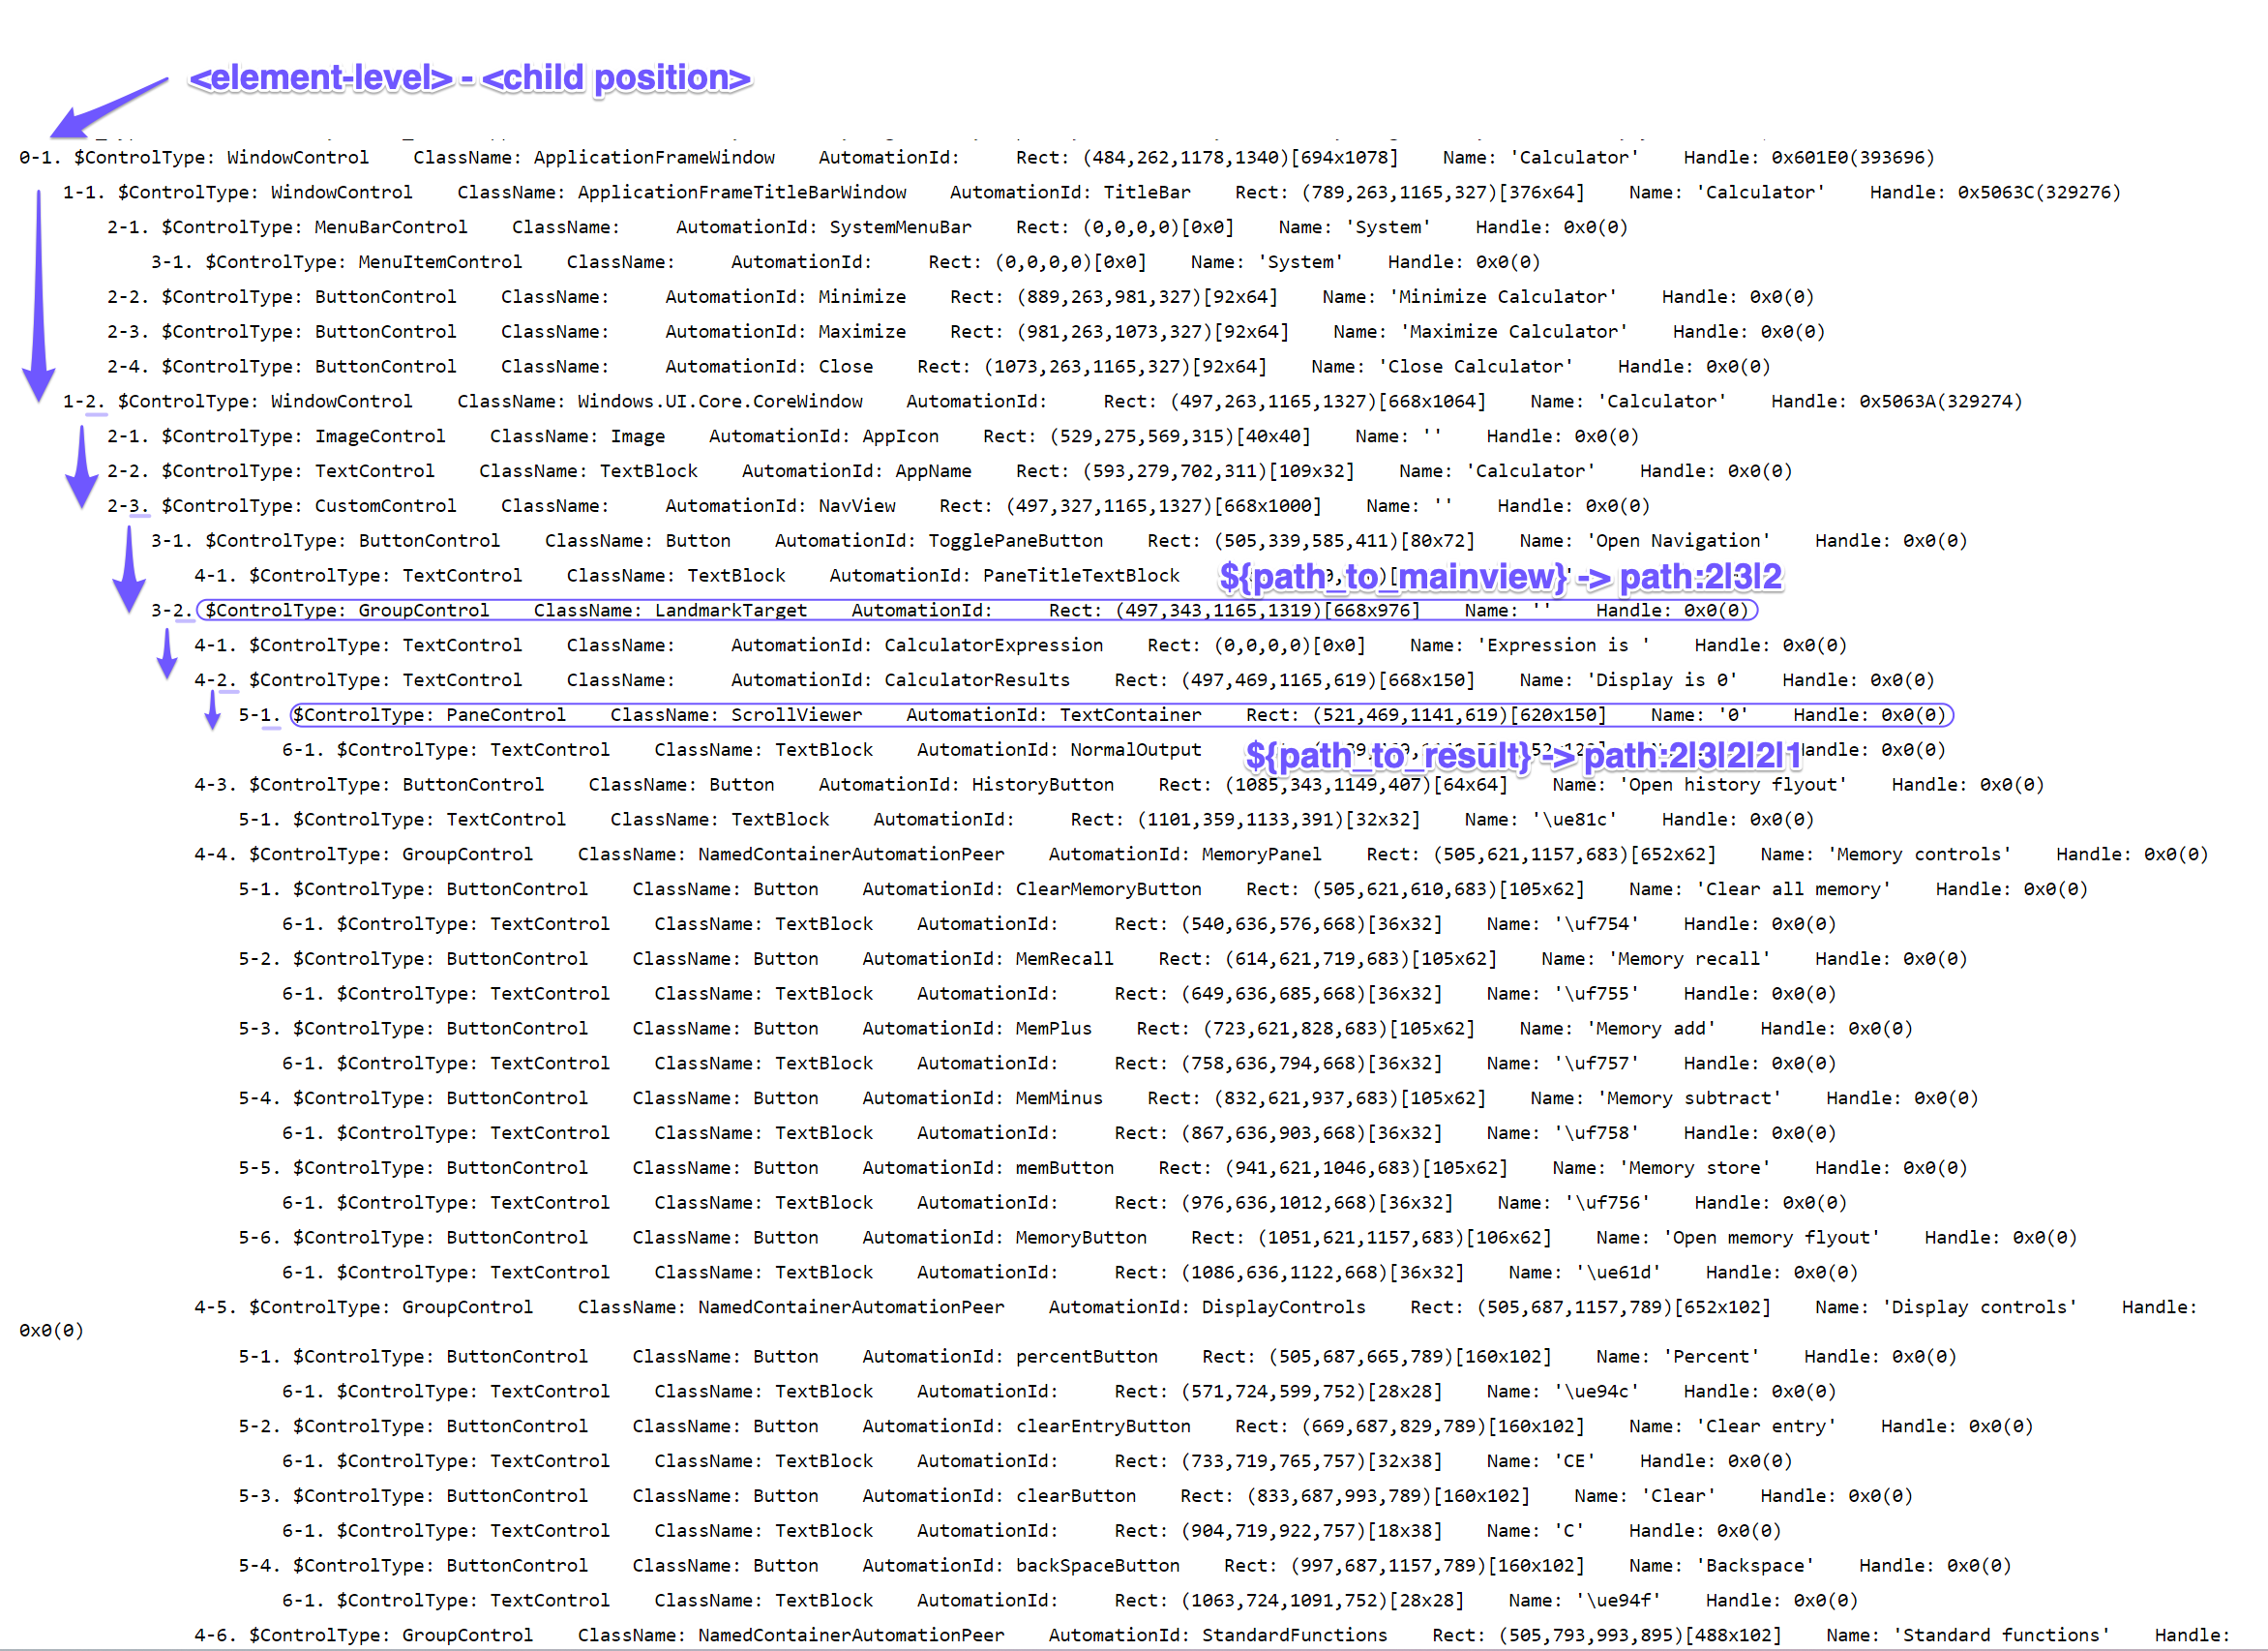
The Windows Calculator is used here as a sample application to show how the element
path works with the robocorp-windows library.
Note: The Calculator application provides excellent accessibility properties, so in usual scenarios, you don't need to rely on paths given this.
Inspecting the element tree and understanding its value
Each entry is prefixed with 2 numbers (check the image below): <element level> - <child position>
- The first number indicates the depth level of the element in the element tree.
As a reminder, the default search depth in
robocorp-windowsis 8 (which applies also to theprint_treefunction). Search depth can be changed with themax_depthparameter. A level of0indicates the root and your path composition starts with the first child under that. - The second number indicates the position of the element under its current level (number 1 indicating the first child) in the element tree. These positions are used as values when creating a path for the element locator.
⚠️ The root element position (here the WindowControl of the Calculator application)
is not part of the element path-based locator. Indexing starts from the depth level
of 1. (as 0 is the singular root level which is already your default active window
if it was previously controlled.
How the value of the path: locator is formed
In our Calculator robot, all the elements of interest are descending from the root
element assigned to the variable ${path_to_mainview}.
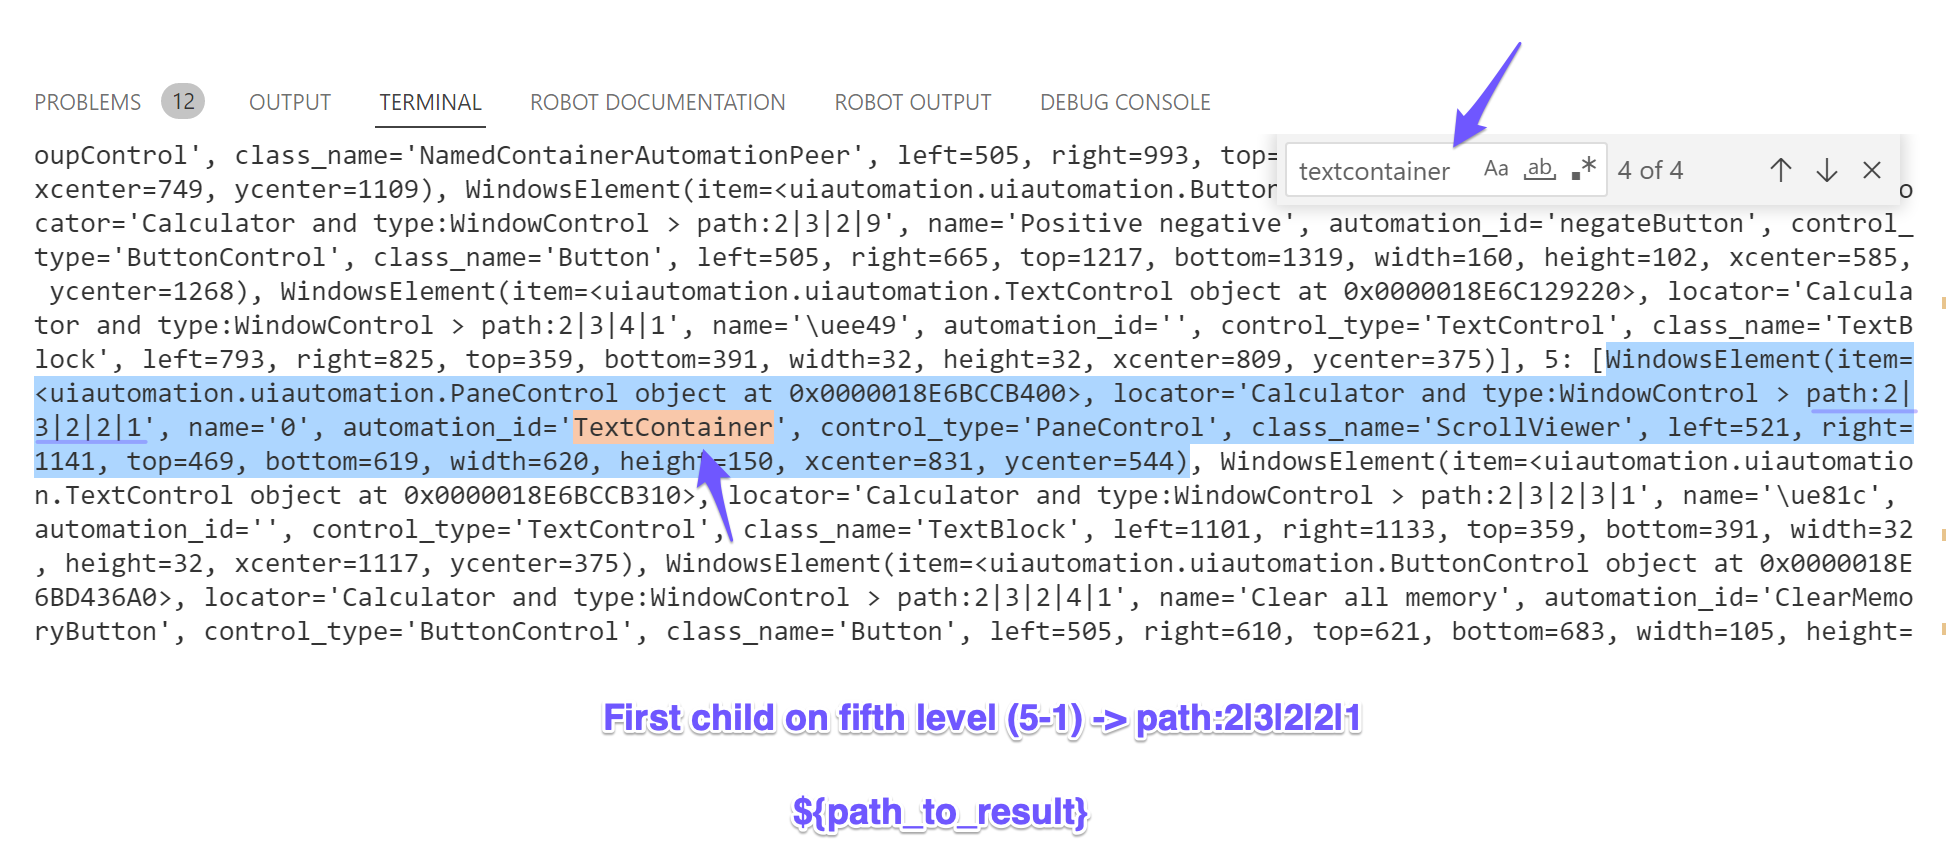
To get an element path for the ${PATH_TO_MAINVIEW}, I can see from the image below
that its locator starts on the second position (under the parent window), which is
"1-2", and then we select the third child ("2-3"), and finally the 2nd next
child ("3-2"). This translates into the final element path-based locator of value:
path:2|3|2.
The pipe character (
|) is used for separating the positions when jumping from level to level. (starting with level1and onwards until you stop at the element of interest)
Now I can use this as a new parent/prefix (instead of the Calculator root window) for the rest of my locators. (to avoid redundancy)
The path: strategy can be combined with other locator strategies as well.
The rest of the locator variables, based on the path: strategy, are computed in the
same way I described above.
Tree printed log:
Tree returned structure:
An element recorder for your convenience
Tired of counting child positions and remembering indexes? We've got your back with our
own windows-record script which is capable of displaying such complete paths
starting with the currently controlled window (the root of the element tree) until the
element you just clicked.
Get a shell into the robot environment and run the script with windows-record -v.
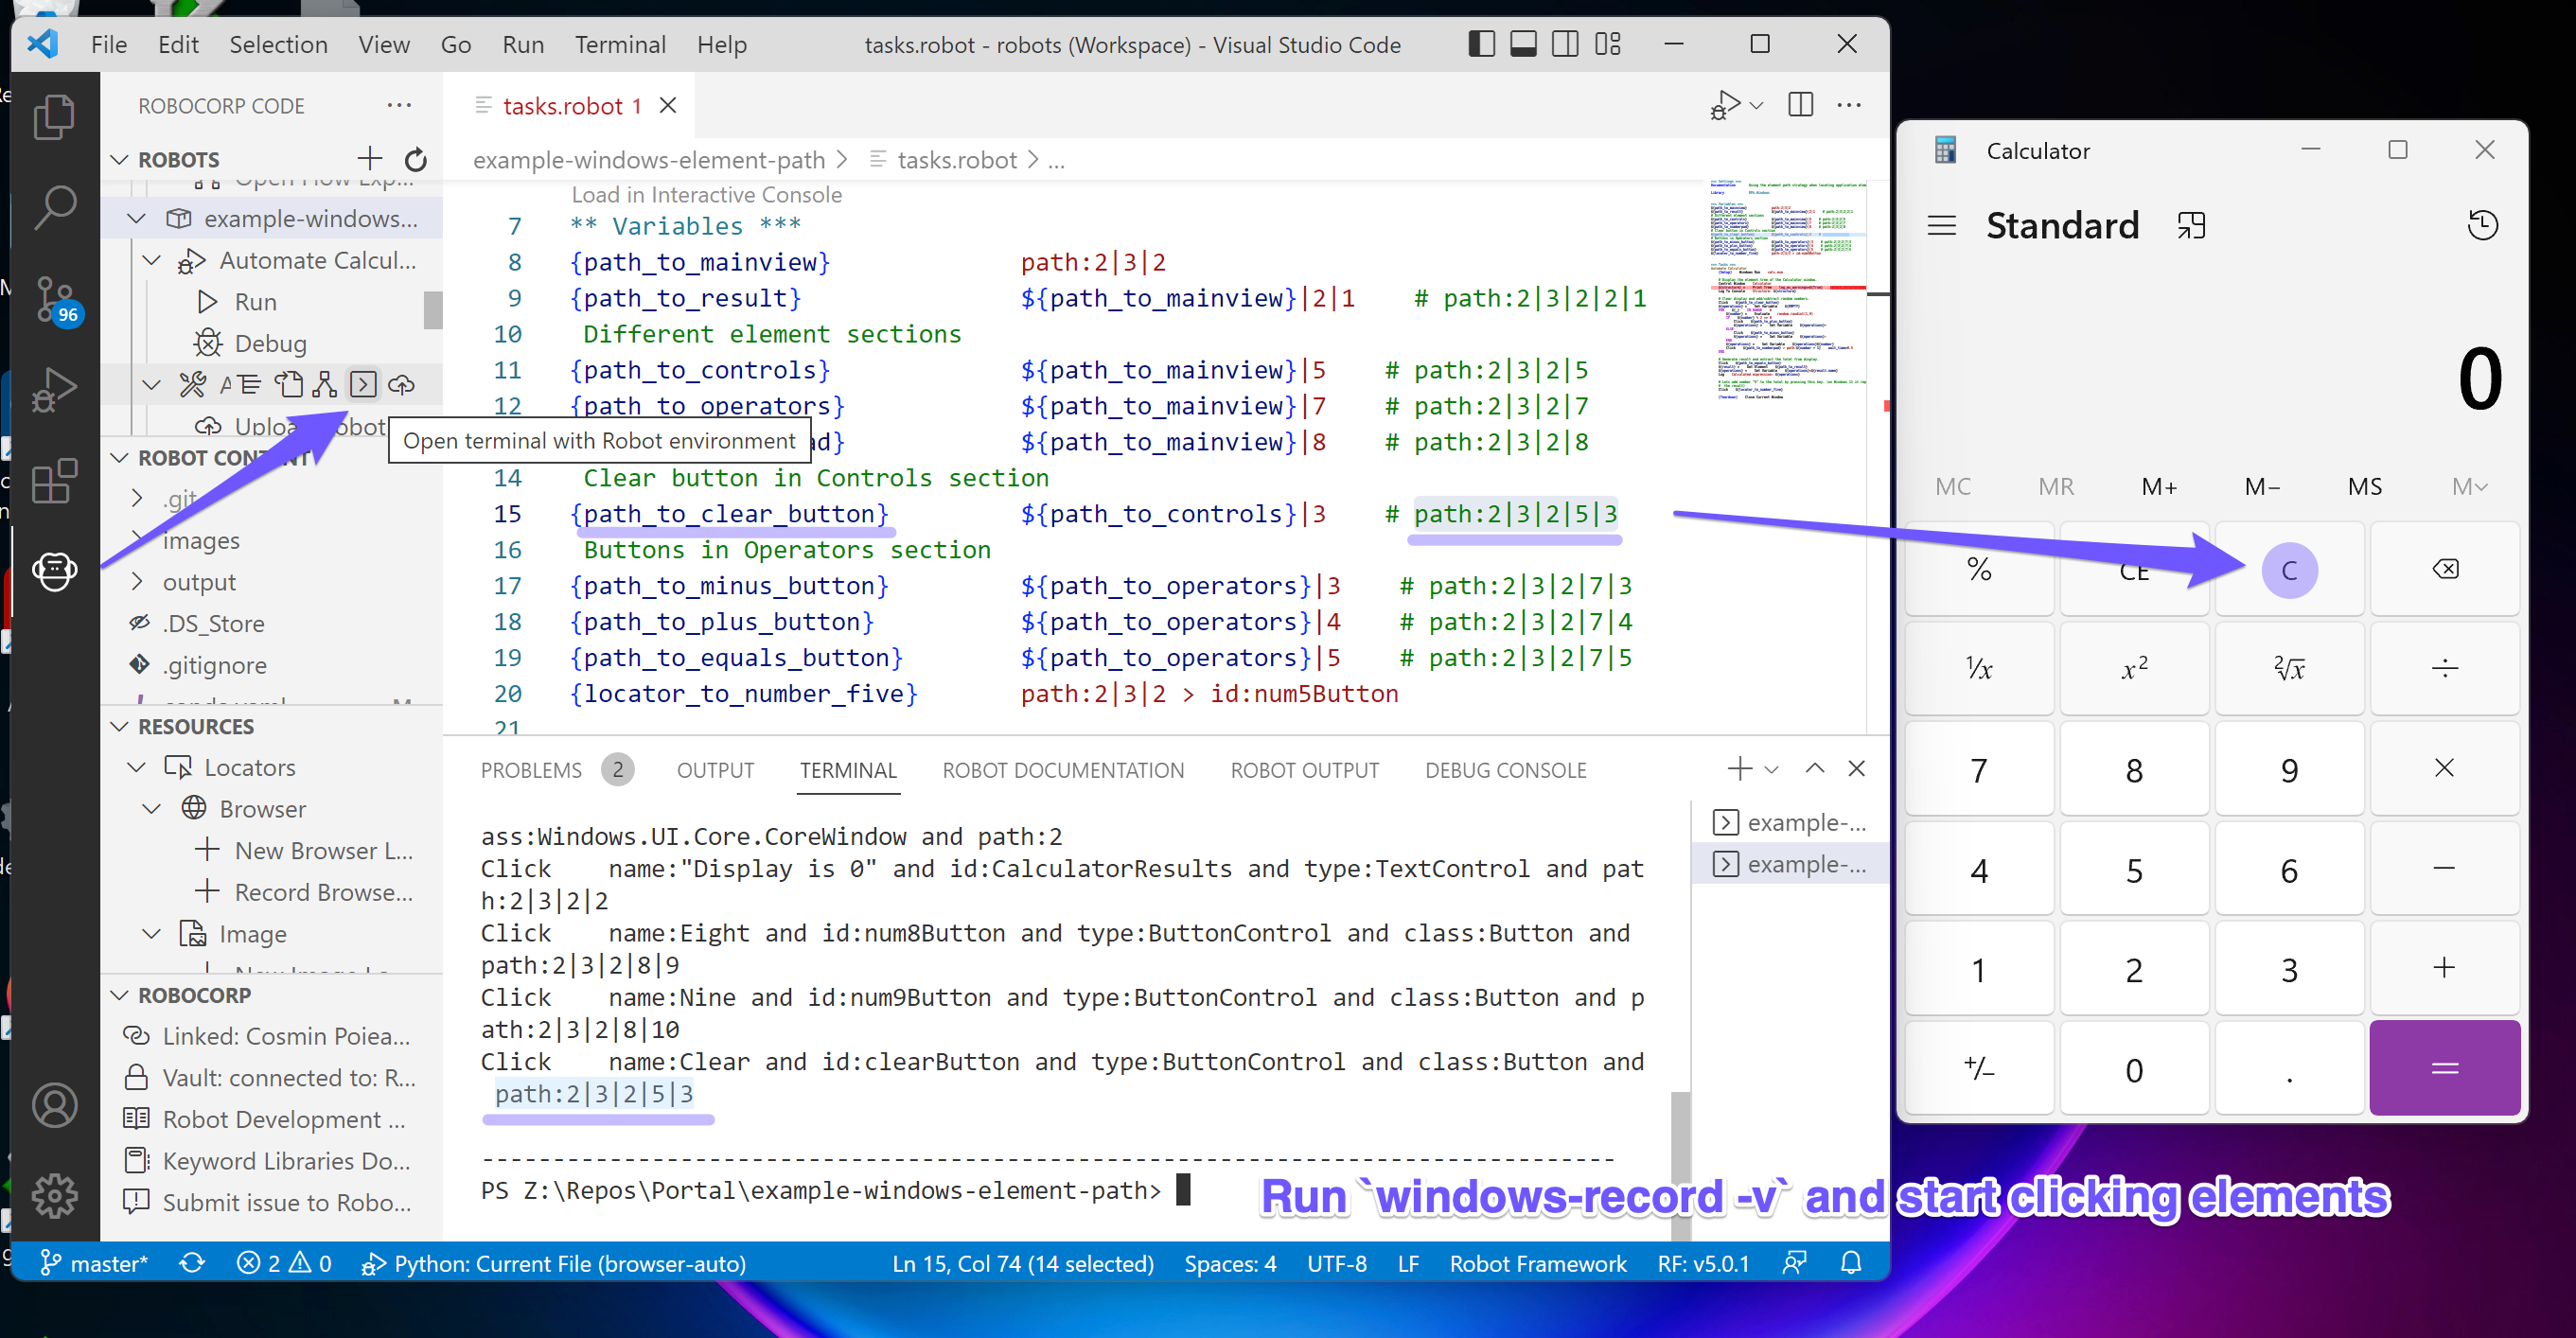
Here's a recorded demo to see it in action: https://www.loom.com/share/2807372359f34b9cbe1bc2df9194ec68
How the robot works
This robot is just entering six random numbers into the Calculator app (after opening it) and either adds or subtracts these numbers.
Learning materials
Technical information
Last updated
3 January 2024License
Apache License 2.0Dependencies