Using work items
What is a Work Item?
Steps in the same process can share data during their execution, thanks to the concept of a Work Item. Each step execution receives work items as inputs from the previous step and creates work items as output to the next one. During the execution, each step can freely read and update the data contained in an item. It's also possible to trigger processes with custom work items via an API call, and the contents can be used in the first step of the process.
A work item contains a payload of JSON-based data and optionally attached files.
Step inputs and outputs
There are two main ways to approach building processes with work items:
- Each step of the process creates output items, with the option of creating multiple items at once.
- One work item for each process run is passed between steps and optionally modified at each stage.
The first option is the default. It enables powerful automation workflows such as the producer-consumer pattern. The second option is less powerful but easier for composing simple sequences of steps. Every trigger of the process ensures all steps run one after the other if no errors are encountered.
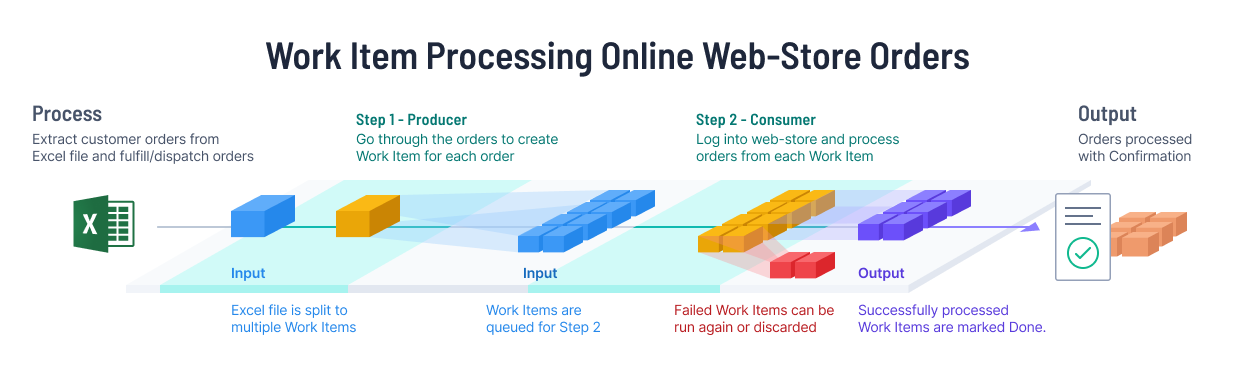
One example use-case of the first option (1.) would be a step that receives a large Excel file of orders and splits it into work items per row (the producer). The second step would be to process each work item individually (the consumer). With this pattern, the producer can wait to handle incoming requests, and the consumer can run in parallel and potentially process a large volume of data.
Another advantage of splitting work into individual items is the separation of concern. If one row of the input data is wrong, it can be manually fixed and re-run without affecting all other rows.
Example: Web store order processor with multiple work items
Dependencies
The primary way to interact with work items is through the RPA.Robocorp.WorkItems library. We start by importing it in our .robot file:
Make sure you have an up-to-date version of the rpaframework library in your conda.yaml file:
By default, the RPA.Robocorp.WorkItems library uses Control Room to store the work items and pass them between steps. It also supports local work items for easier development. More on that later.
The producer: Creating output work items
In the example linked above, the first task defined in producer.robot looks like this:
For every row in the table, we call the Create Output Work Item keyword, passing it the variables. Saving is done by setting the save argument to True.
A keen reader might have seen an example of reading files in work items in the first task! We used the Get Work Item File keyword to receive the initial Excel file of our orders. How the first step receives this item is described in the following sections.
All changes to work items are stored locally until you save the output work item.
The consumer: Reading work item data
In the consumer.robot, we want to log in to the storefront, but we want only to do that once as it can be the slowest part of the process. After login, we want to loop through the incoming work items making orders for each:
The For Each Input Work Item keyword loops through the work items in the input queue, passing each to the Load and Process Order keyword.
The Load and Process Order keyword handles incoming work items one by one. It uses the Get Work Item Payload keyword to get the input work item data and passes them to the Process order keyword. Process order contains the logic that adds the Items to the shopping cart and then performs checkout using Name and Zip.
If the Process order keyword fails:
- We log failure details, which end up in
log.htmland are visible in the execution output - We call
Release Input Work Itemto mark that specific work item as failed. Here we also provideexception type,code, andmessagefields so that the robot developer can affect and aid in the resolution of these items.- Use these correctly to enable effective resolutions when running in Control Room.
- See Work Item Exception handling for recommended practices.
In the example, one of the items cannot be found in the storefront:
- When running in Control Room, the item will be shown as failed.
- In Control Room, the failed work items can be checked, fixed, re-run, or marked as completed, so you only have to handle the failed items.
If the
Process orderkeyword would generate more output work items for other process steps, those output work items would be released for processing whenRelease Input Work Item DONEis called, signaling a successfully handled input work item.
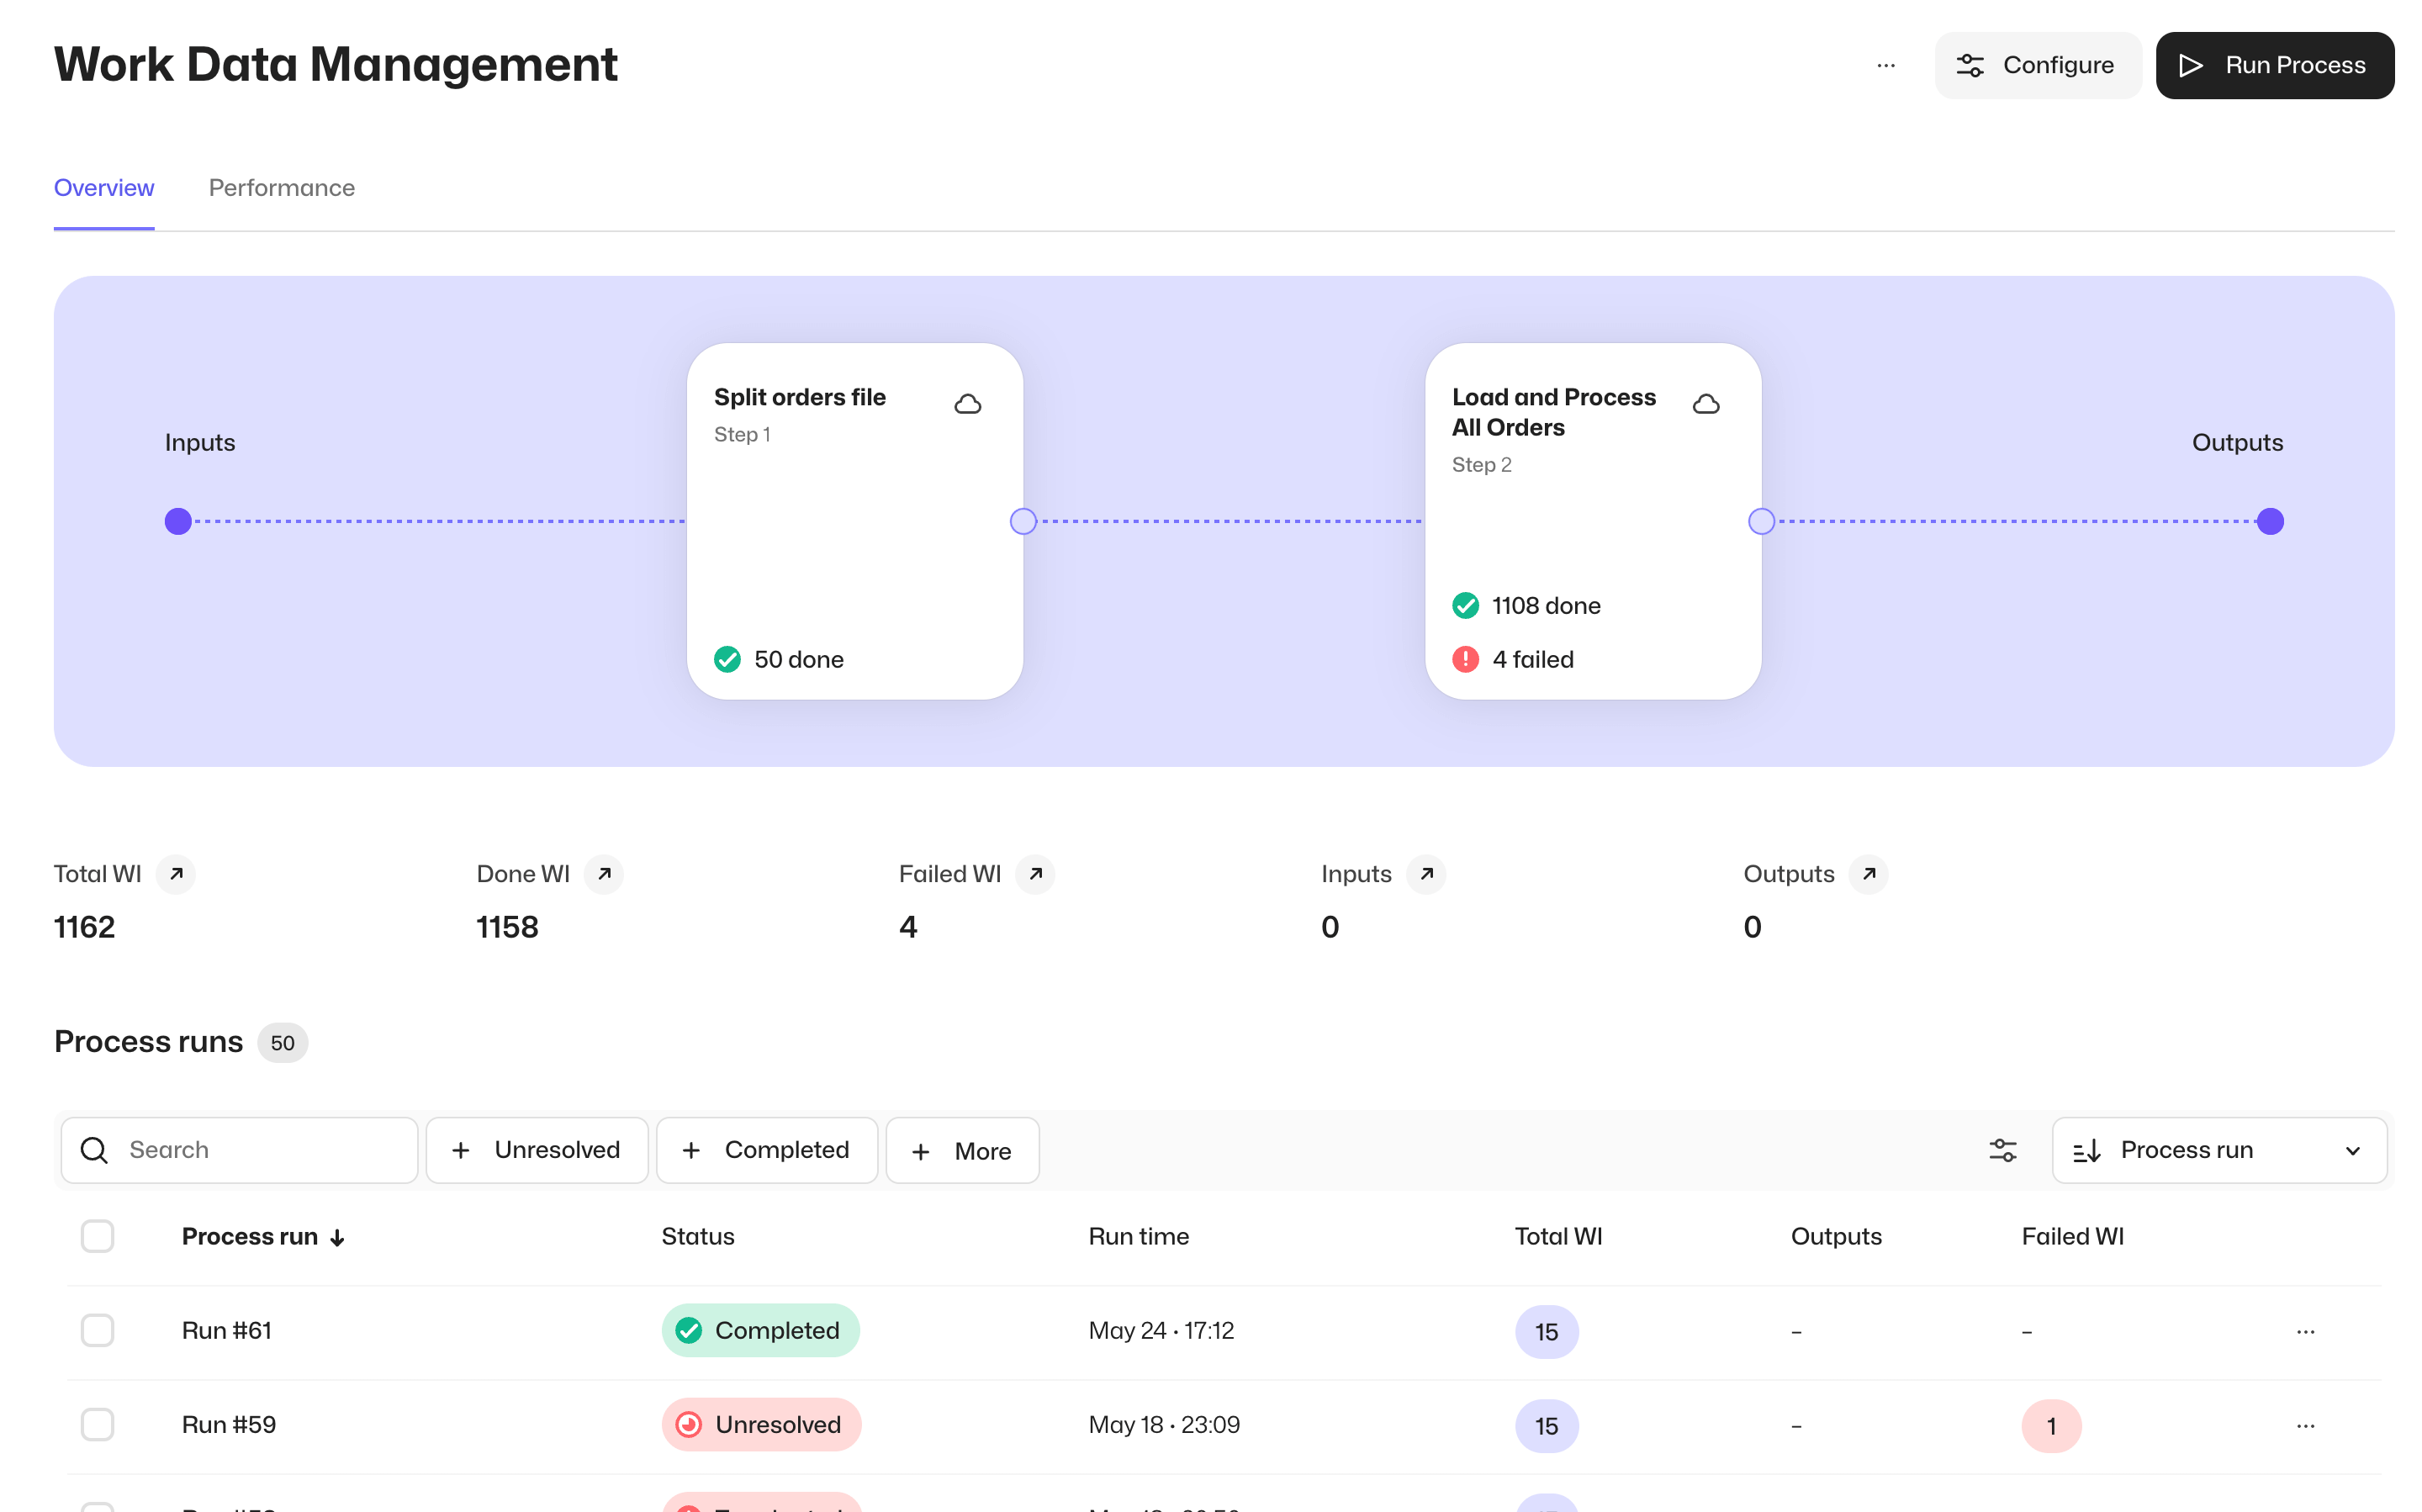
Configuring Control Room
To run the full process in Control Room, we create a new process under the Processes section. The process will have the two steps described earlier:
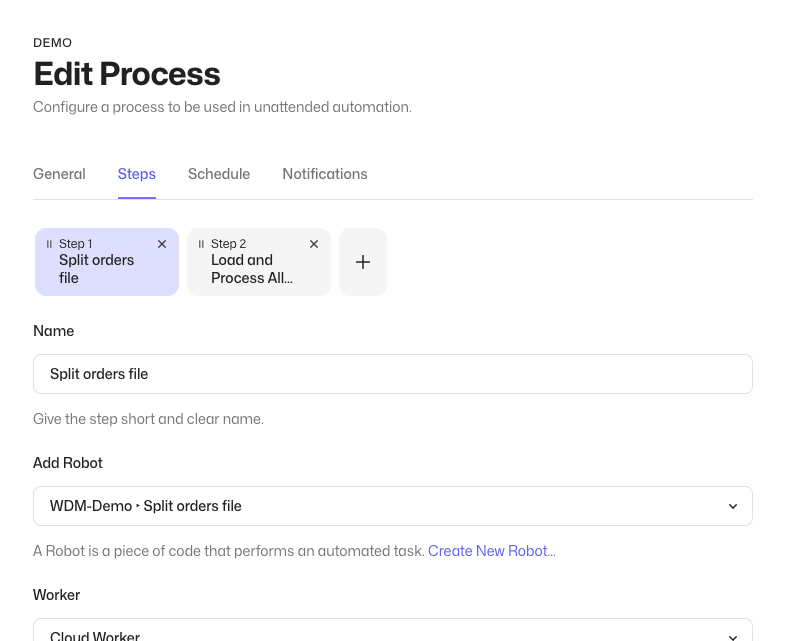
Another feature of Control Room that we can use with our current process is parallel executions, the ability to run multiple work items in parallel in the same step. The number of parallel executions can be changed in the step configuration:
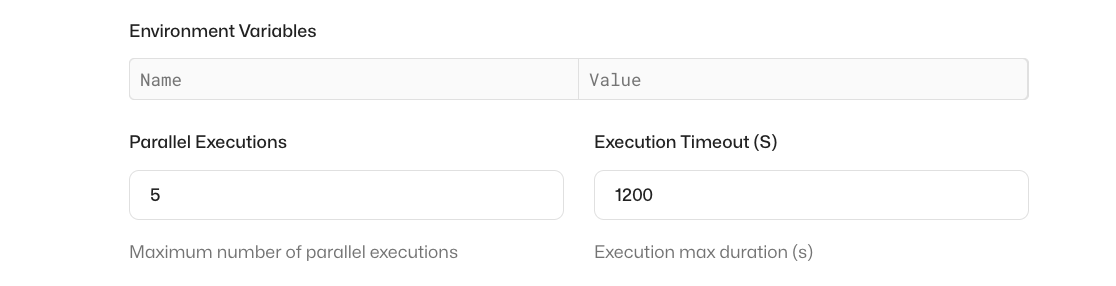
In this example, we use a parallelisation value of 5. If there are more than our set limit of work items, they will wait until previous items have been processed.
Triggering the process
This robot expects to receive an Excel file of a certain format, named orders.xlsx. There is an example of such input in the root folder of the robot.
You can accomplish this in two ways:
- Triggering a process manually with a custom work item, using the Control Room UI.
- Triggering a process via a Control Room API call, passing the work item content.
Work item exception handling
In short, if the handling of a work item fails, we need to mark that work item as failed. However, just stating that "something failed" is not enough; we need to categorize the problem and help out the people who resolve these as much as possible.
Thinking ahead to the maintenance phase of a robot, providing good exception details can mean that the people using the robot can resolve most if not all data-related issues, leaving the robot developer more time to focus on new robots.
For stating the exception, we have three details in the exception: type, code, and message.
Details for each of these is explained below, and you can find the example of how to use these here.
Exception type
Types are used to categorize the exception on a high-level enabling Control Room to perform further actions or highlight the need for human attention needed.
Exception types are:
- Application exception
- This type should be used when the exception is such that a retry is possible with the same data.
- Example: Target system login is down, automatic retry in 2 hours.
- Business exception
- This type should be used when human attention is required for resolution.
- Examples: Missing values in data, missing products in the system, etc.
- Unspecified exception
- Default type if no other type is specified
- ...meaning some case has been missed and should be checked and identified.
- Orchestration exception
- This type is reserved for edge-case exceptions that are outside of the robot and usually have to do with infrastructure problems.
- This code should not be used in the robot code.
- Requires attention from the Process Manager/robot provider/IT.
- Examples: Run terminated by users, connection lost to environment (e.g., a machine has powered down)
Exception code
The code field should be used to give more technical tags to categorize exceptions deeper. This field is designed to enable customized automatic actions based on the exception.
So even though the code field is just a string, it is for the machines.
For example:
All application exceptions related to SAP are marked with codeSAP. In the future, custom exception handling logic can be built on top of this:
>If SAP, retry in 6 hours
Exception message
The message field is for humans.
Robot developers should use this to aid in the resolution of the exception, mainly the process operator in the Control Room. Giving good guidance in this field can save significant time in robot maintenance, so it is worth investing time and thought in this one.
For example:
In case of an Application exception where the robot could not log in, the message could be
“Robot could not log into examplestore.com. Please check the website is not down.”
Manipulating the whole item payload
As we have seen, the Get Work Item Variable and Set Work Item Variable keywords allow you to manipulate the values in your work item conveniently.
There are cases, for example, when receiving a webhook from an external system, when you might want or have to structure the data differently. In these cases, you can take advantage of the Get Work Item Payload and Set Work Item Payload keywords to work with the whole item payload.
Assuming you have a work item structured like this:
Note how the item payload is no longer a map of key-value pairs.
Because you do not have a typical dictionary as the payload, the Get Work Item Variable, Set Work Item Variable, and Get Work Item Variables keywords are not helpful in this case. Instead, you will need to access the full payload item and then target the data elements you need by directly manipulating the data.
An example of manipulating raw payloads:
- In the
*** Settings ***section, we have added the Robot FrameworkCollectionslibrary, which allows us to manipulate data structures like lists and dictionaries. - We are using the
Get Work Item Payloadkeyword to get the whole payload into a variable that we call${payload}. - We can loop over the raw payload using a
FORloop because it is a list instead of a typical dictionary. - To add new values to the payload, we can use the
Append to listkeyword that we got from theCollectionslibrary. - We can then set the work item payload using the
Set Work Item Payload, and finally make the change permanent using theSave Work Itemkeyword.
Using this method, you can work on payloads with arbitrary structures at the price of adding a bit of complexity: for this reason, if you can create your payload using the default structure, we recommend you do so.
Working with files in the work item
In addition to structured data, the work item can also be used to store and share files. The RPA.Robocorp.WorkItems library provides keywords to add, retrieve, list, and delete work item files. Like all other data stored in the work item, the files will be available to all robot steps added to the same process. Files added to the work item are stored by Control Room and can be inspected using its user interface.
Control Room enforces a size limit of 50 MB per file added to the work item.
Developing with work items locally
When executing a robot in a Control Room, the RPA.Robocorp.WorkItems library will store the work item in the Control Room, sharing its contents between steps defined in the same process, without any configuration needed.
When developing our robot and running it locally, we want to simulate the Control Room behavior as much as possible using local files.
The robot in the example has detailed guides on using work items in local testing with different tools, so we highly recommend checking the description of that robot.
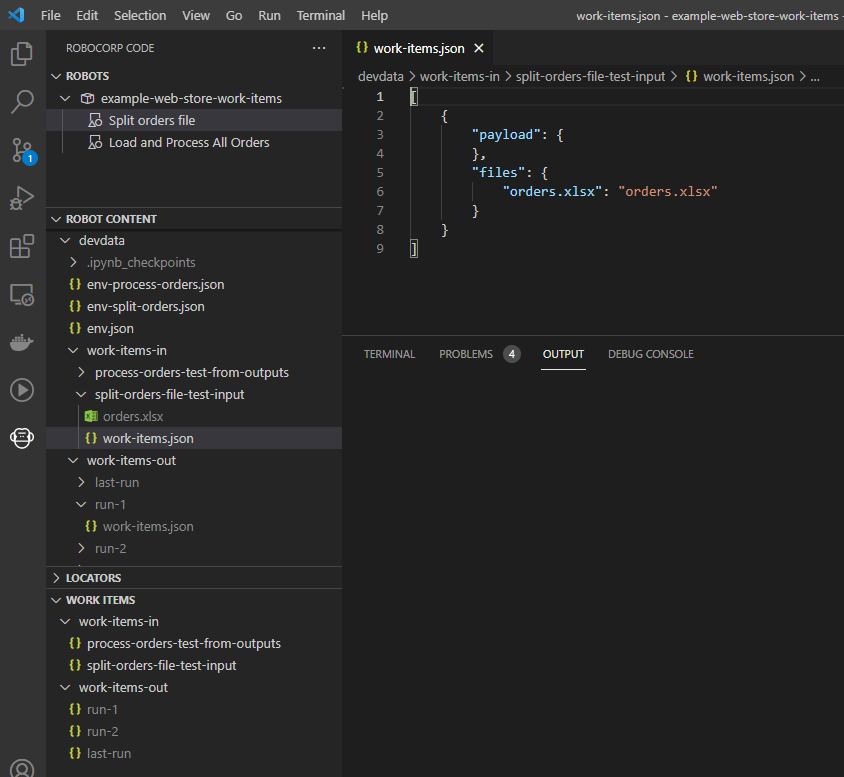
In your robot folder, the local testing focuses in the devdata folder.
By convention, you should have two folders in the devdata folder: work-items-in and work-items-out. This helps you store test input data in version control but leave the dynamically changing output out.
By convention, each folder under devdata/work-items-in is considered a "test set".
work-items.jsonis a reserved file, and it contains one or more work item definitions.- We recommend placing files linked to these work items in the same folder with the
work-items.jsonfile.
Inside work-items.json, the defined structure is a list of work items, each of which can contain payload and/or files sections.
- The content of the
payloadsection is JSON. - The content of the
filessection expects a key-value list where the key is the name used in the Robot implementation, and the value is the relative path to the file. - This is the same as the work items you see in Control Room.
Example work items
The best way to get started with work items is to start with the example robot and test it out, both in local development and Control Room.
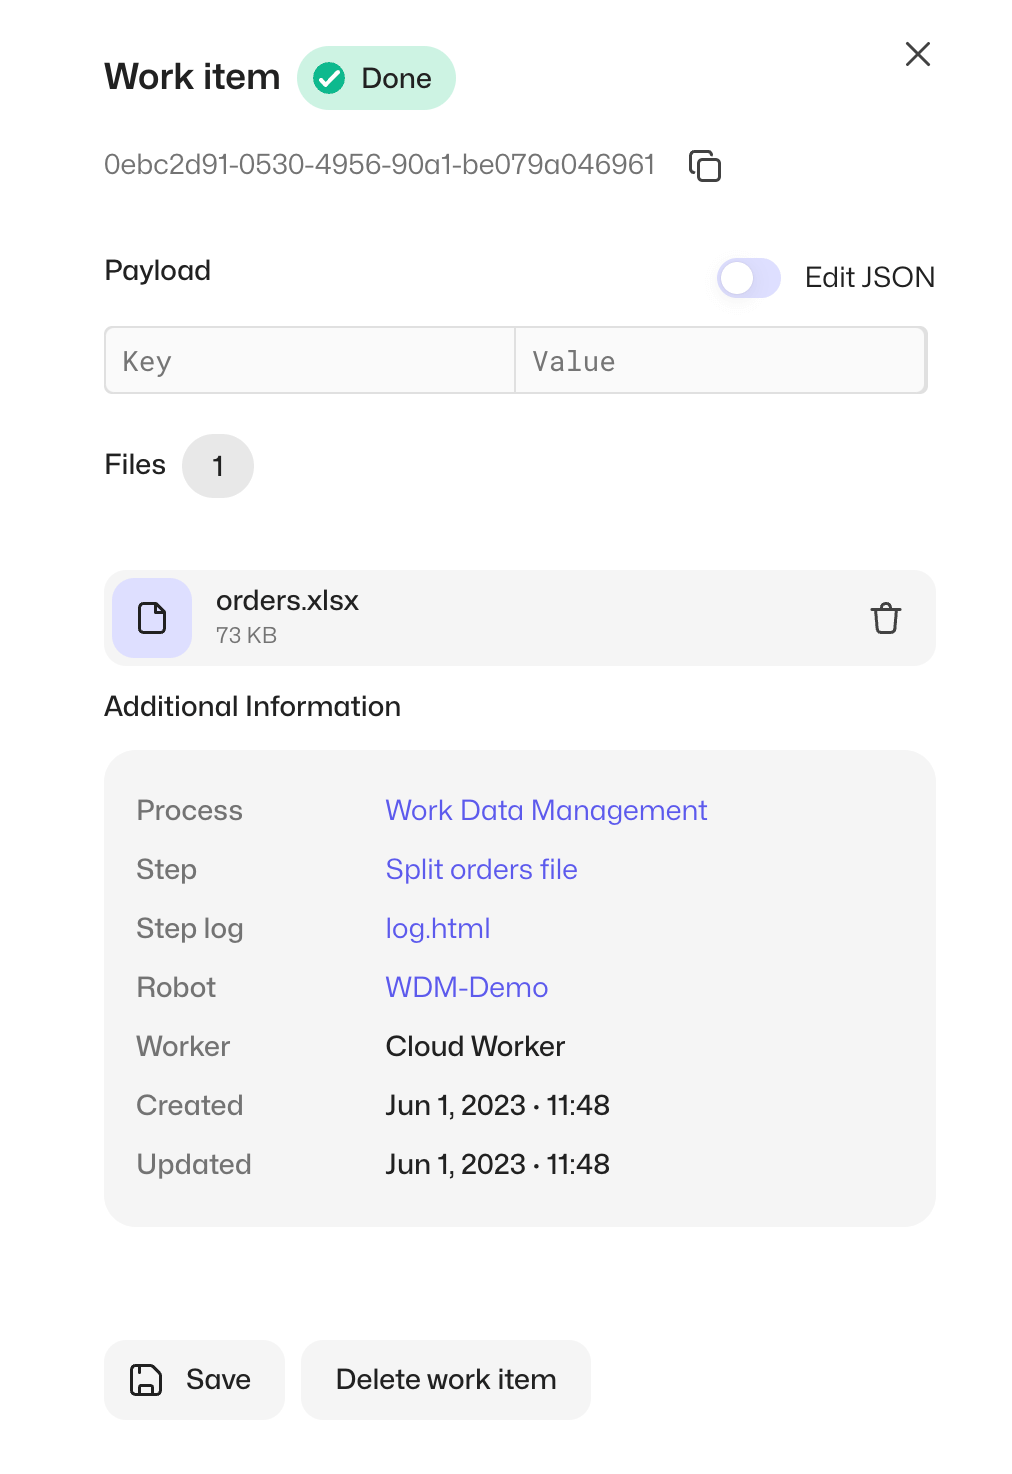
Work item with only a file
In Control Room, the work item looks like this:
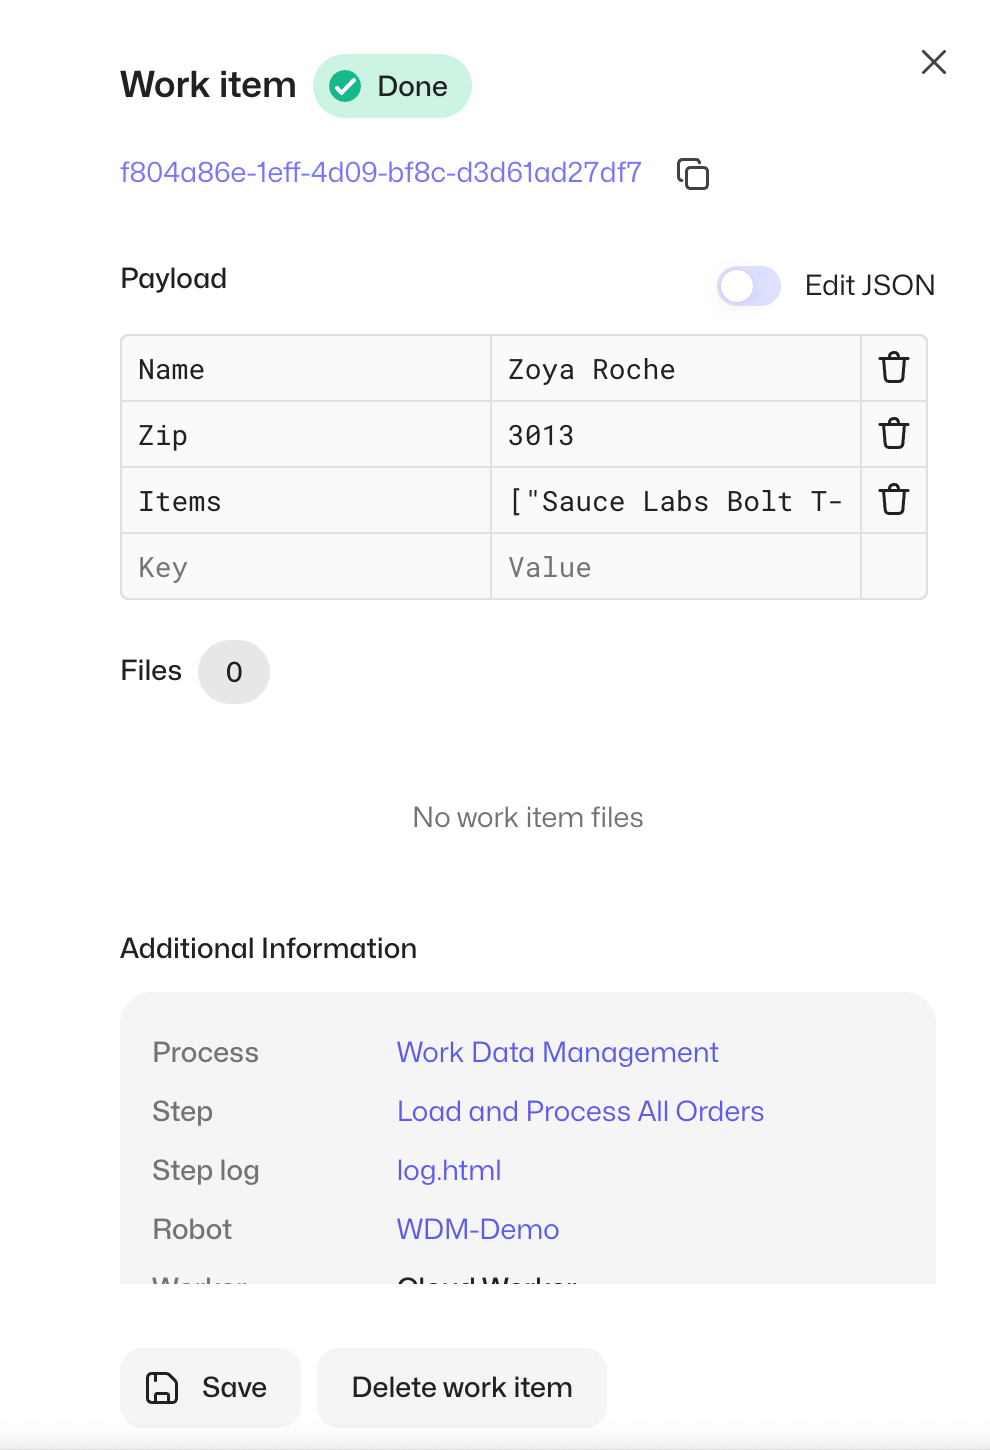
Work item with payload
In Control Room, the work item looks like this: