Reference guide
Setup Utility aims to ease the setup of the Robocorp environment for individuals and organizations. It provides ways for SSO profile integrations, complex network setups and Worker management.
Setup Utility is equipped to handle:
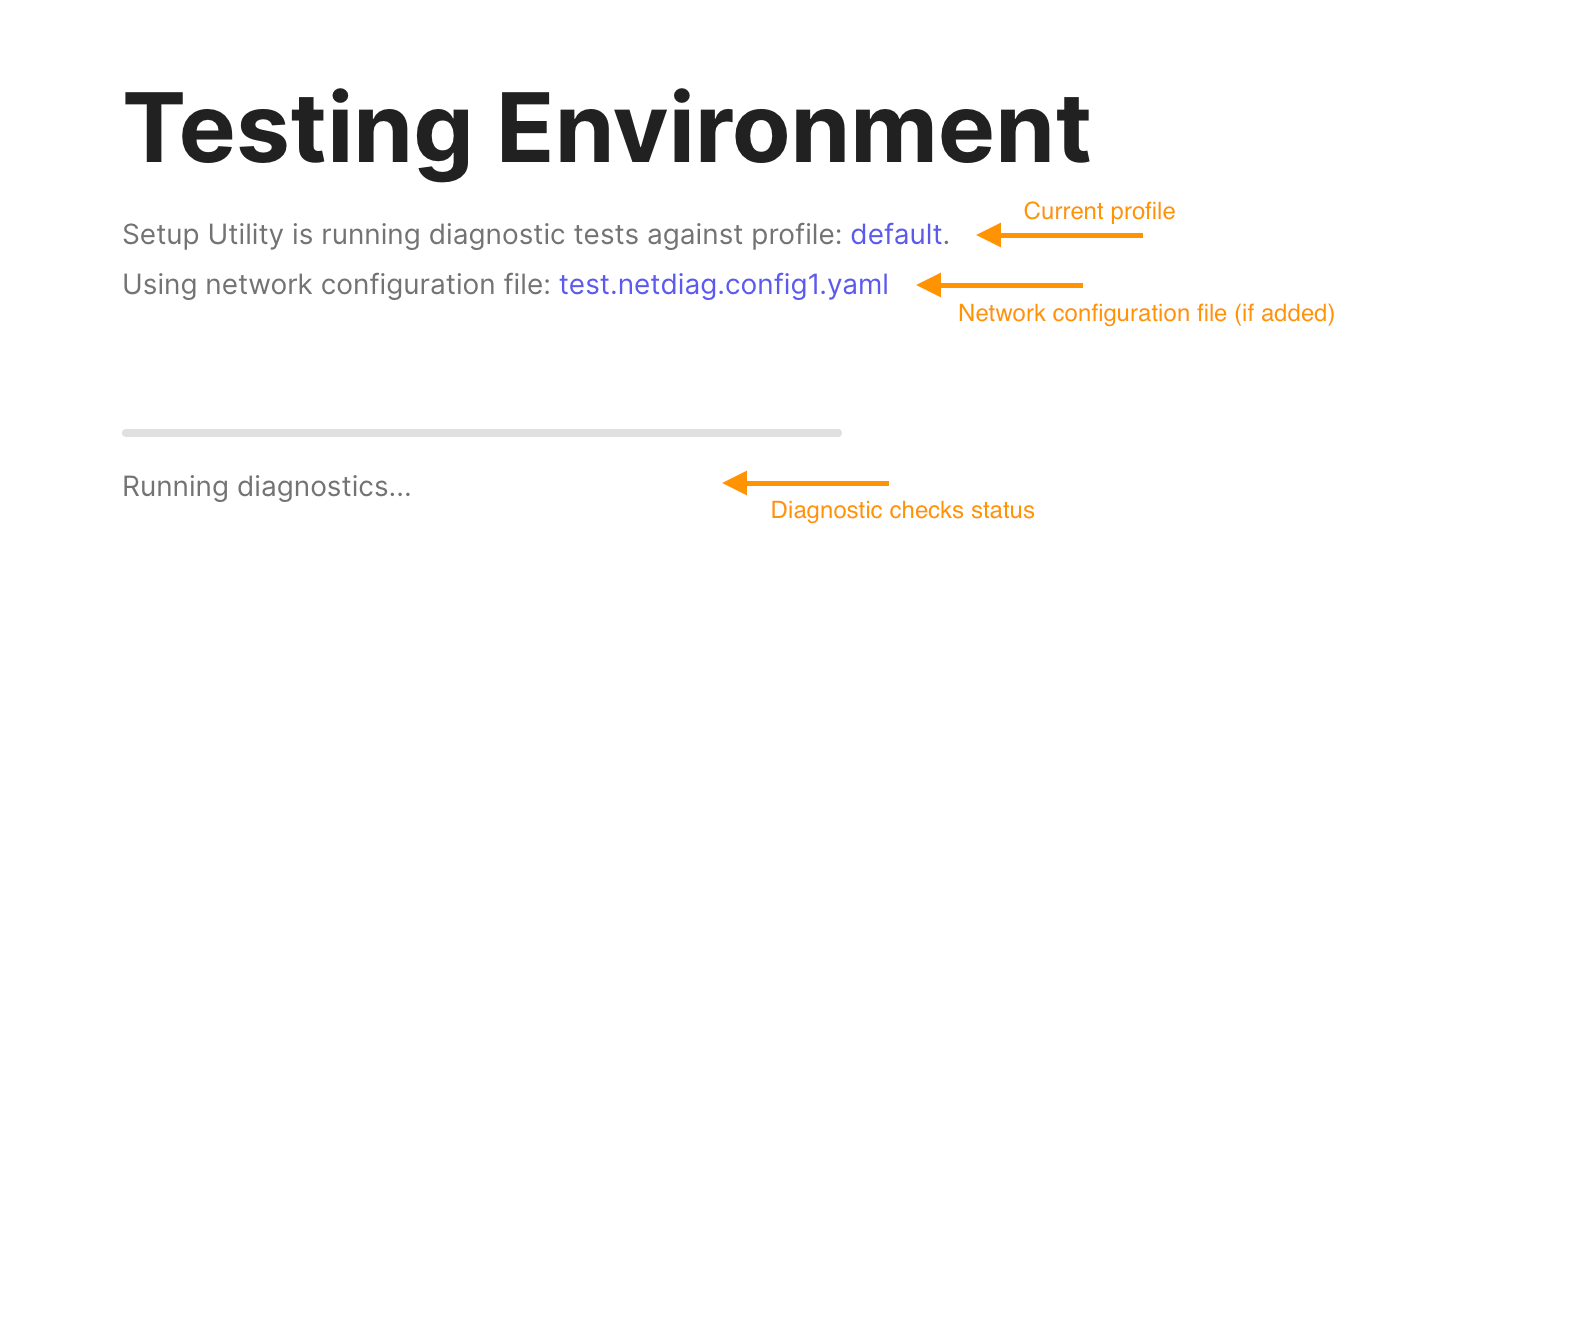
- Testing Environment - Run the diagnostic checks with the current RCC profile (and a network configuration profile if added)
- Environment Diagnostics - Display the diagnostic details and run actions to test or correct the current environment settings
- Profile Management - Add a new company profile, edit the current profile, import a new profile or switch to another available profile
- Worker Management - Setup Demo Worker for testing or Windows Workers for automation tasks
- Miscellaneous - Miscellaneous aspects of the application
On every page of the application you'll find the Settings Button that will open a specialized menu with different options for you to pick.
Be aware of the fact that Setup Utility works in two distinct capacities: as an Administrator enabled app & as a simple user app. Being an Administrator of the device will grant you access to specific features of the application.
Testing Environment
Before even starting on implementing any kind of automation task, you firstly must ensure you have the proper environment. The Robocorp environment is a set of tools and settings that sustain coherent and feasible automation.
To set up the Robocorp environment, you first need to configure a RCC profile based on your needs or your organization's needs.
Once the intended RCC profile is set up, the environment needs to be validated. As Setup Utility comes packed with the default RCC profile (which contains all the necessary items configured for common situations), you don't need to create an initial one.
Note: Every time Setup Utility is started, it will run the diagnostics checks with the current selected RCC profile (and a network configuration profile if added).
The RCC profile is an YAML file that describes different aspects on how the environment should behave.
Here is an duplicate of the default profile:
Re-running the diagnostics checks, can be triggered from the Environment Diagnostics page.
Simple stated, diagnostics checks are a set of tests ran with rcc that will create a holistic image of the system's environment by focusing on: Network, Operating System, RPA Settings. The overview of each category's status can be seen in Environment Diagnostics.
A diagnostic check has different outcomes - Fatal, Failed, Warning and Passed.
And all of diagnostic checks and their statuses can be seen in detail in the Diagnostic Details dialog.
Note: All the displayed diagnostics will be sorted depending on their status - you will always find the Fatal, Failed and Warnings on top. The Fatal and Failed status are considered to have the same importance as someone needs to intervene in order to correct the issue.
In order to have a completely reliable environment all of the diagnostic checks should pass. Here is the way Setup Utility relays the status of the environment in different situations:

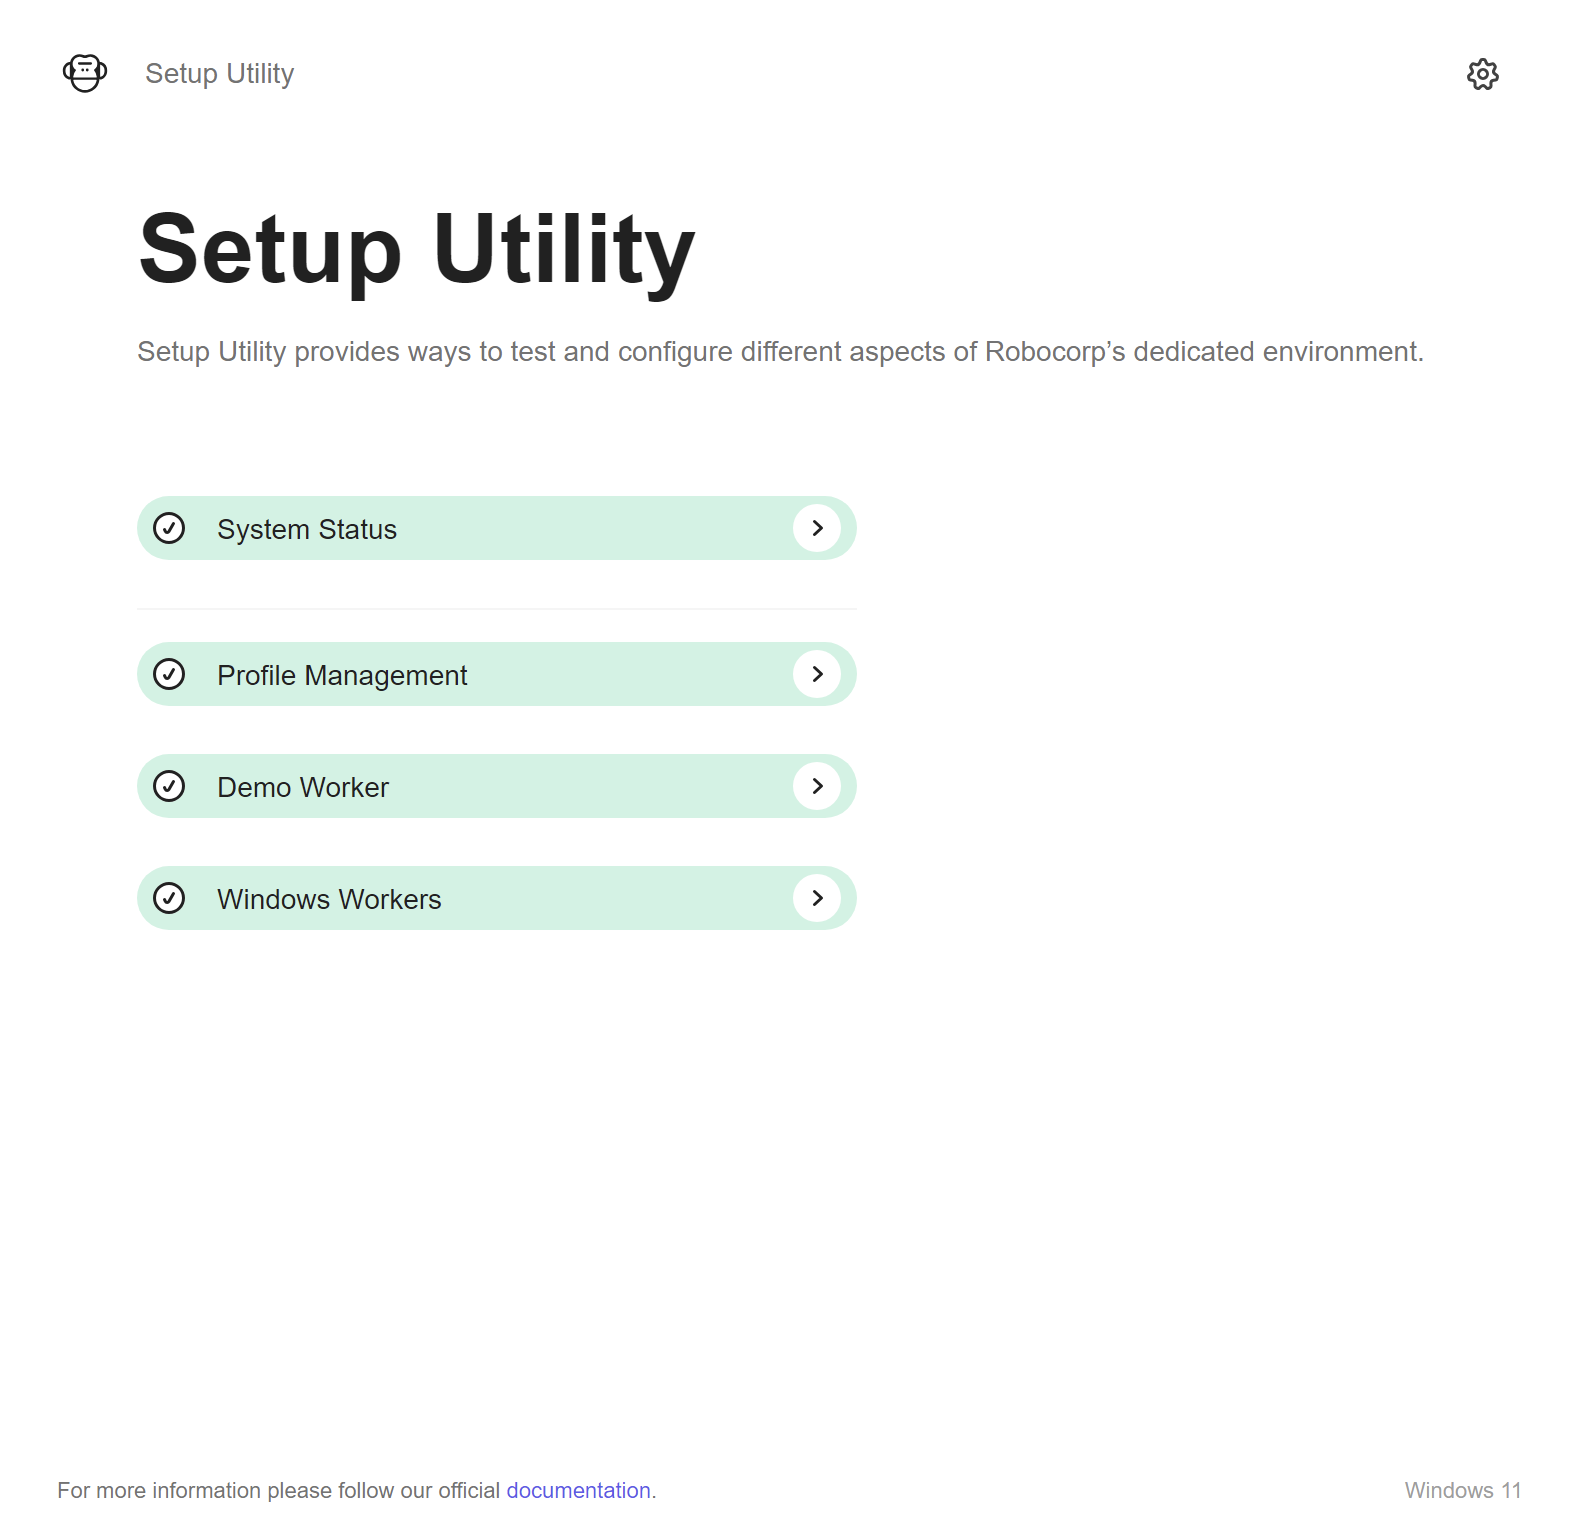
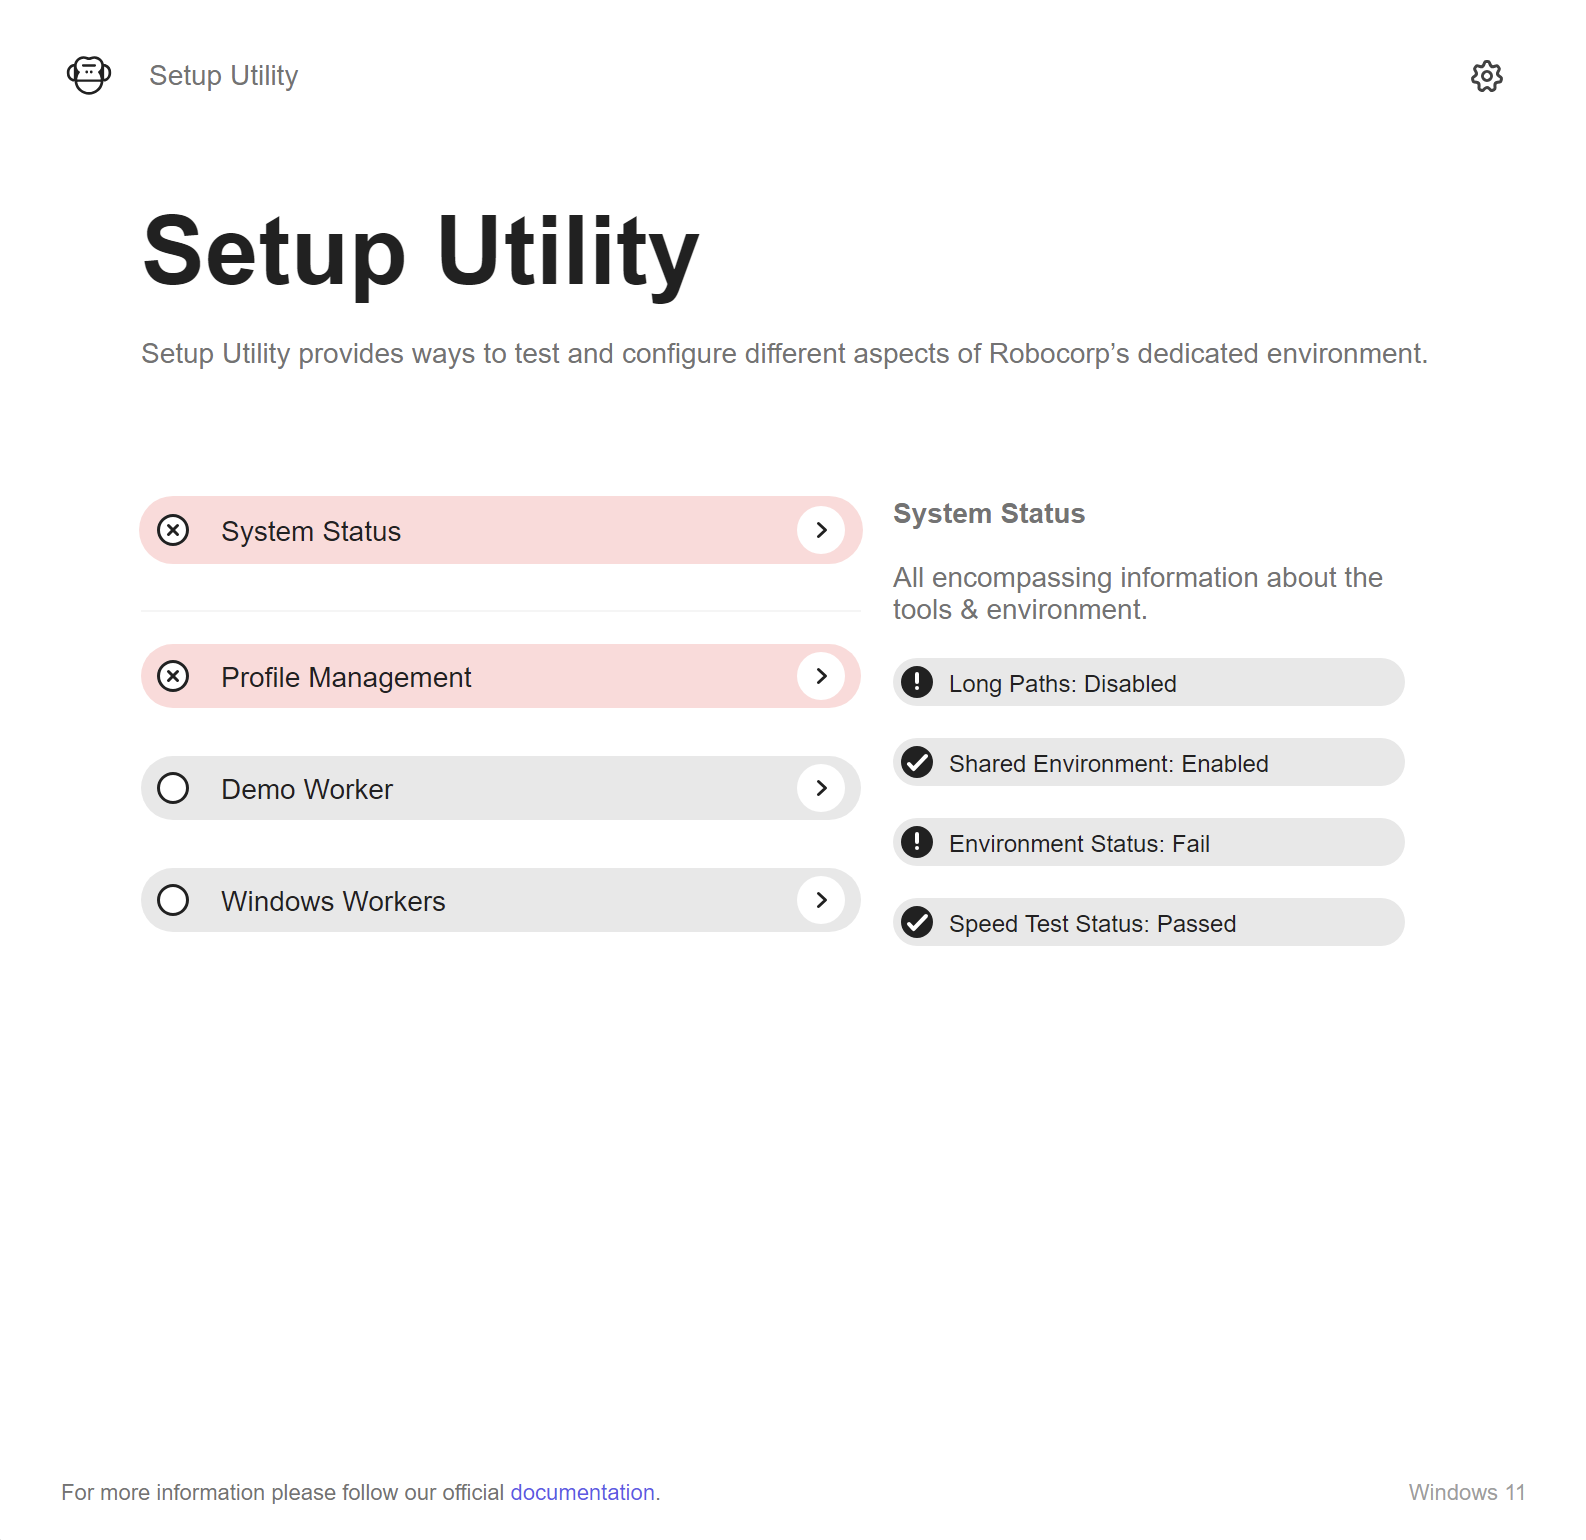
The Main Page
After executing the system diagnostics, indifferent of the outcome, you will be redirected to the main page of the application. Here you will be able to see the status of the Environment Diagnostics and navigate to the Profile Management page.
The Worker Management is under development and coming soon.
| Environment OK | Environment Warnings | Environment Failures |
|---|---|---|
|  | 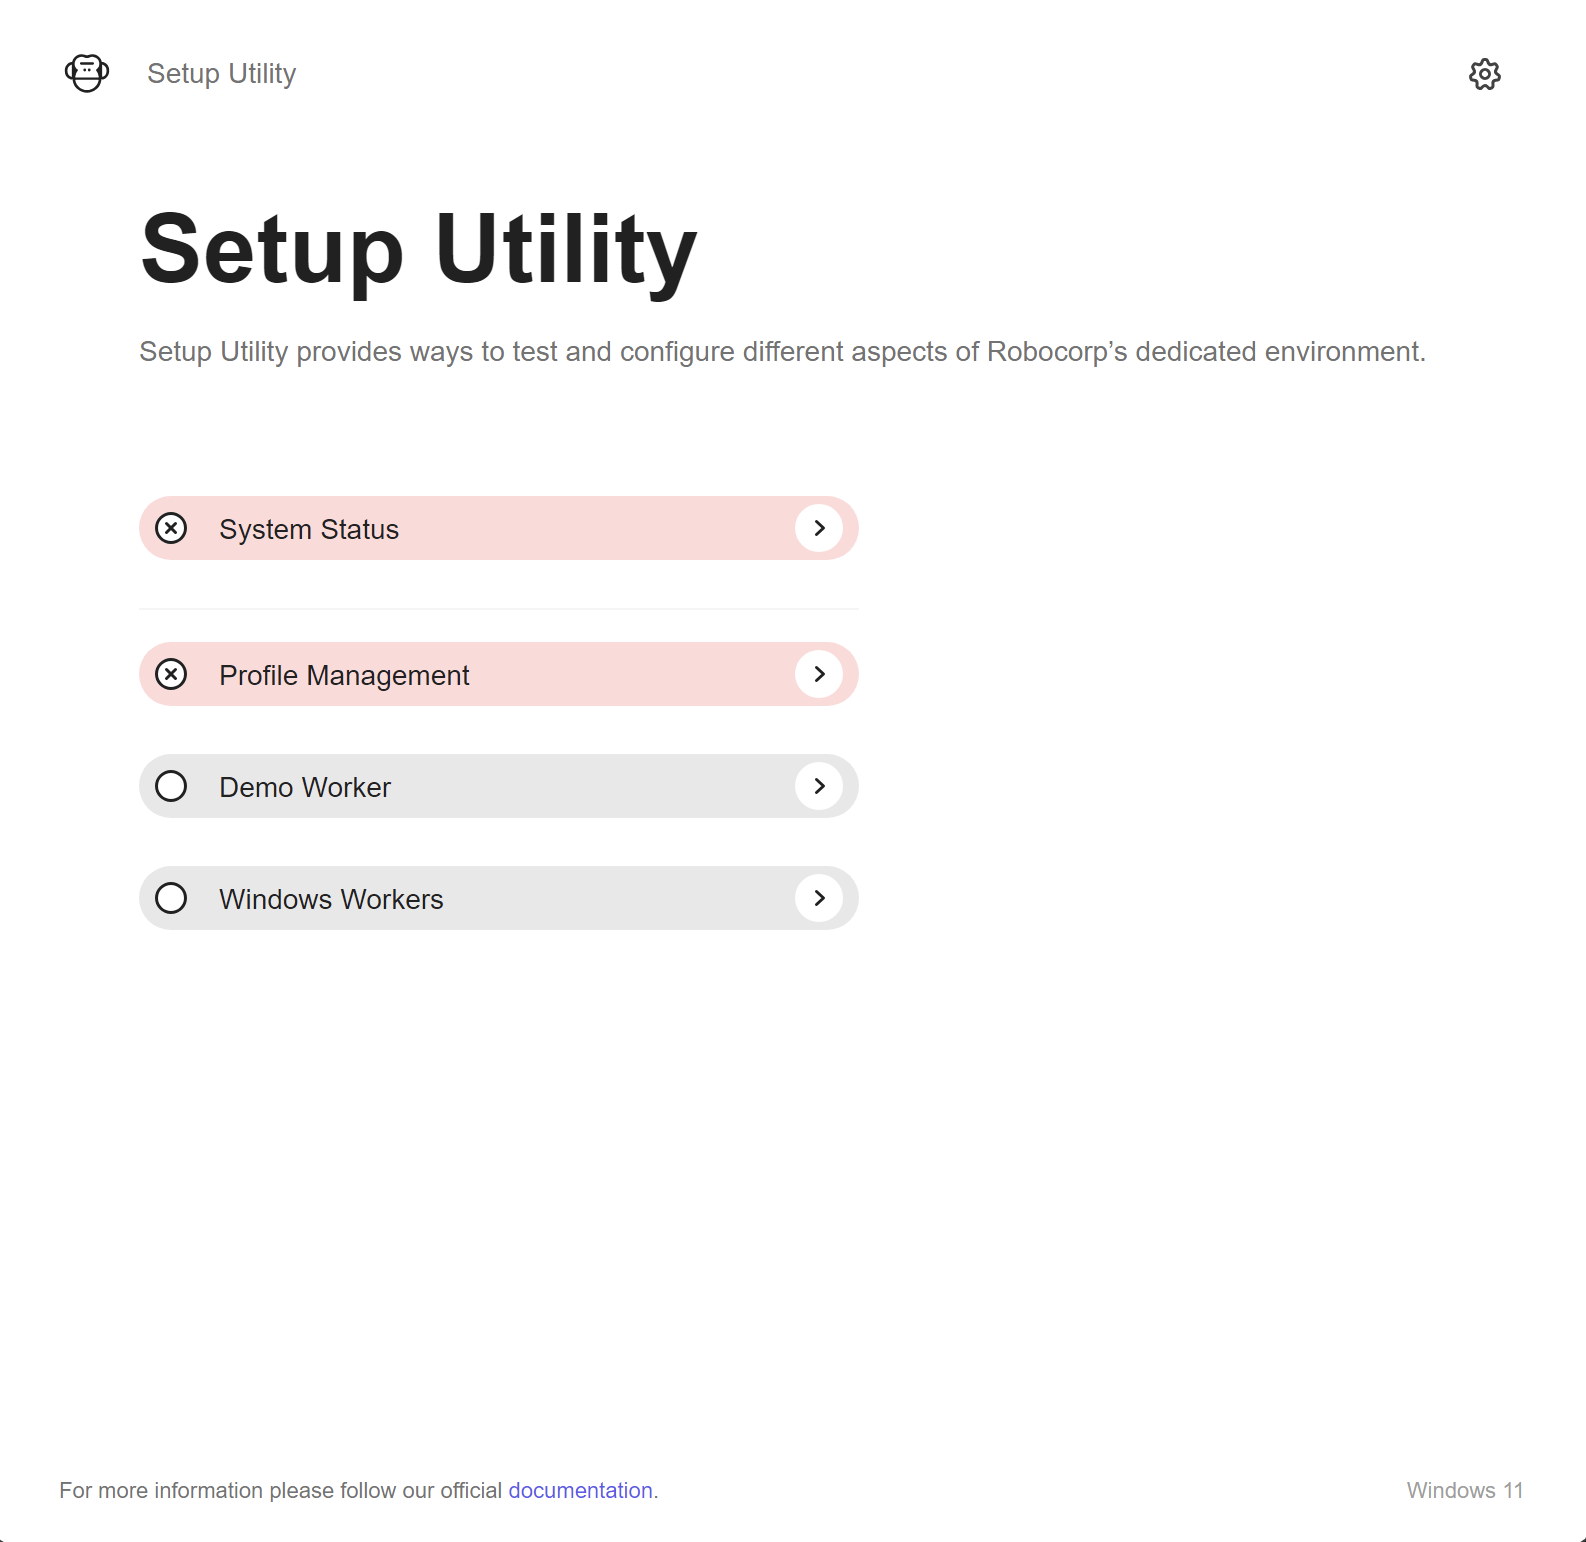 |
Note: The highlighted purple text in the app is representative of an external or internal link.
Environment Diagnostics
The Environment Diagnostics page will inform you about the results of the diagnostics run.
You can always rerun the diagnostic process by clicking the Rerun Diagnostics button.
Actions that modify the environment should be followed up with a rerun of the diagnostic process if not already automated.
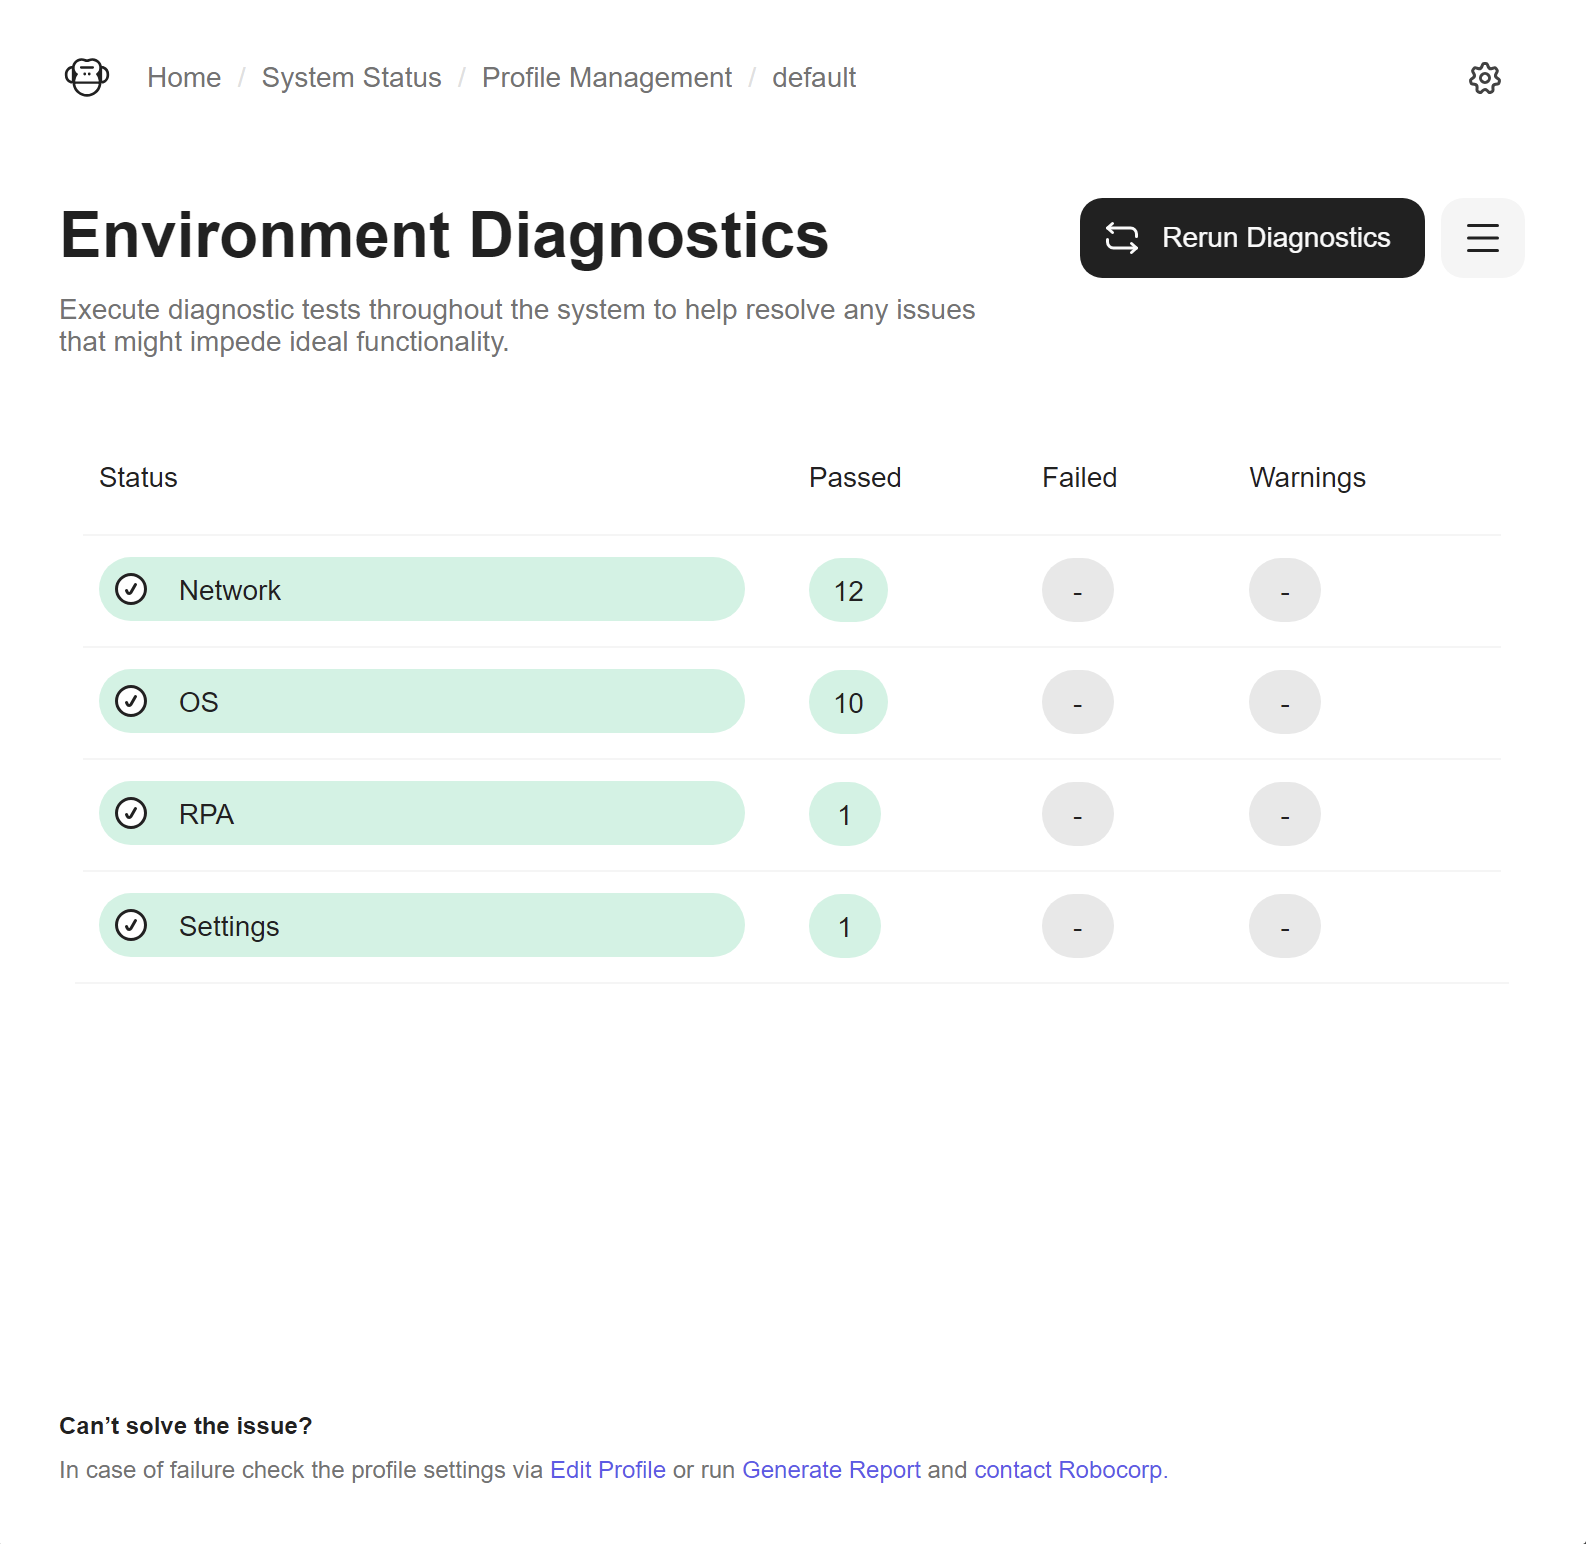
On the Environment Diagnostics page you can find the overview statuses for: Network, Operating System, RPA Settings.
Alongside these you will find the number of checks that have Failed, Passed or have Warnings.
As such you will have a holistic image of the Robocorp environment's status.
If you need a more detailed view of the executed run report you can open the Diagnostic Details dialog by clicking on the overview table or from the Details button.
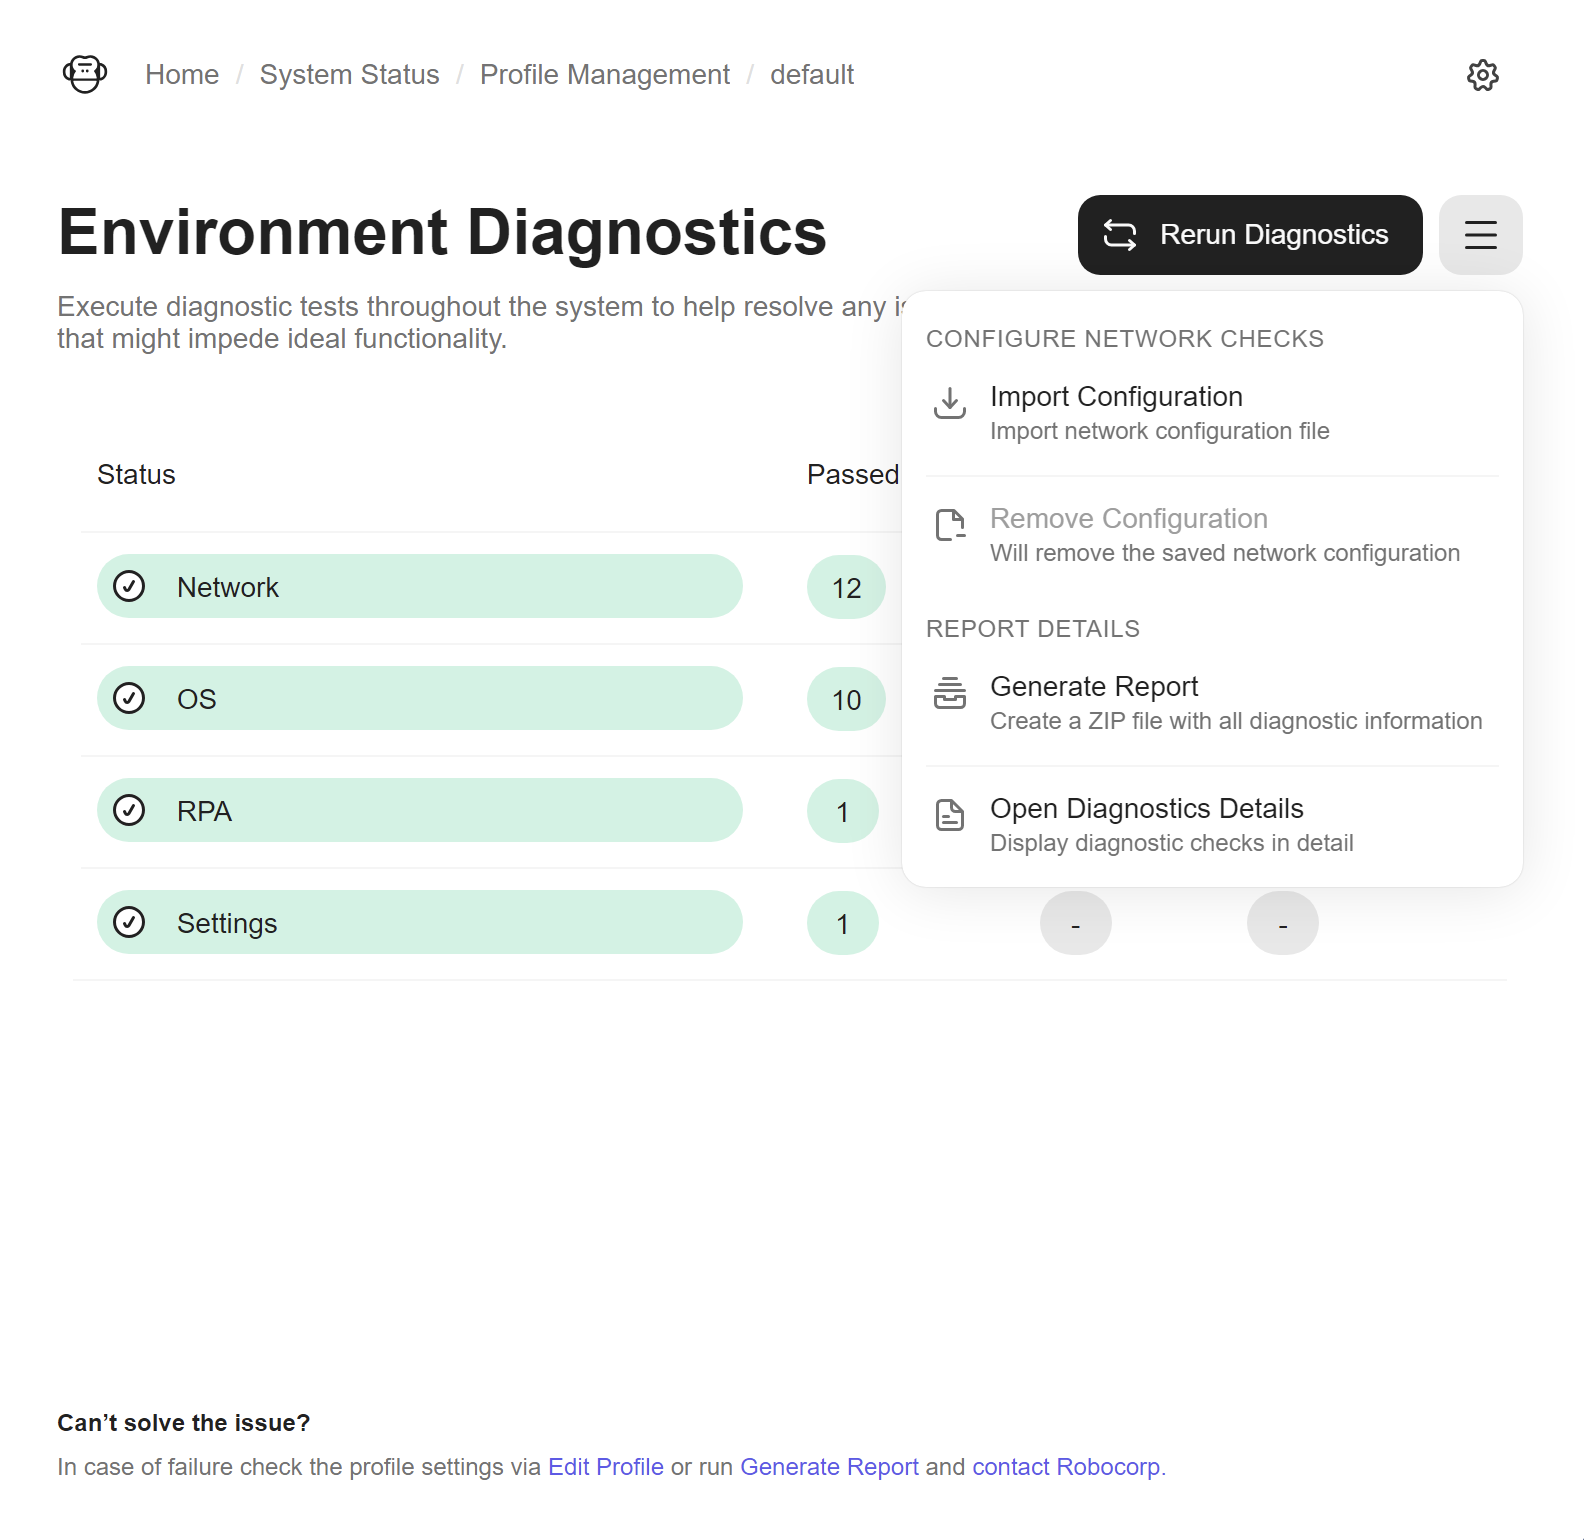
The Details button offers a series of actions:
- Configure Network Checks
- Import Configuration - Import network configuration file
- Remove Configuration - Will remove the saved network configuration file (without actually deleting the file)
- Report Details
- Generate Report - Create a ZIP file will all the diagnostic information, essential in support cases
- Open Diagnostic Details - Opens the Diagnostic Details dialog
- System
- Open System Diagnostics - View/Edit the system settings
The Profile Management button will take you to the Profile Management page.
Note: You can also navigate the application by using the breadcrumbs found at the top.
Configure Network Checks
The network configuration file is technically a YAML file describing different network testing endpoints. These are additional checks, they will run on top of the default diagnostic tests. Here is an example configuration:
Importing the network configuration file creates a link between Setup Utility and the appointed file. By removing the configuration file, the link is broken but without any change to the original file.
Once a network configuration file is appointed, Setup Utility will use the newly linked endpoints when running the diagnostics.
Report Details
Generating a report will create an archive (a .zip file) containing all the files that have relevant diagnostic results.
This archive is extremely valuable for Robocorp's support team. With it, the probability of a correct diagnosis for the issues you might be facing will significantly increase.
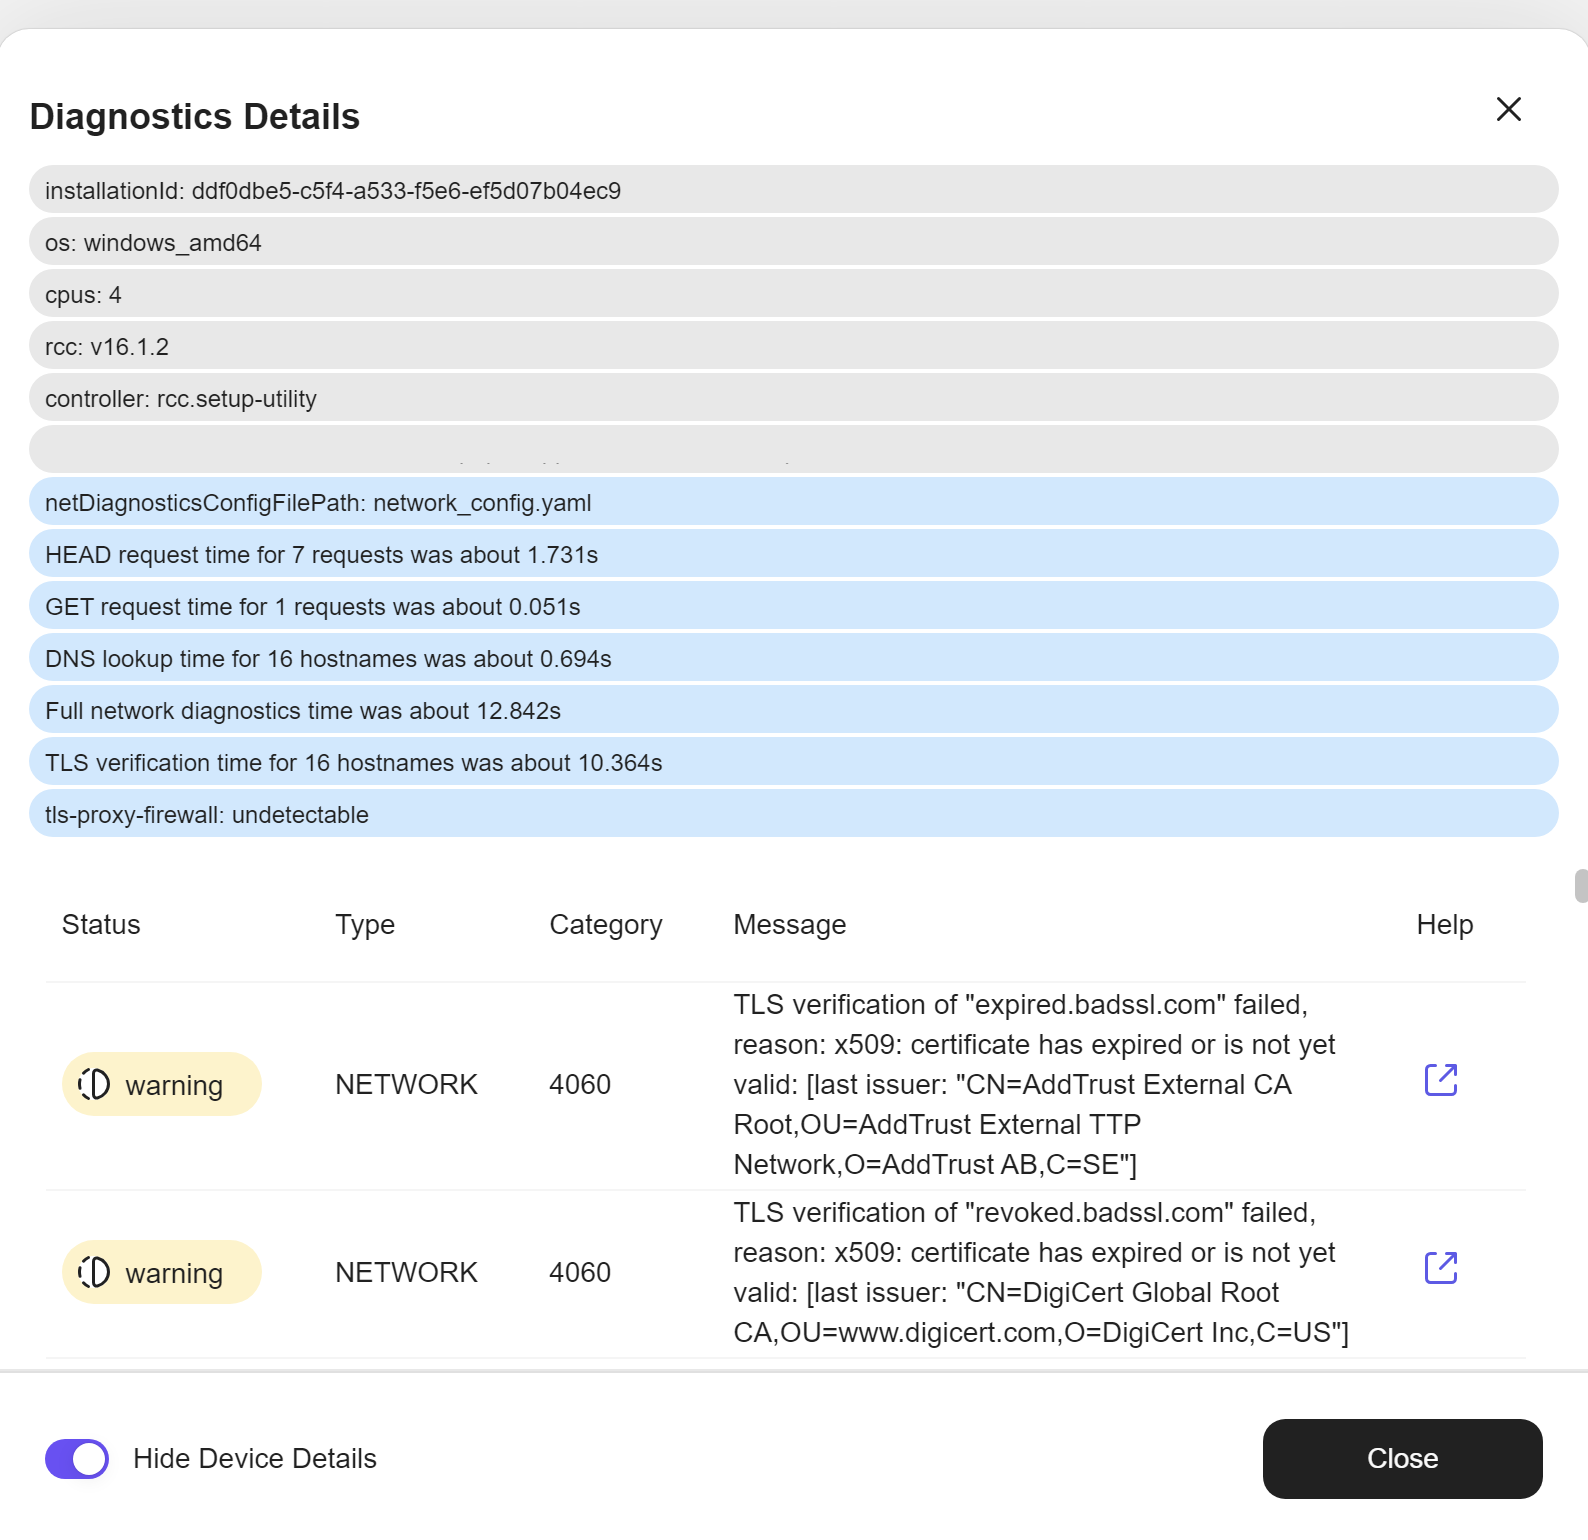
Opening the Diagnostic Details will display the entire list of the diagnostics checks executed against the system.
Every check is described by it's Status, Type, Category (uniquely dedicated codes), Message (the output after the check was executed) and Help (external link that will take you to the official documentation related to that diagnostic check).
You can also display the Device Details gathered by rcc if you would like to do so.
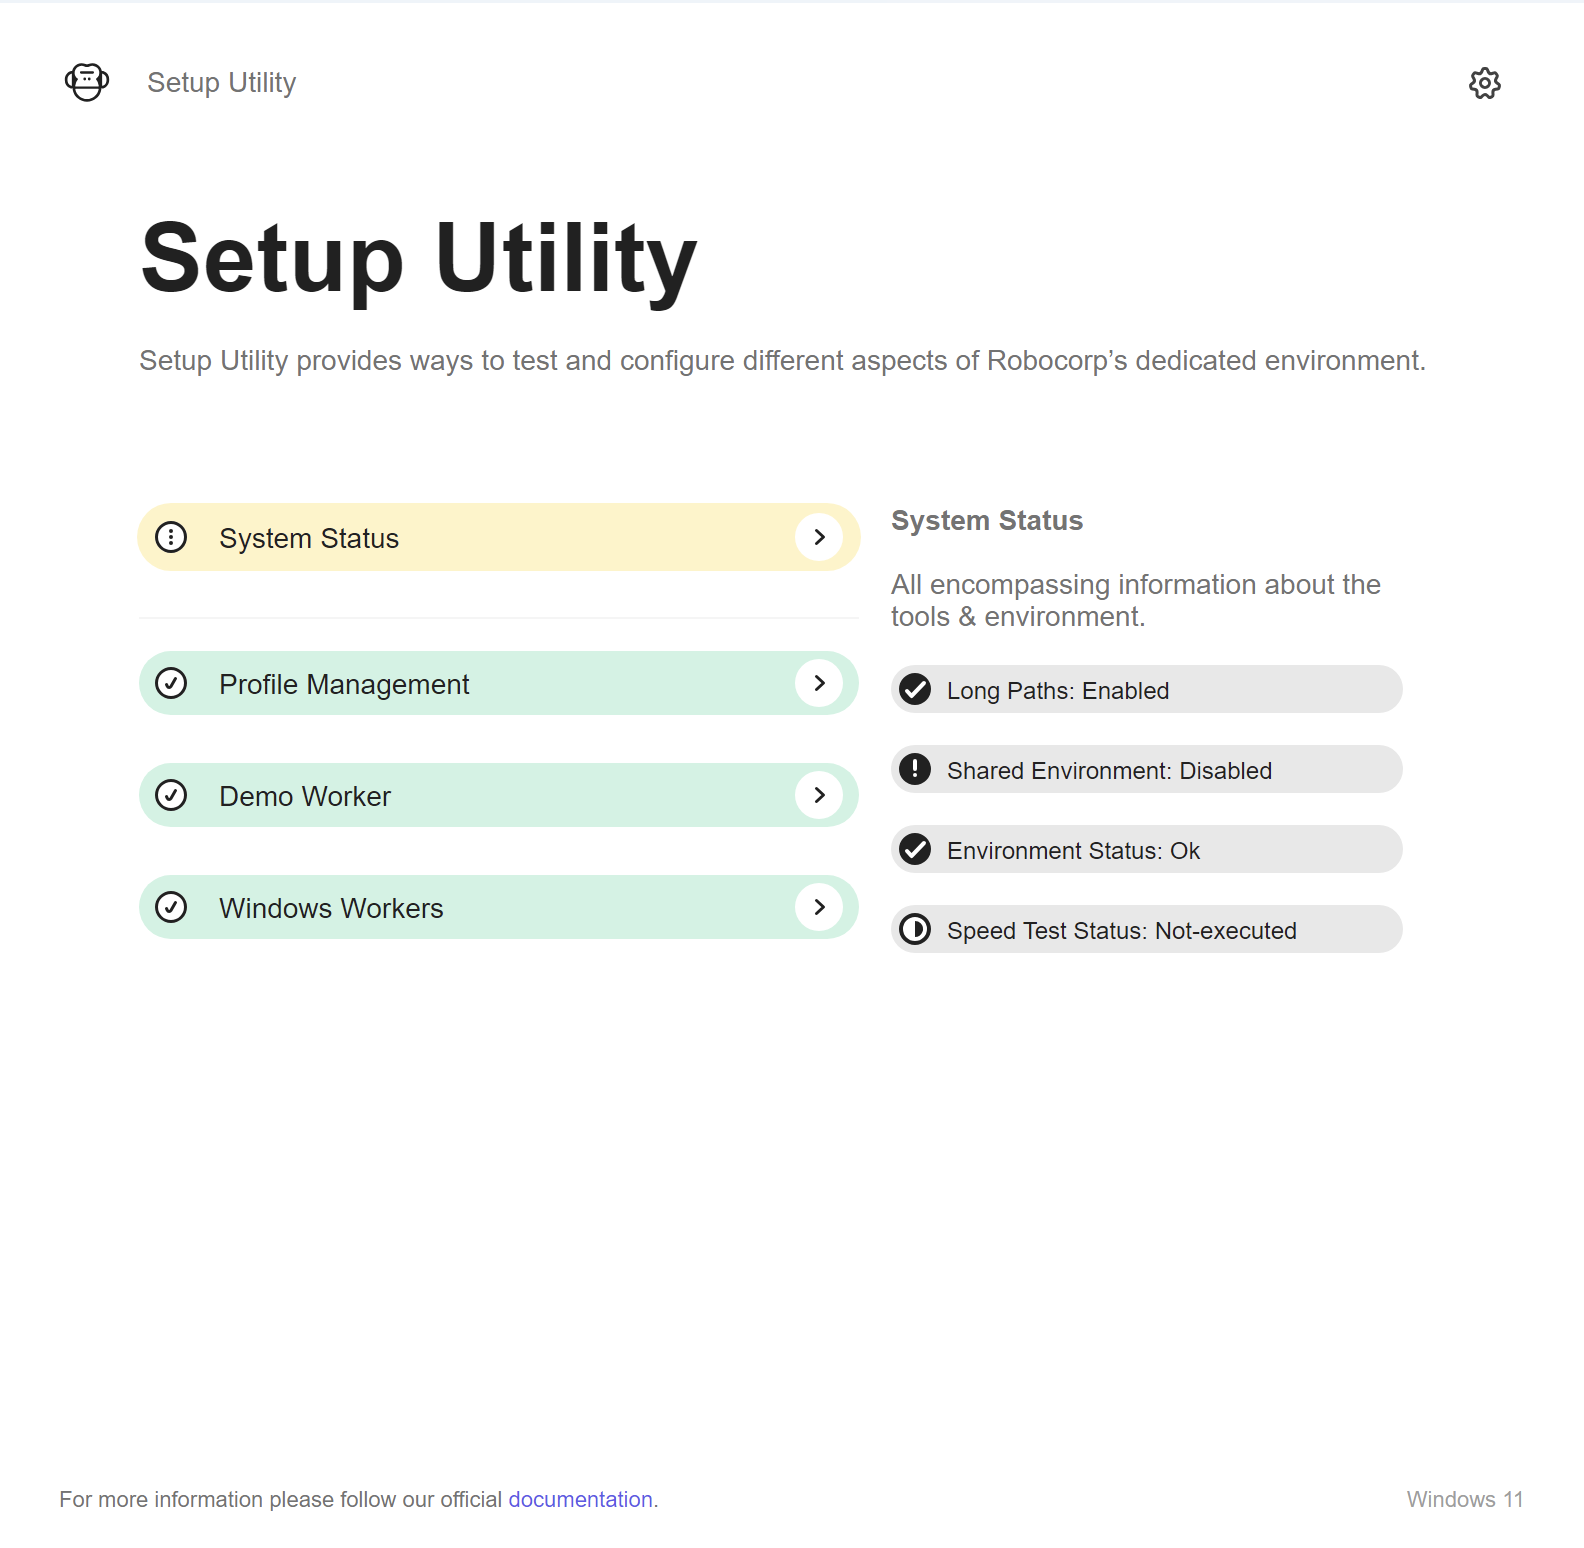
System Status
The System Status will give you immediate feedback about the environment known issues.
| System Status PASS | System Status FAILURE |
|---|---|
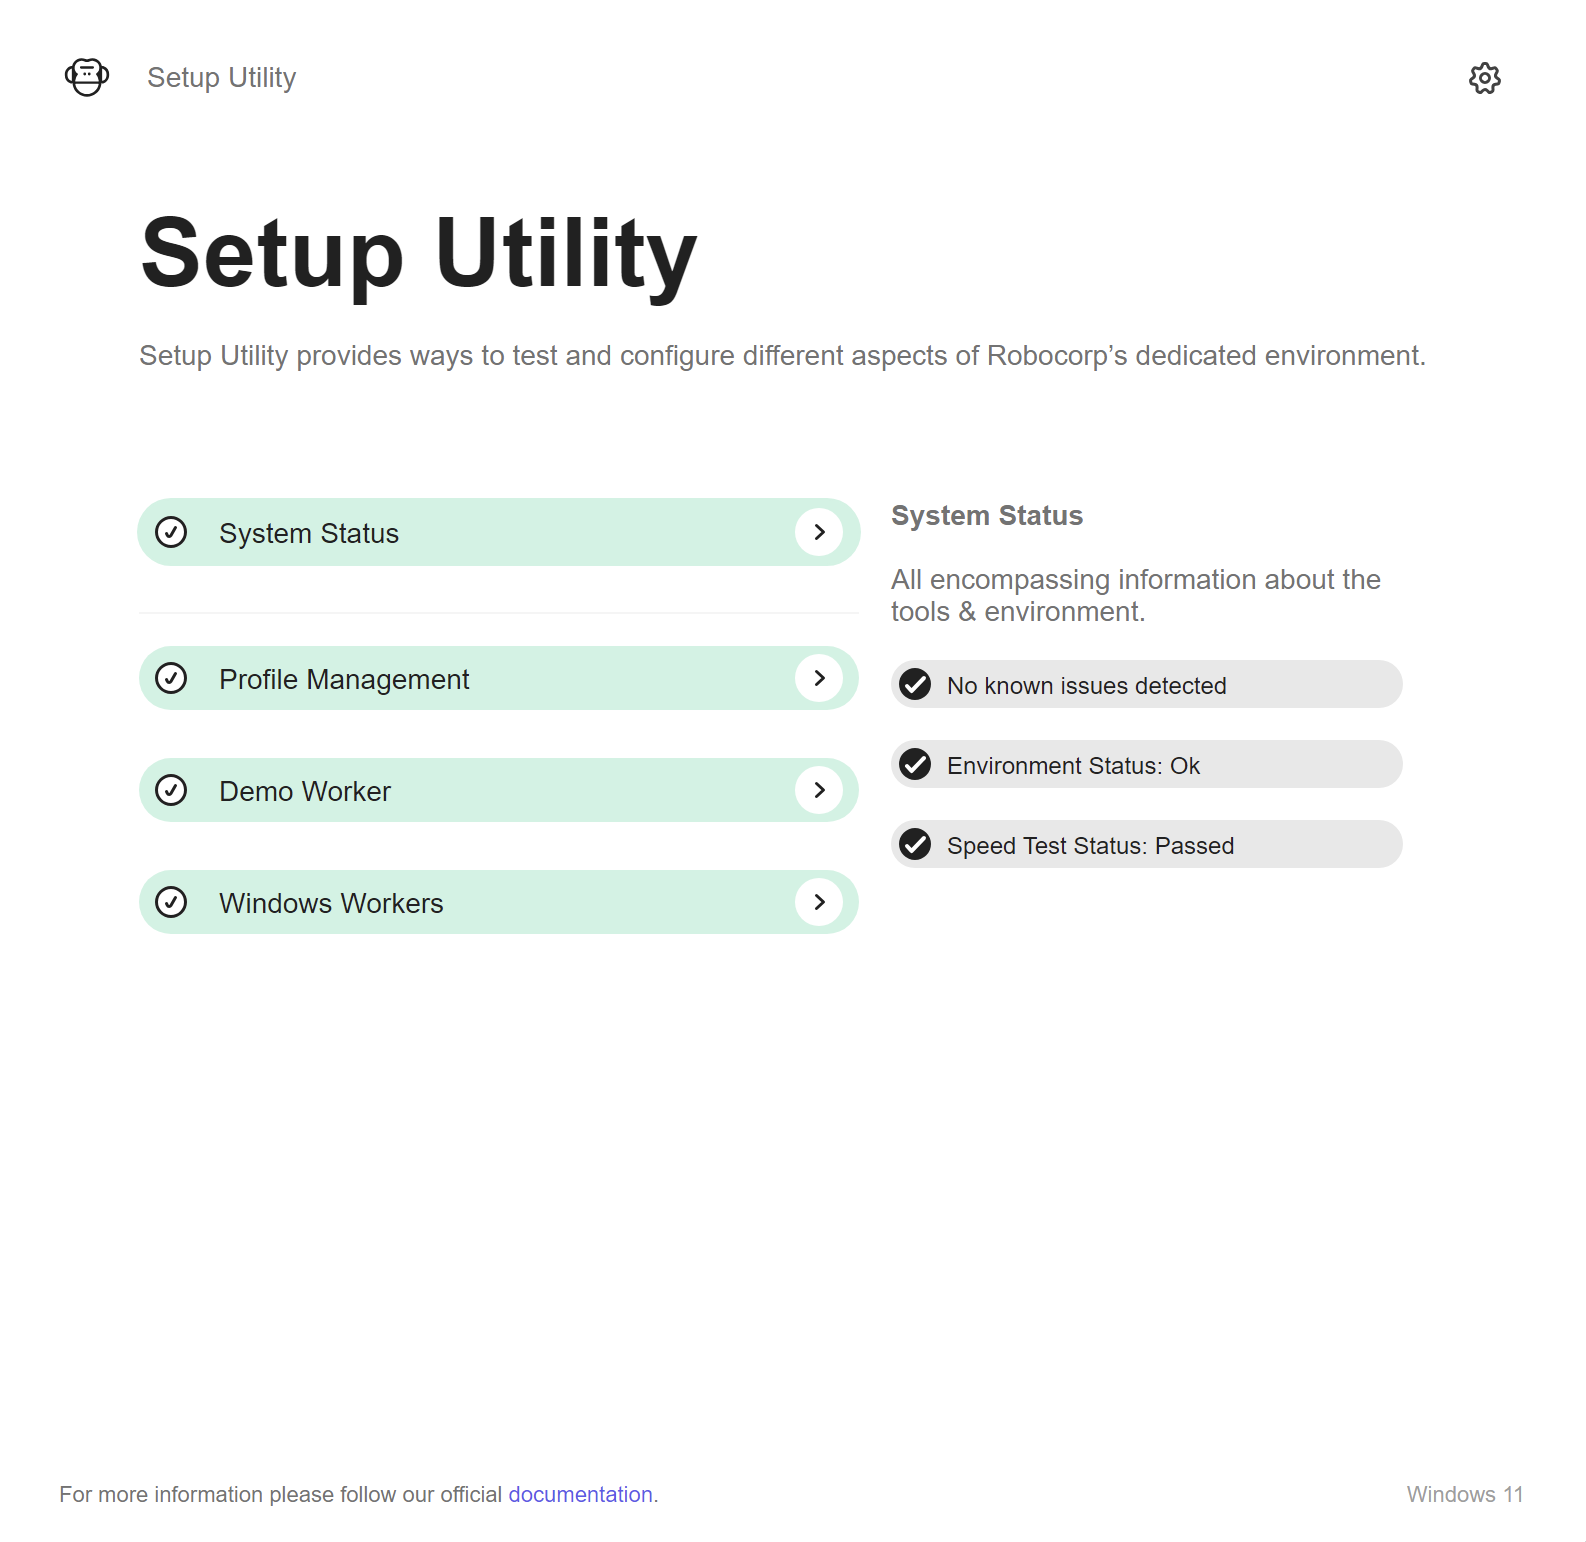 |  |
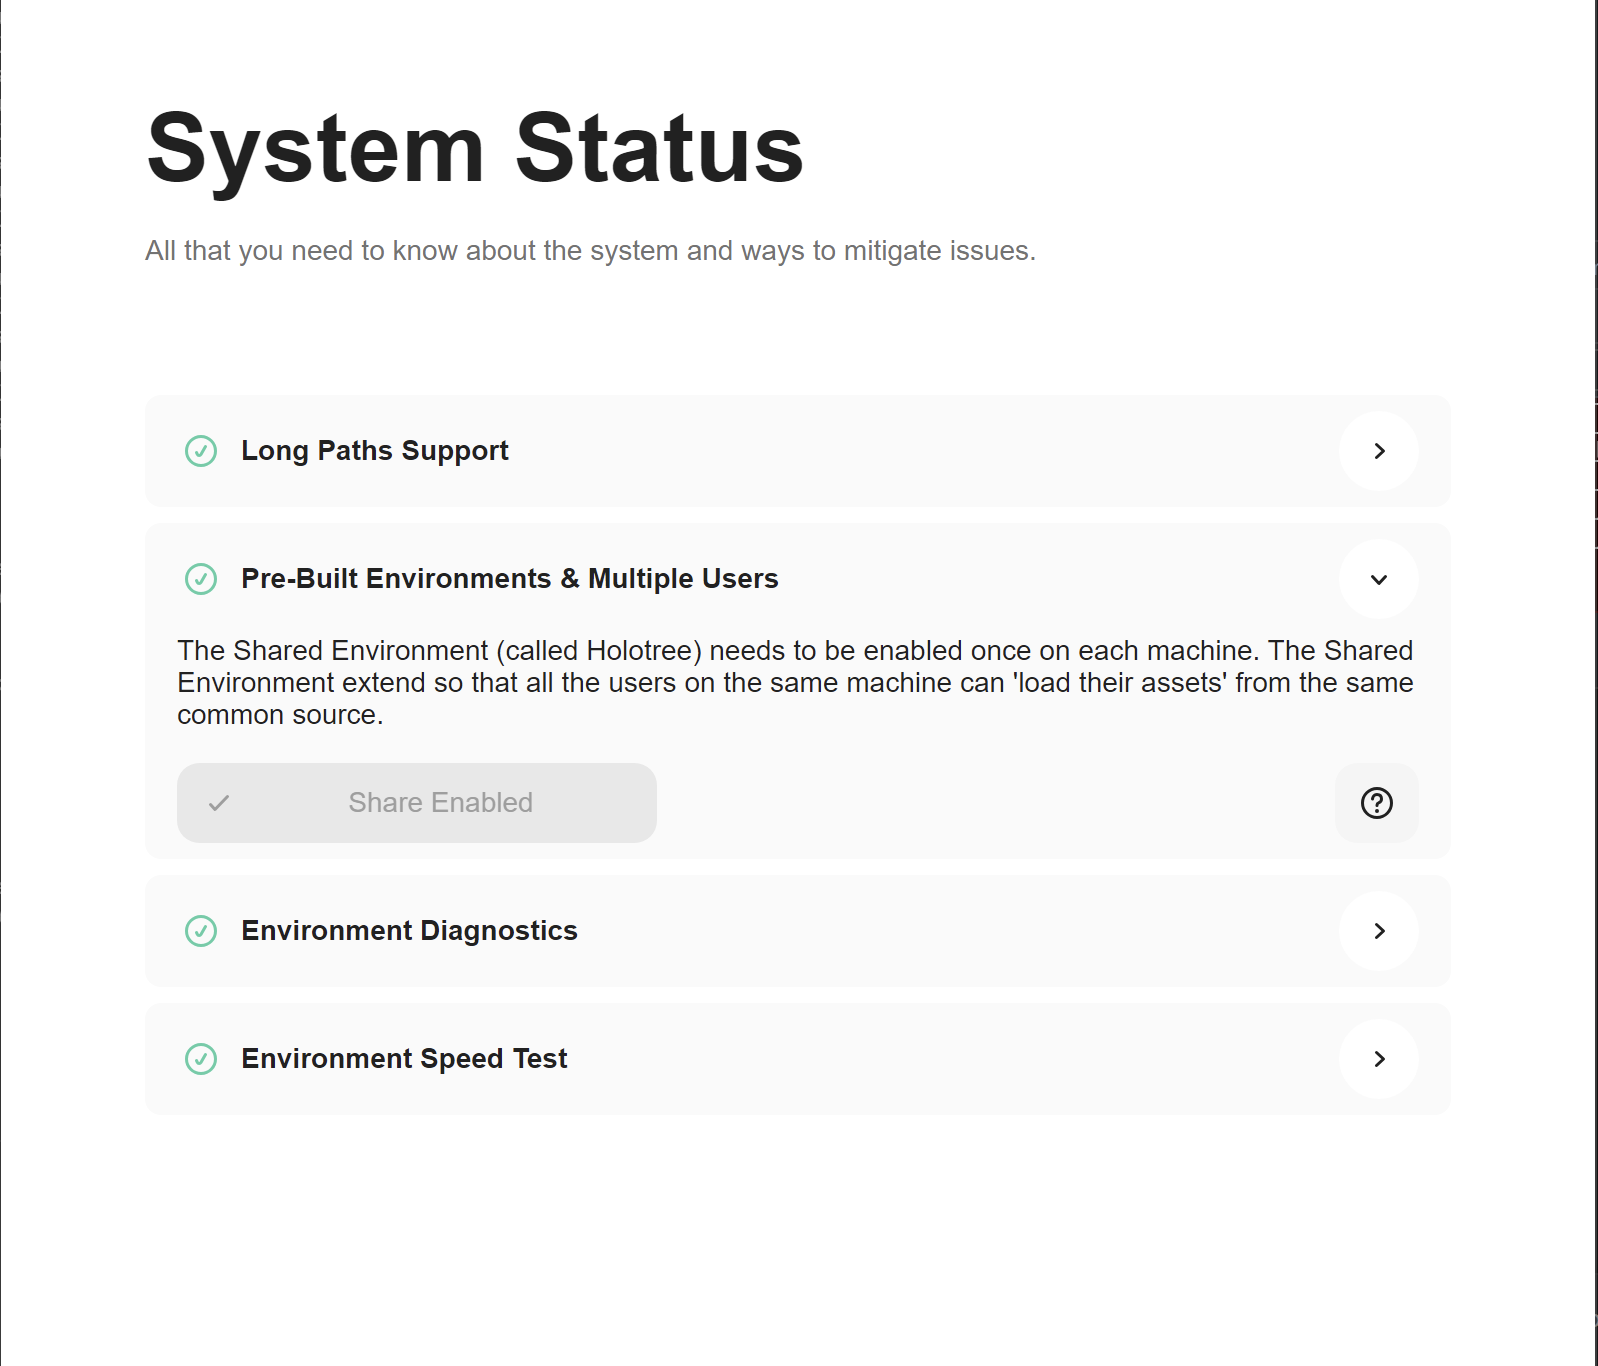
Opening the System Status will display the status of several aspects of the environment that are fixable without too much intervention. If diagnostic checks related to the System fail, you will be notified in the Environment Diagnostics page.
For each check in the System Status dialog you'll be notified about it's status, you'll find guidance and a way to attempt an automatic fix.
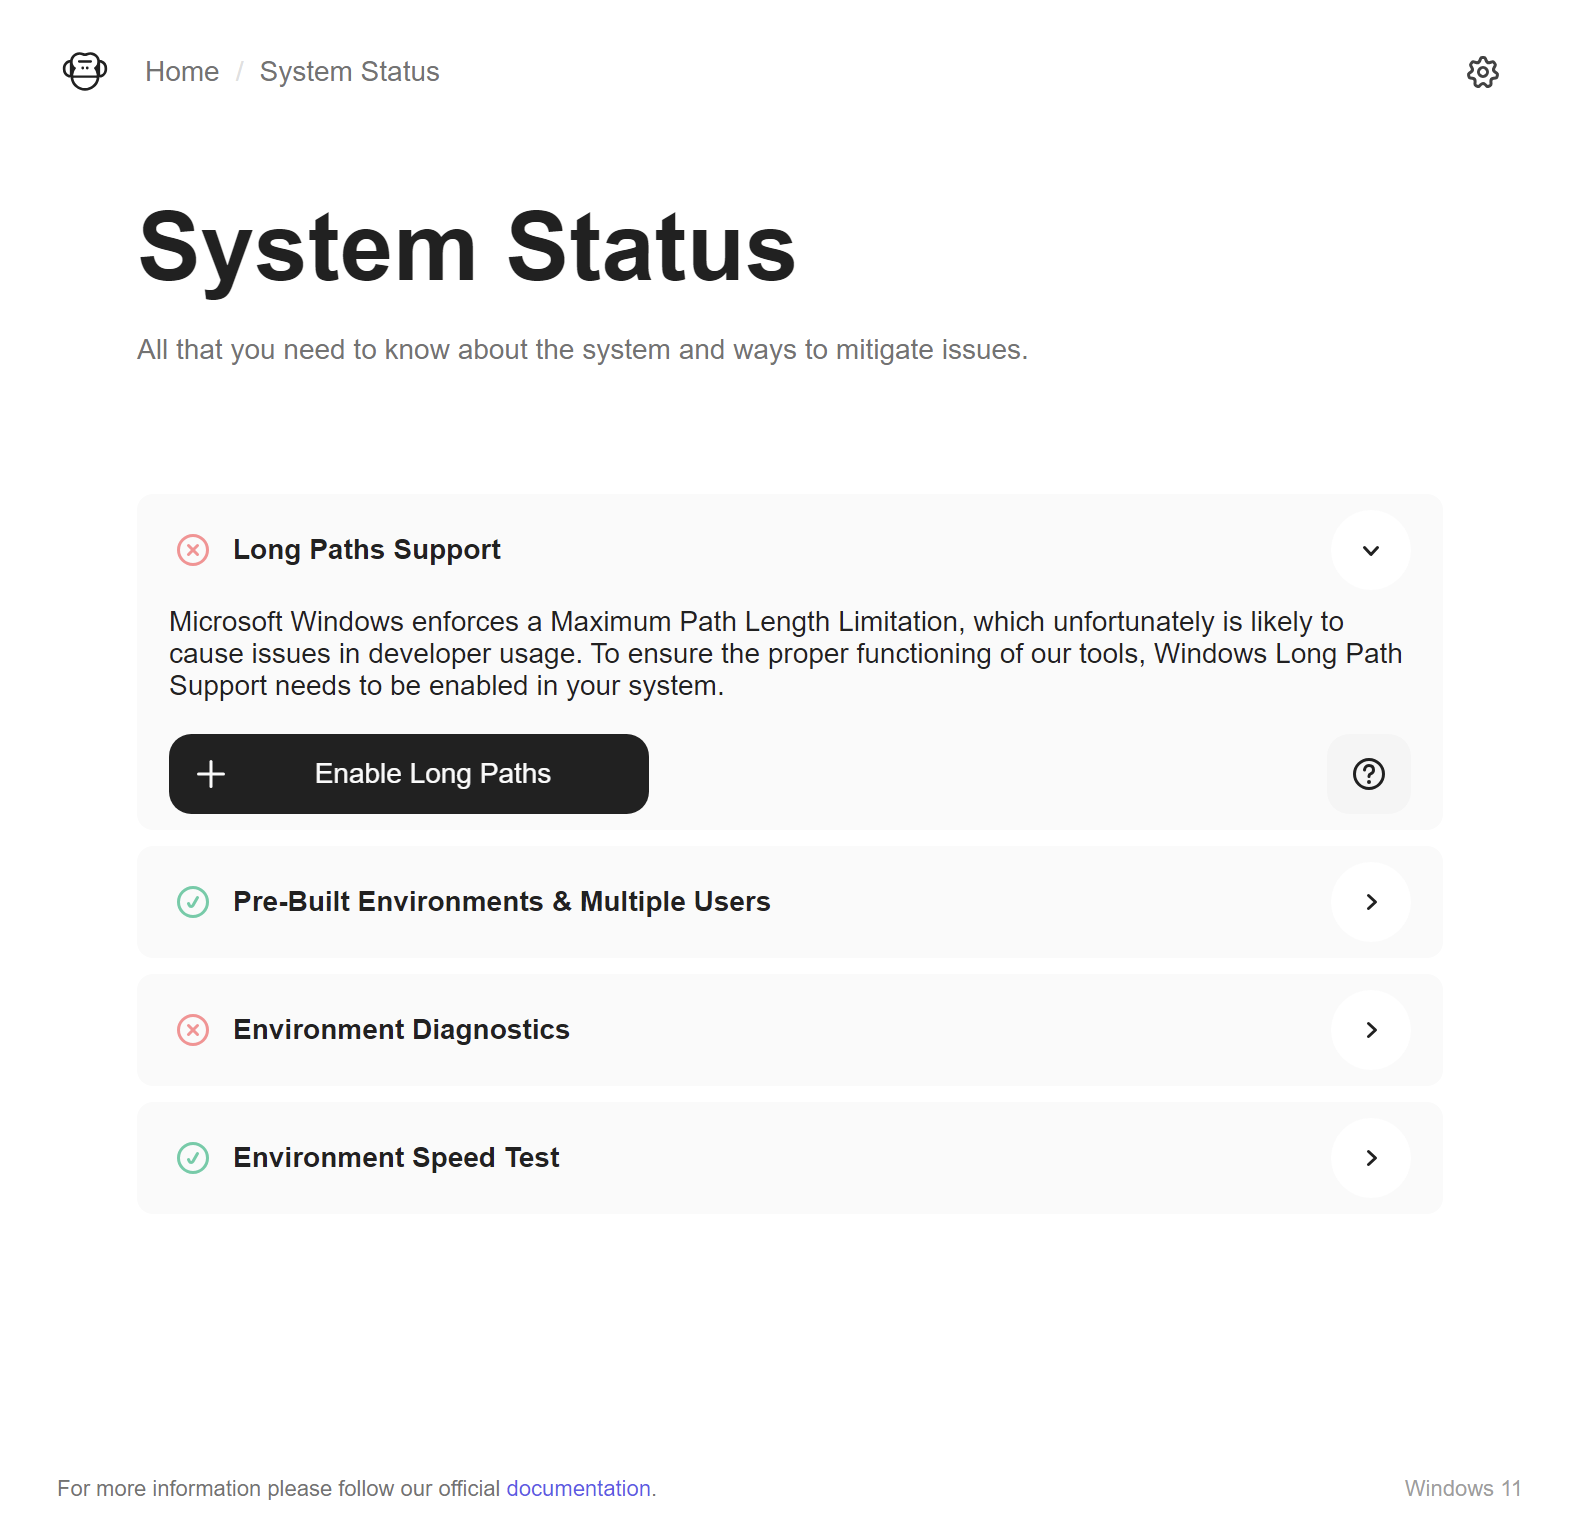
- Long Path Support - Microsoft Windows enforces a Maximum Path Length Limitation, which unfortunately is likely to cause issues in developer usage. To ensure the proper functioning of our tools, Windows Long Path Support needs to be enabled in your system.
- Pre-Built Environments & Multiple Users - The Shared Environment (called Holotree) needs to be enabled once on each machine. The Shared Environment extend so that all the users on the same machine can 'load their assets' from the same common source.
- Environment Diagnostics - Diagnose your system to identify and resolve issues that might impede ideal functionality.
- Environment SpeedTest - Run tests that provide additional diagnostics for the environment
Environment SpeedTest
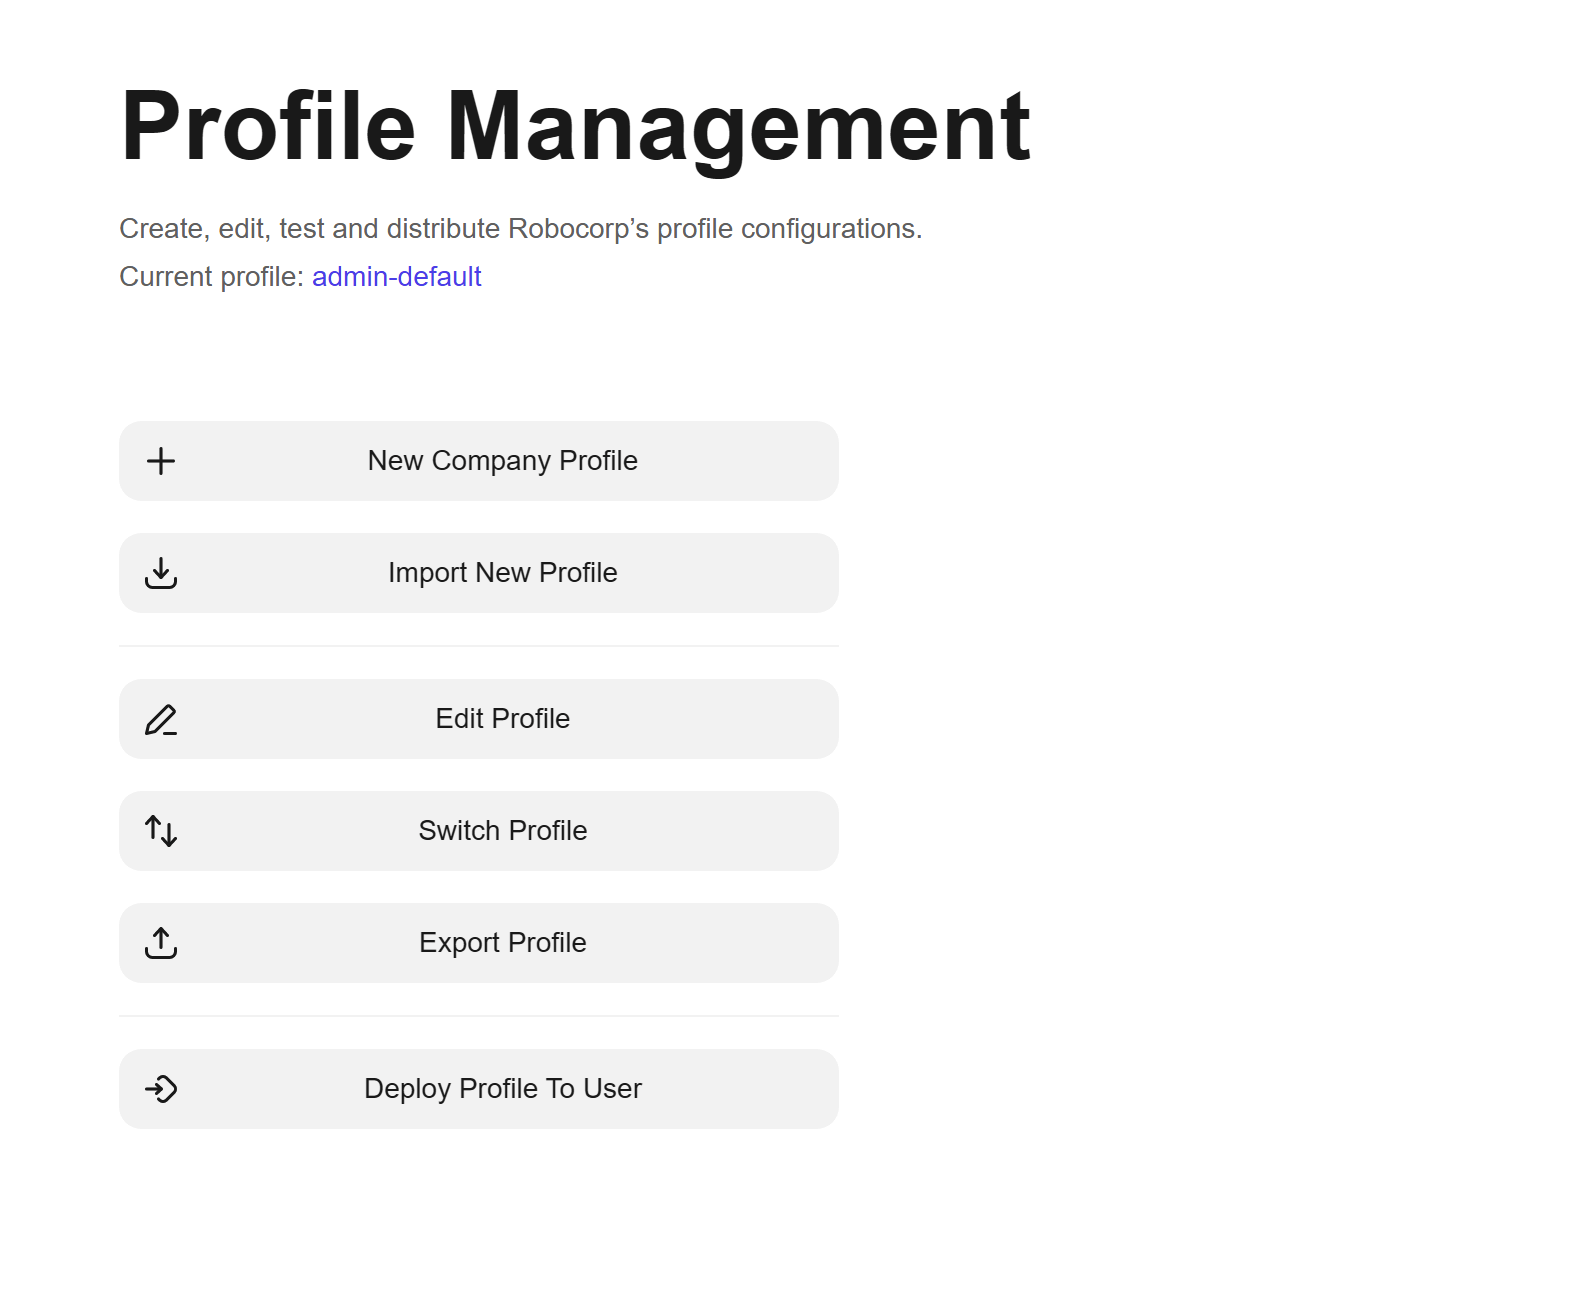
Profile Management
Create, edit, test and distribute Robocorp’s profile configurations. You can find the current profile internal link that will take you to the Environment Diagnostics executed for that profile.
- Edit Profile - Will open a dialog permitting you to edit the current selected profile.
- Switch Profile - Will open a dialog permitting you to switch to another available profile or reset to the
defaultone. - Export Profile - After you select the location and name, it will create a new YAML file that will be a direct copy of the current profile YAML file.
- New Company Profile - If your organization provides you with a specific RCC profile, you can specify the given URL as guided by the interface. Setup Utility will attempt to automatically download the profile and switch to it once the download is over. Running the diagnostics will start automatically.
- Import New Profile - Gives you the possibility of picking a dedicated YAML file from your local disk that will become the new current profile. Running the diagnostics will start automatically.
- Deploy Profile To User - Opens up the possibility of propagating the current profile to a specified user on the same device. This means that the working Robocorp Environment will be shared among all users and Workers
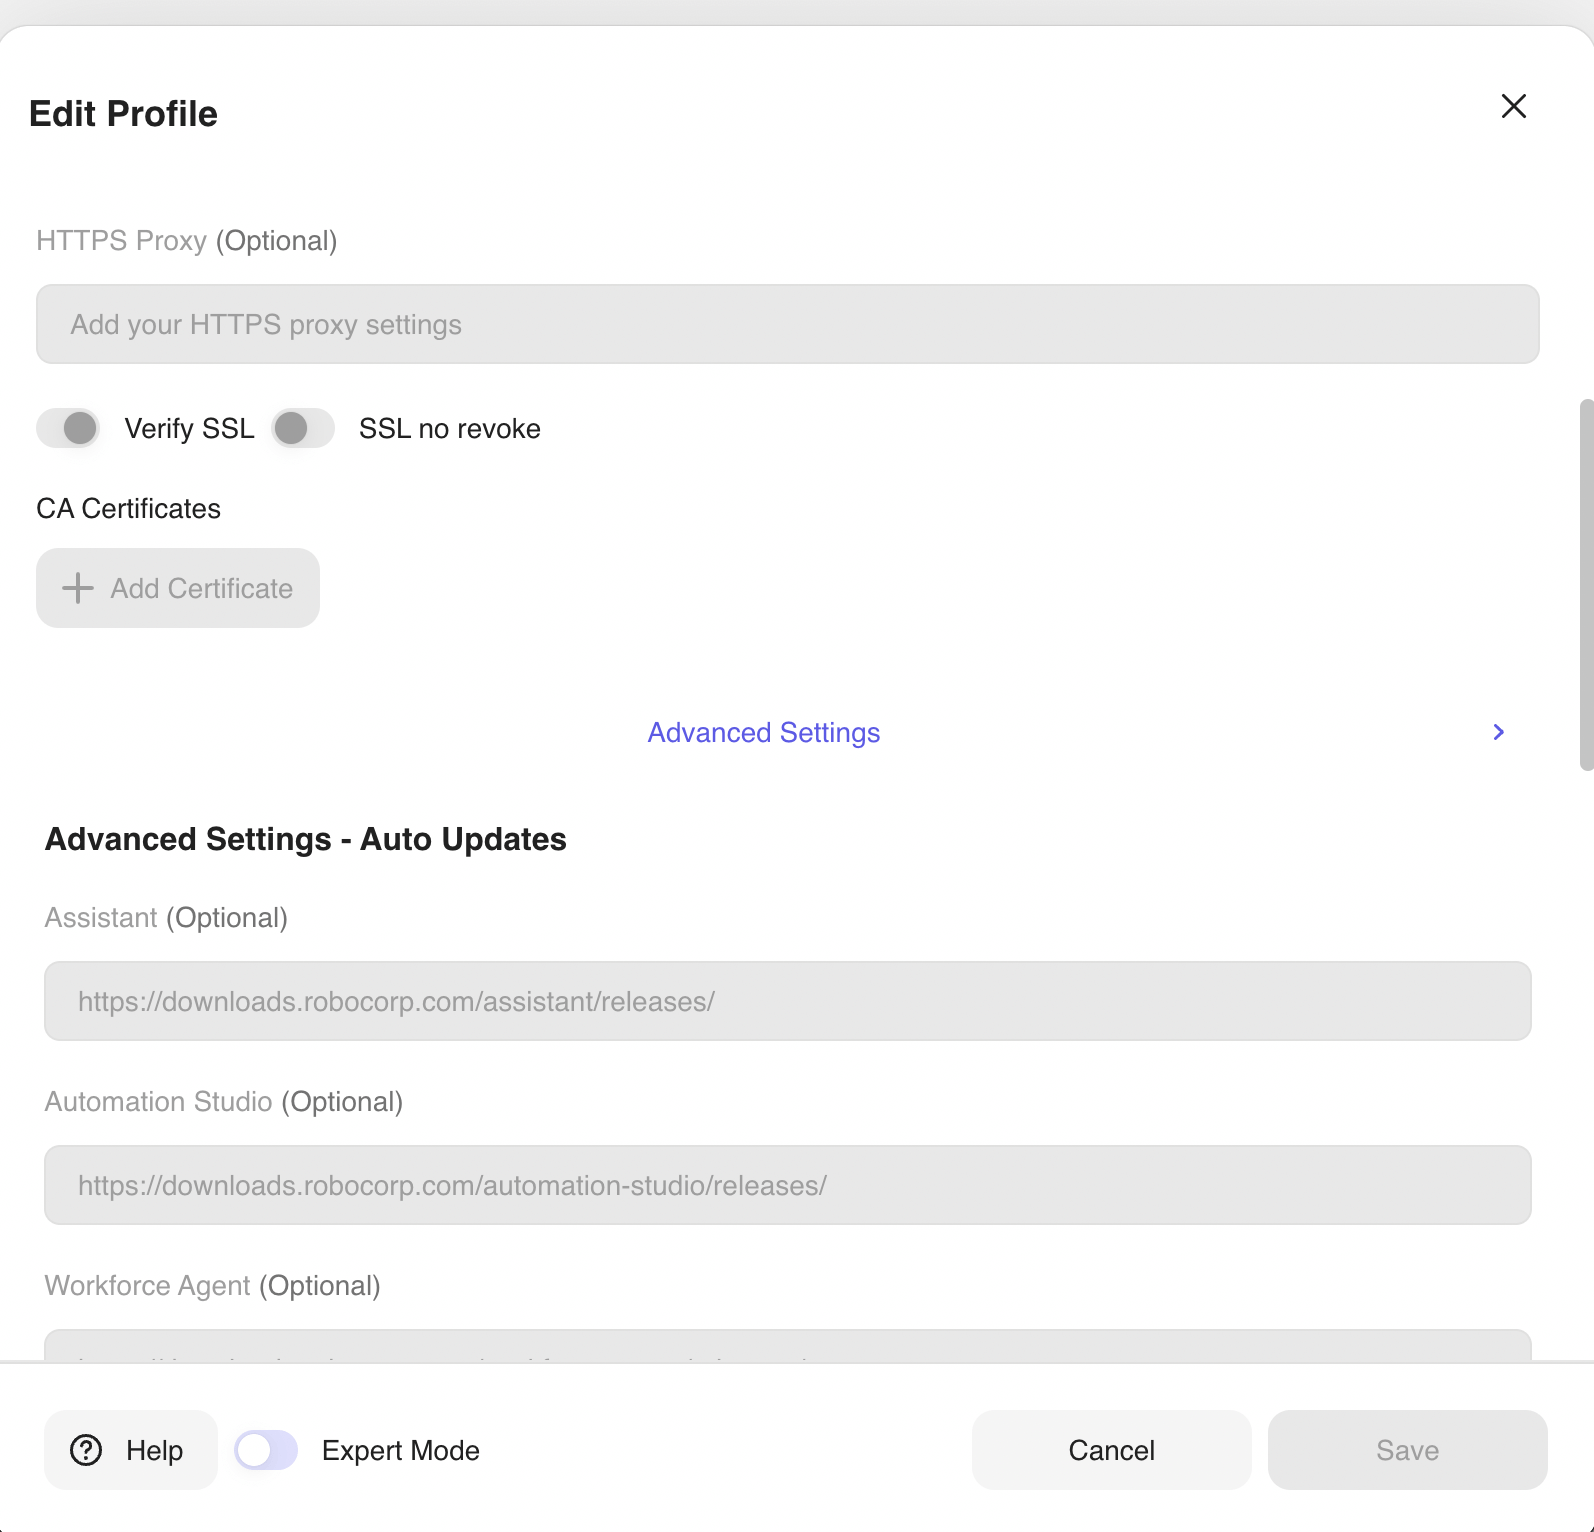
Edit Profile
The Edit Profile dialog will provide you with the possibility of editing the fields directly corresponding to the profile YAML file. Switching on the Advanced Settings will reveal additional fields related to auto updates, endpoints and more.
Once you will Save the changes, Setup Utility will automatically start executing the diagnostics with the new profile.
If the current profile is the default profile, you will not be able to edit anything related to the fields until you will change the name of the profile.
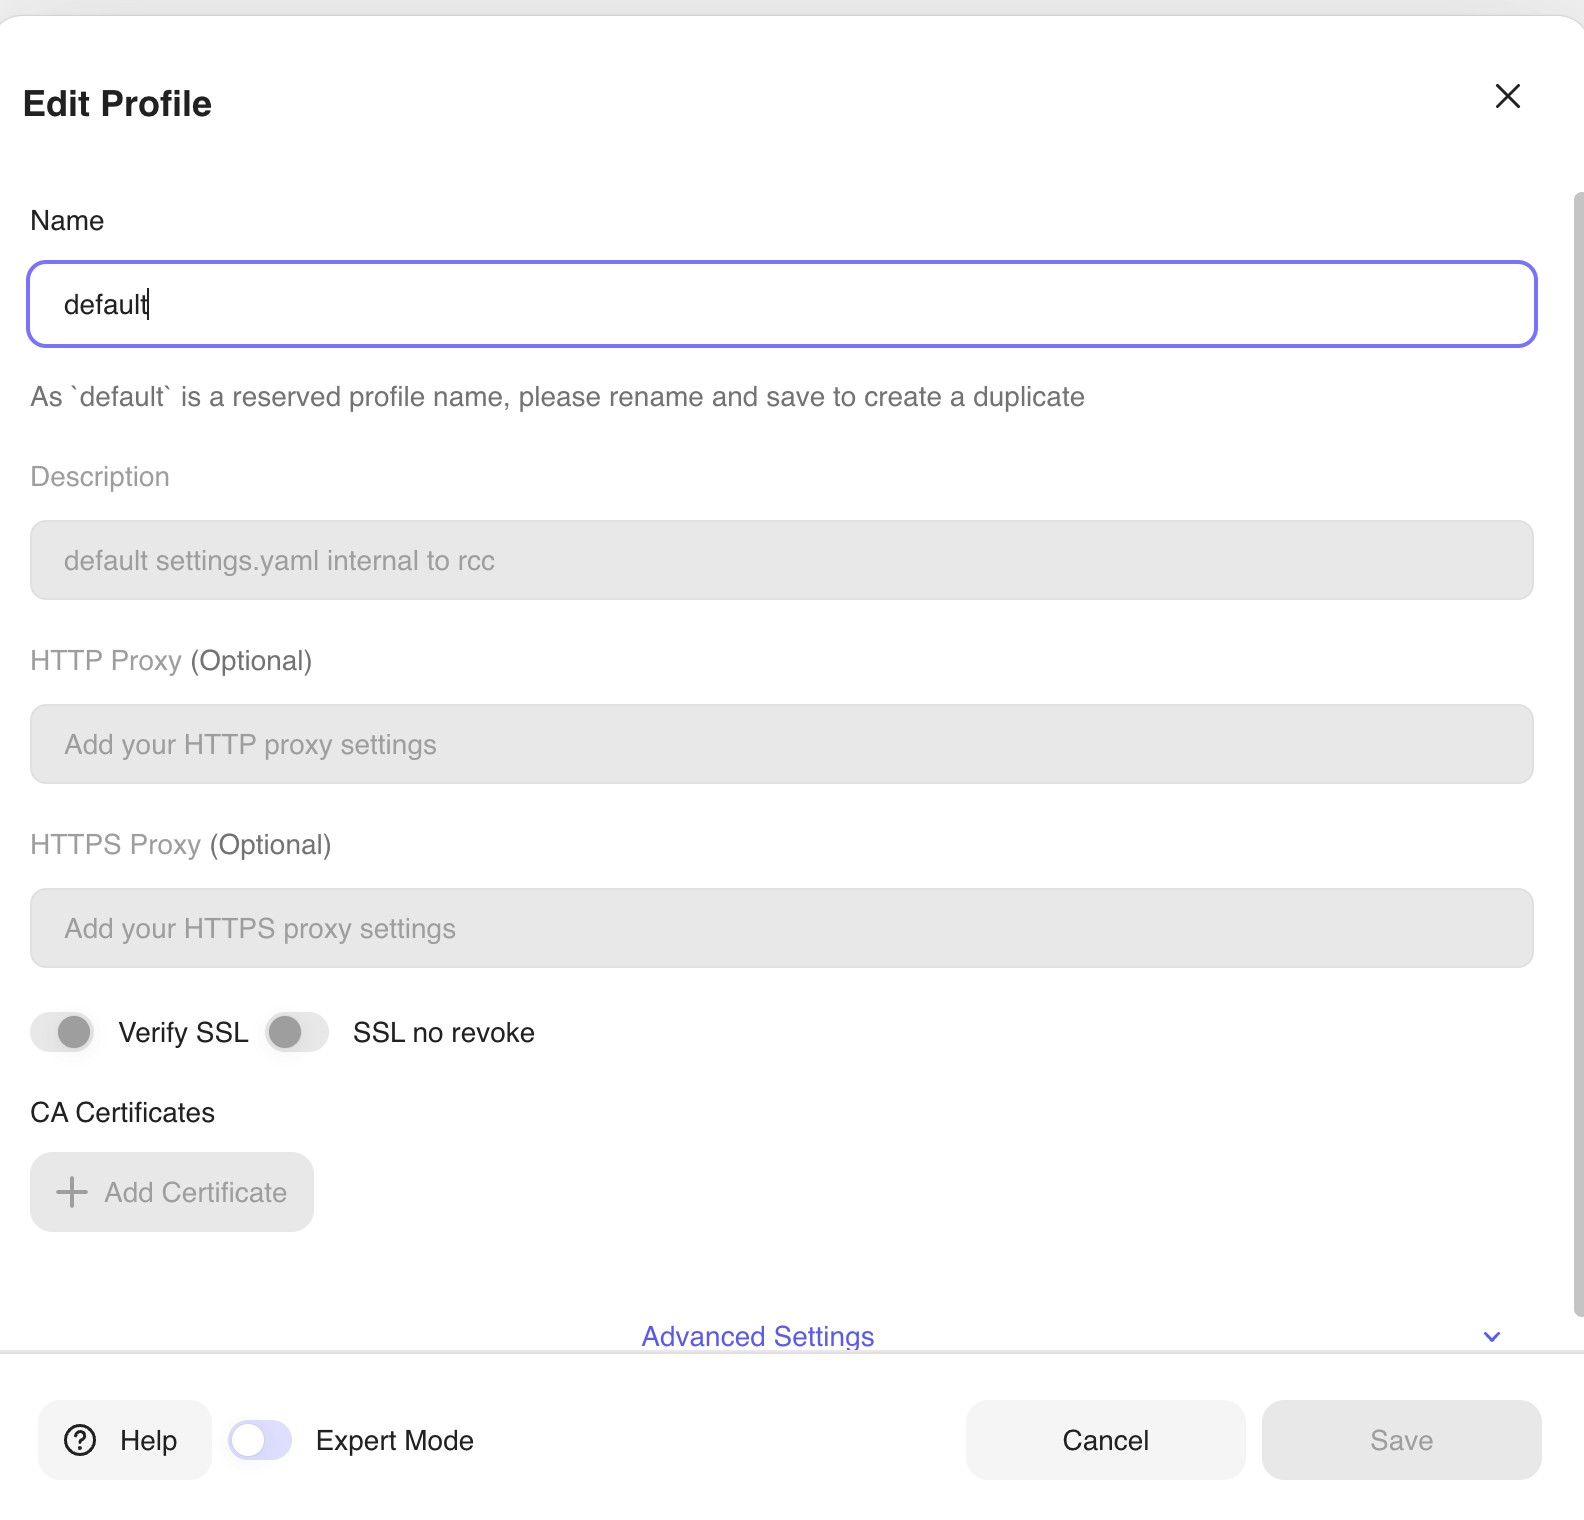
If the name is changed and you
Savethe profile, a new profile will be created. This is indifferent of the current profile.
Once the profile has been edited and saved, Setup Utility will start executing the diagnostic checks with the new version of the profile.
Note: If in need, at any moment, you can consult the official documentation via the Settings Button.
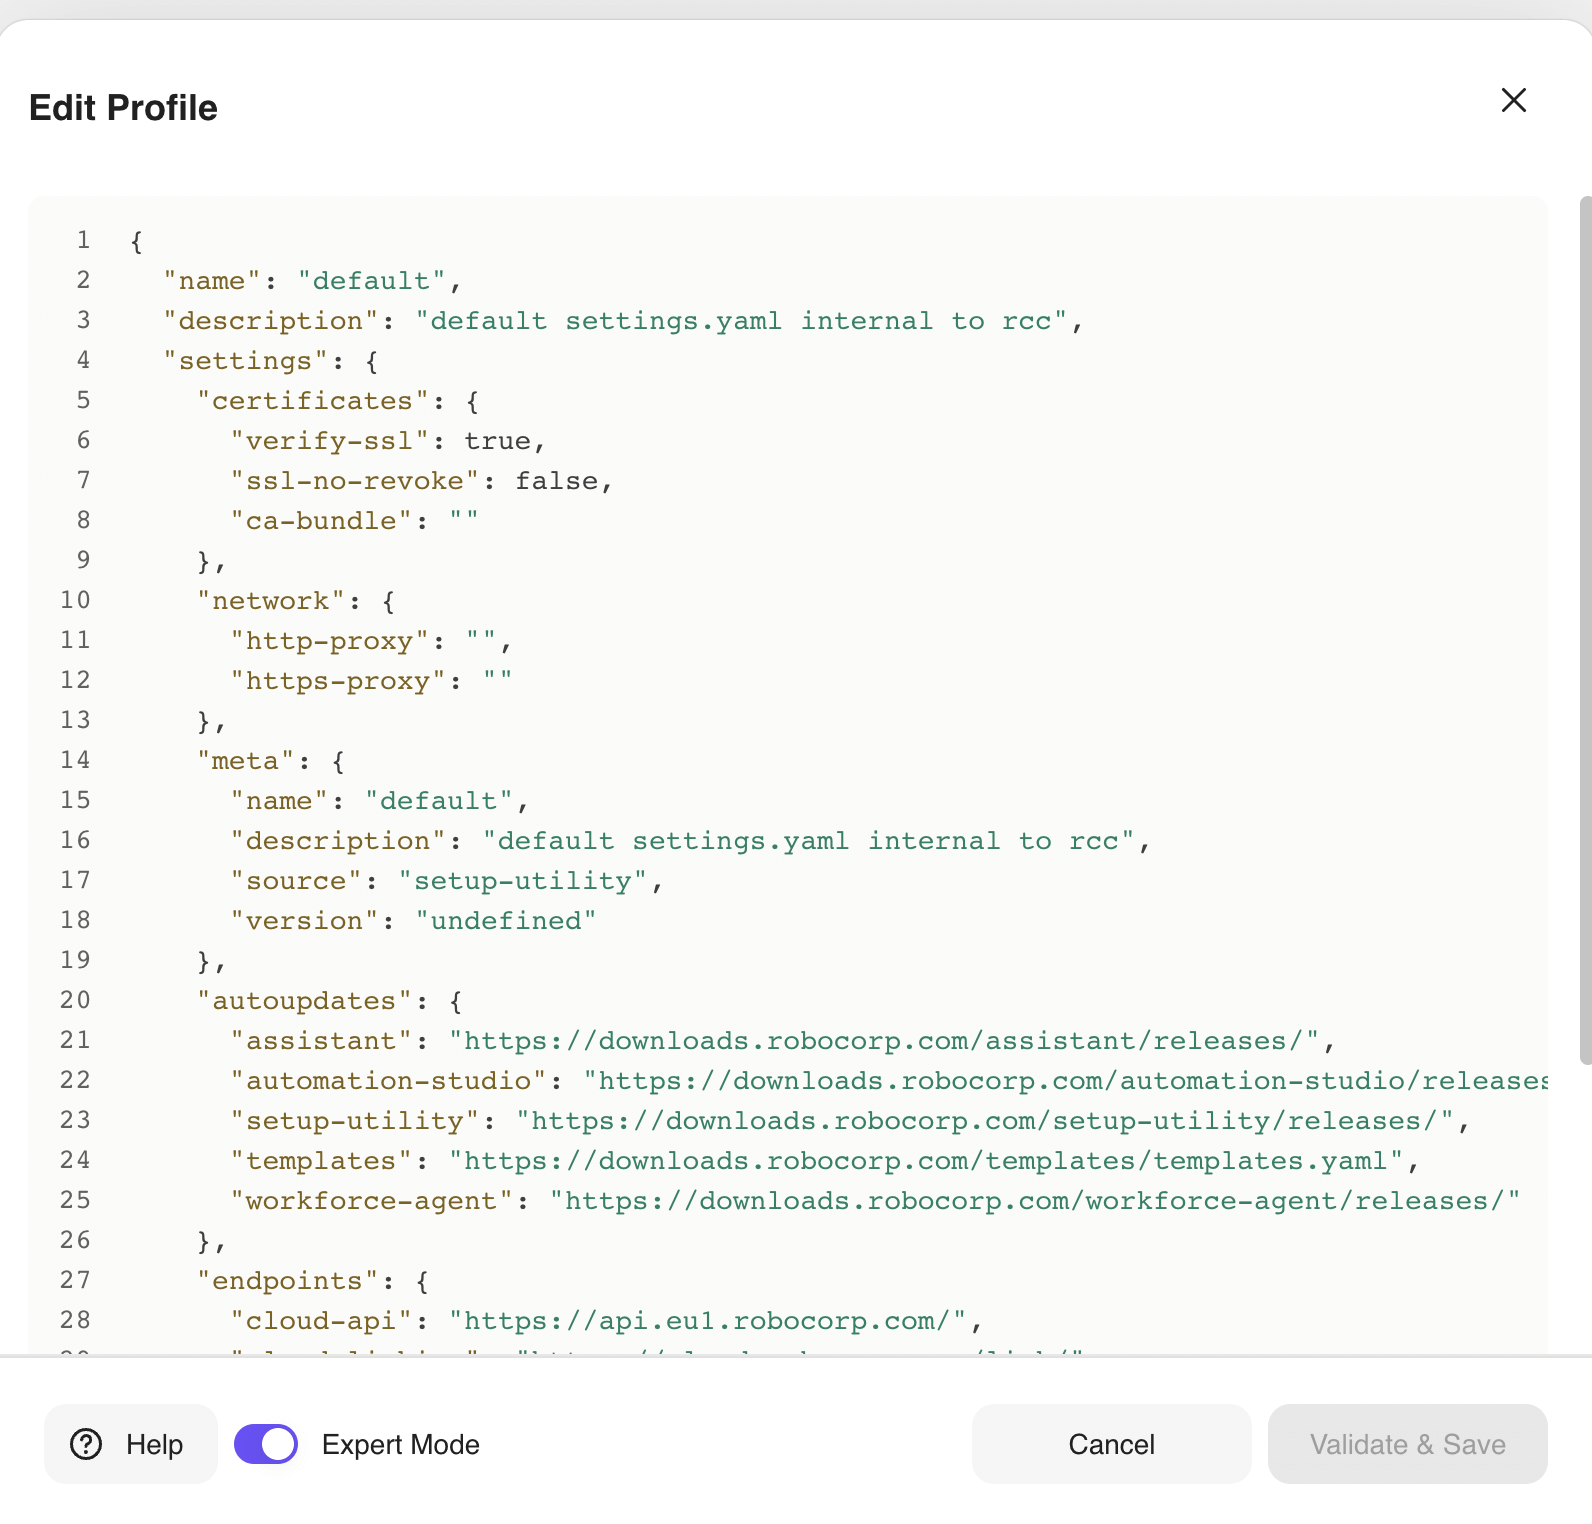
The Expert Mode will give you the possibility of changing the profile by editing directly the values in the profile in a JSON format.
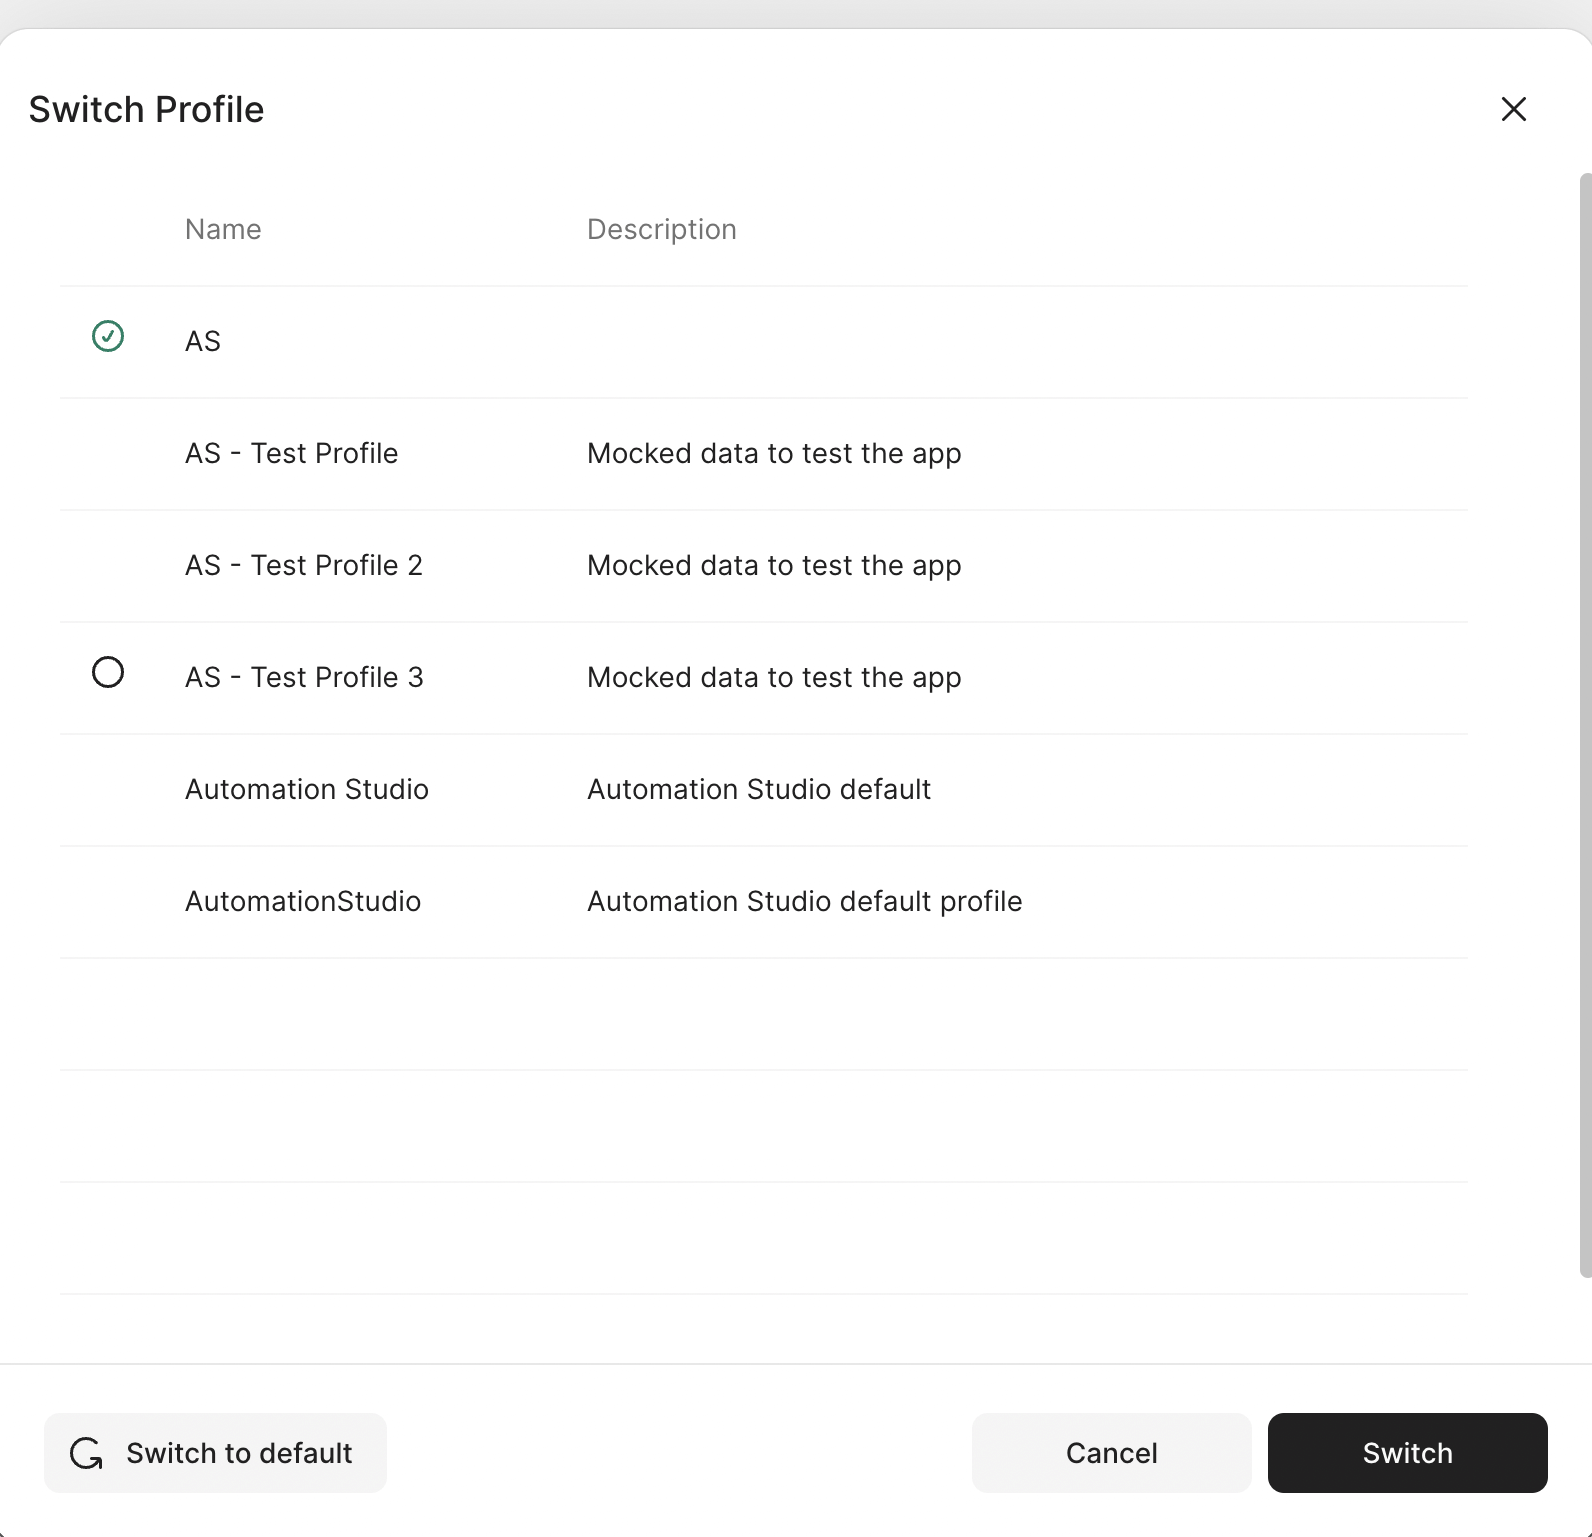
Switch Profile
To Switch Profile you will need to select an available profile from the displayed list.
You can Switch to default profile anytime you need.
Once the profile has been switched in the system, Setup Utility will start executing the diagnostic checks with the newly appointed profile.
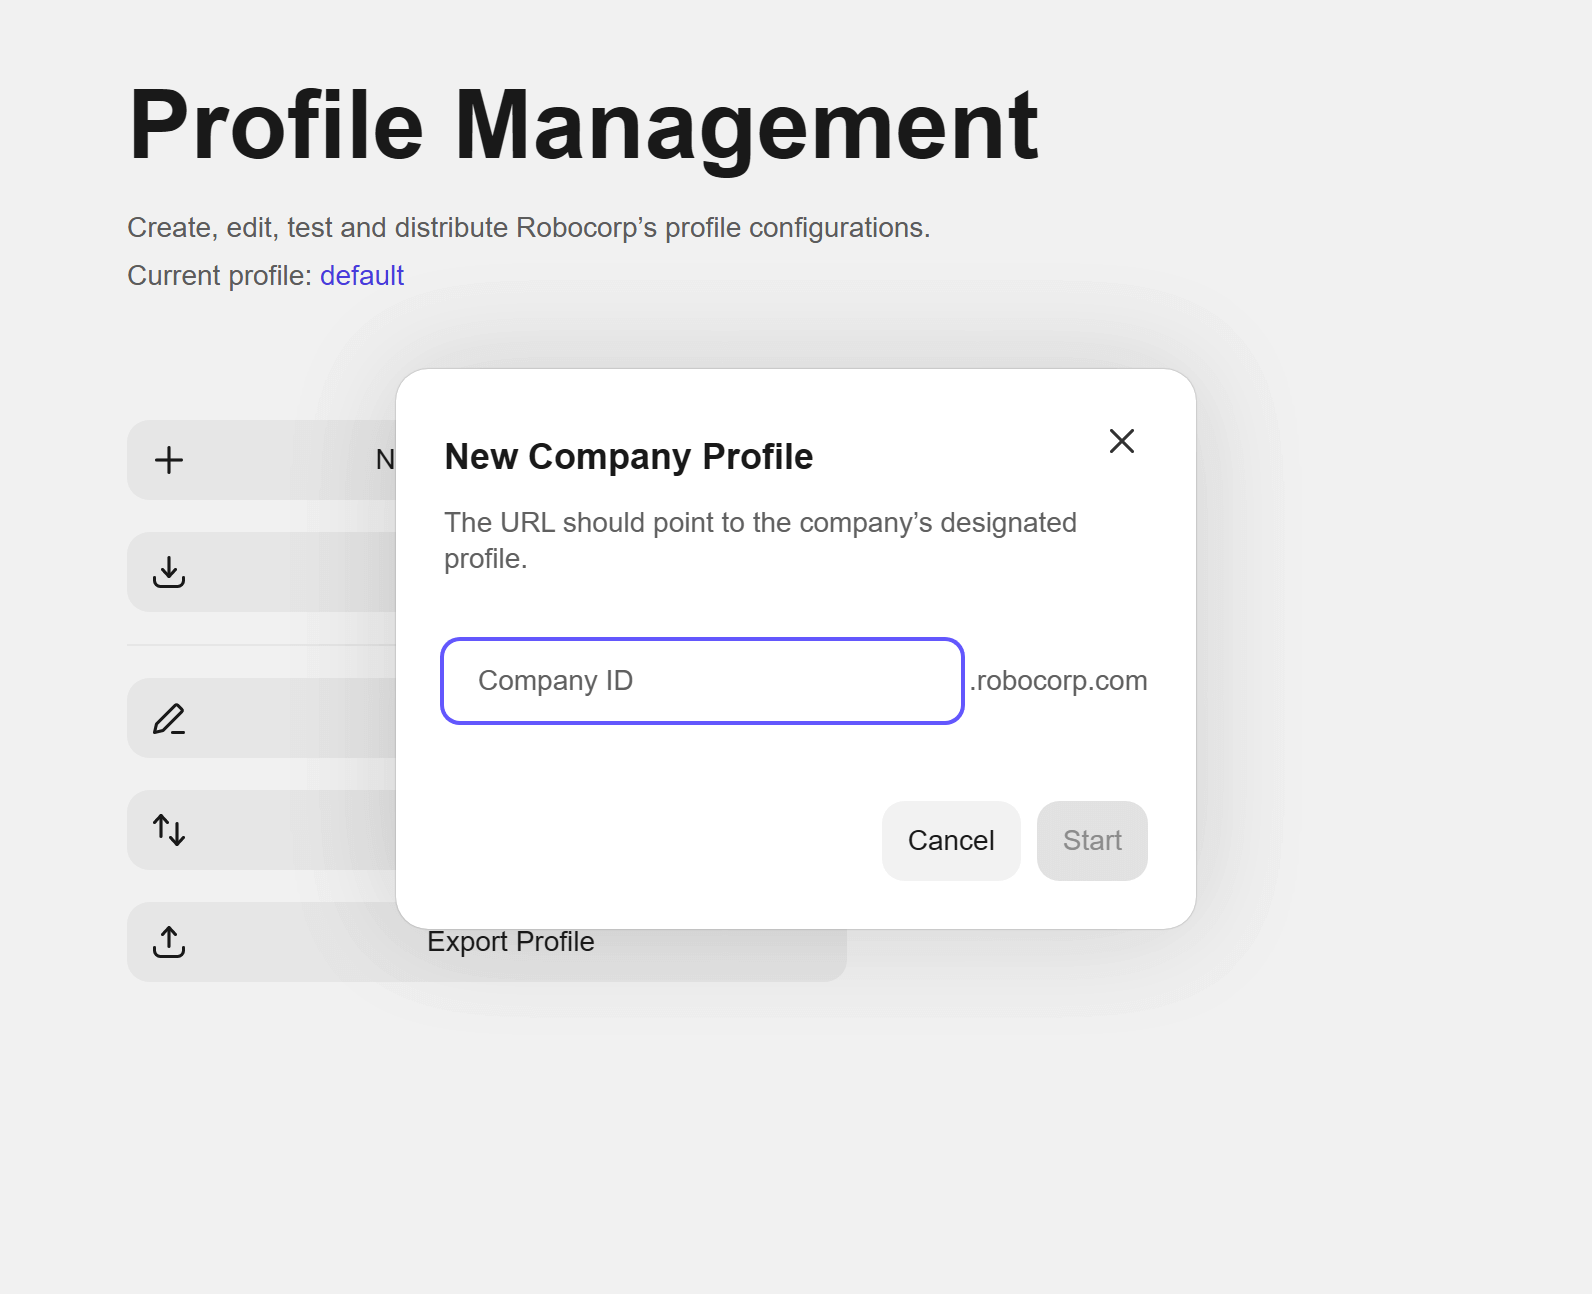
New Company Profile
Creating a new company profile means having a dedicated organizational URL from where Setup Utility can automatically download the RCC profile. You can always go the manual route and import the YAML file once you have it on disk.
If, for some reason, Setup Utility cannot download from the company dedicated URL, it will open the URL in the browser and advise you to import it manually.
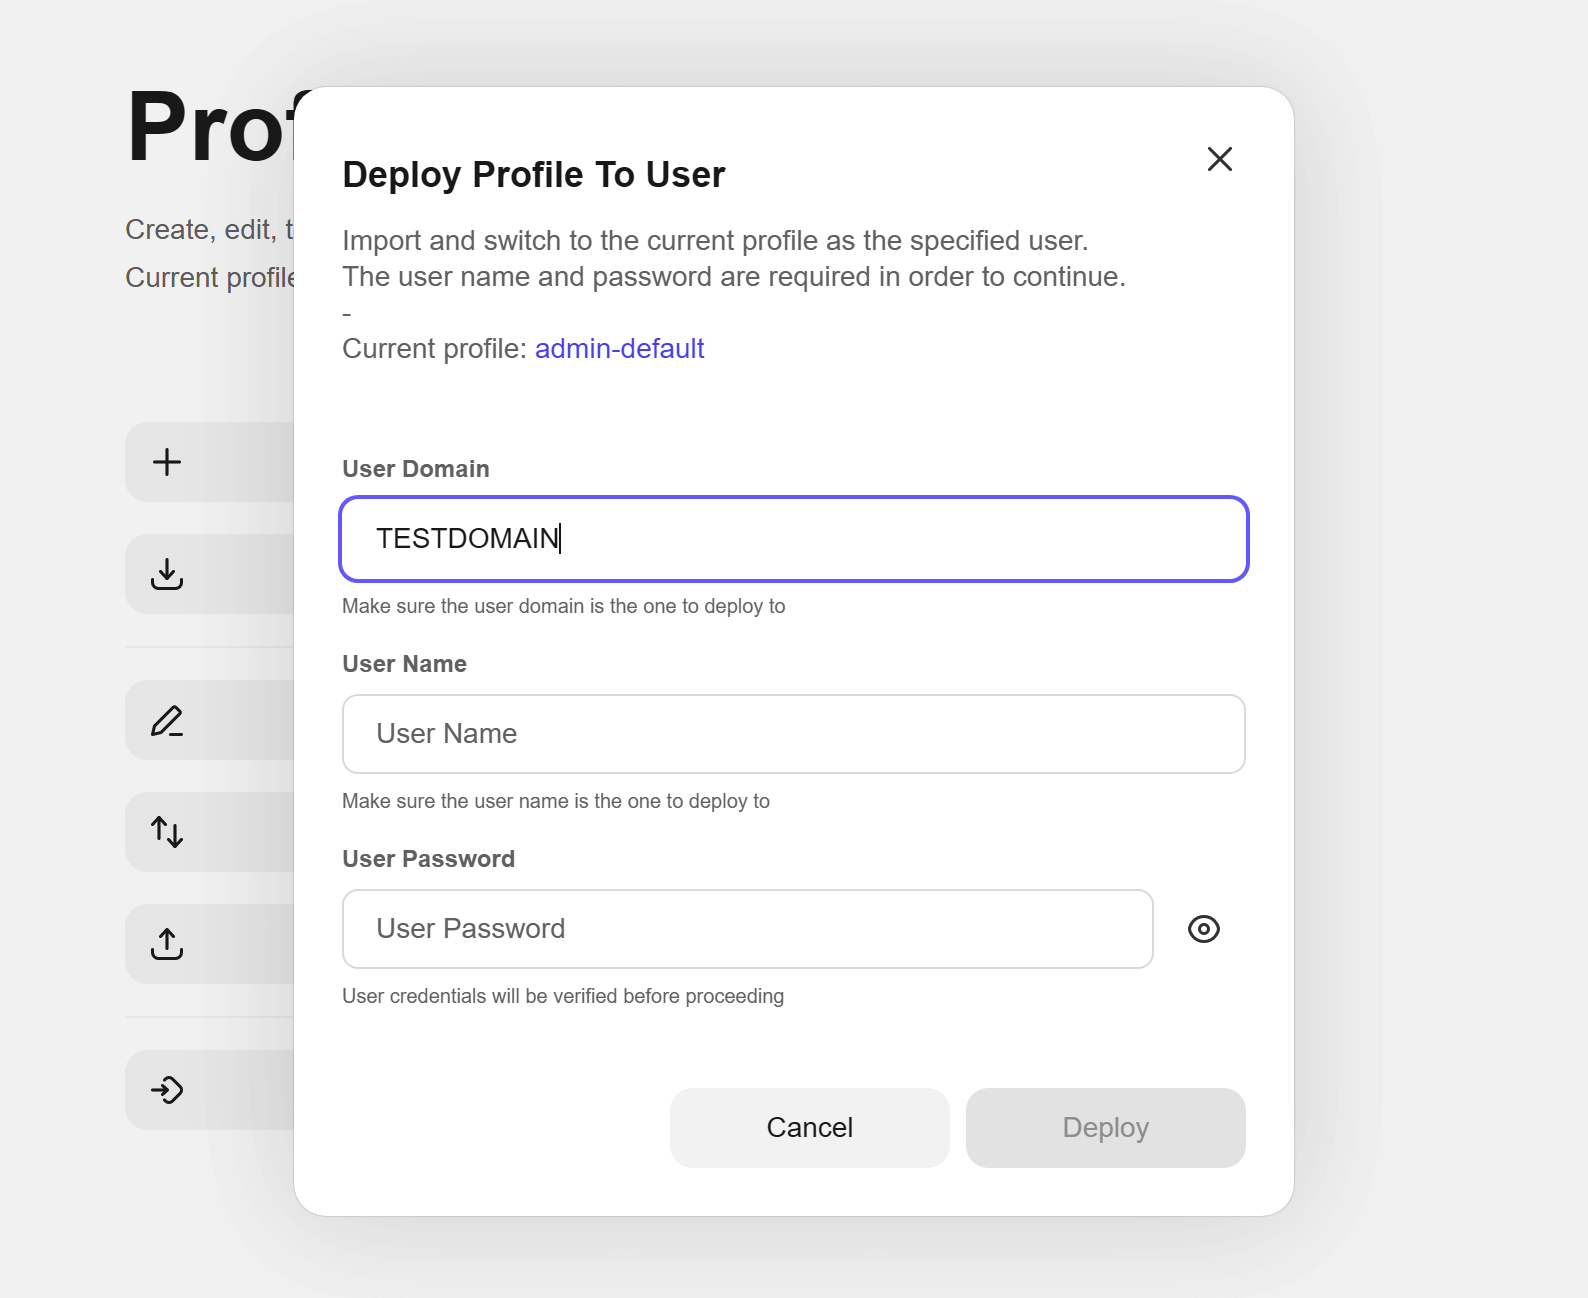
Deploy Profile To User
The Administrator of the device can easily deploy the rcc profile to other users of the same device.
This action means copying the current active profile from the Administrator workspace to the targeted user account/workspace, import the said profile and make it active for the user in question.
Thus the Robocorp working environment is propagated to another user workspace.
Worker Management
The Worker Management pages will provide ways to set up a Demo Worker for testing purposes and dedicated Windows Workers for different automation tasks.
Worker Management will also provide you with a list of Workers that you can inspect and control. You will be able to see the Worker status in different circumstances, and also execute different actions with the Worker.
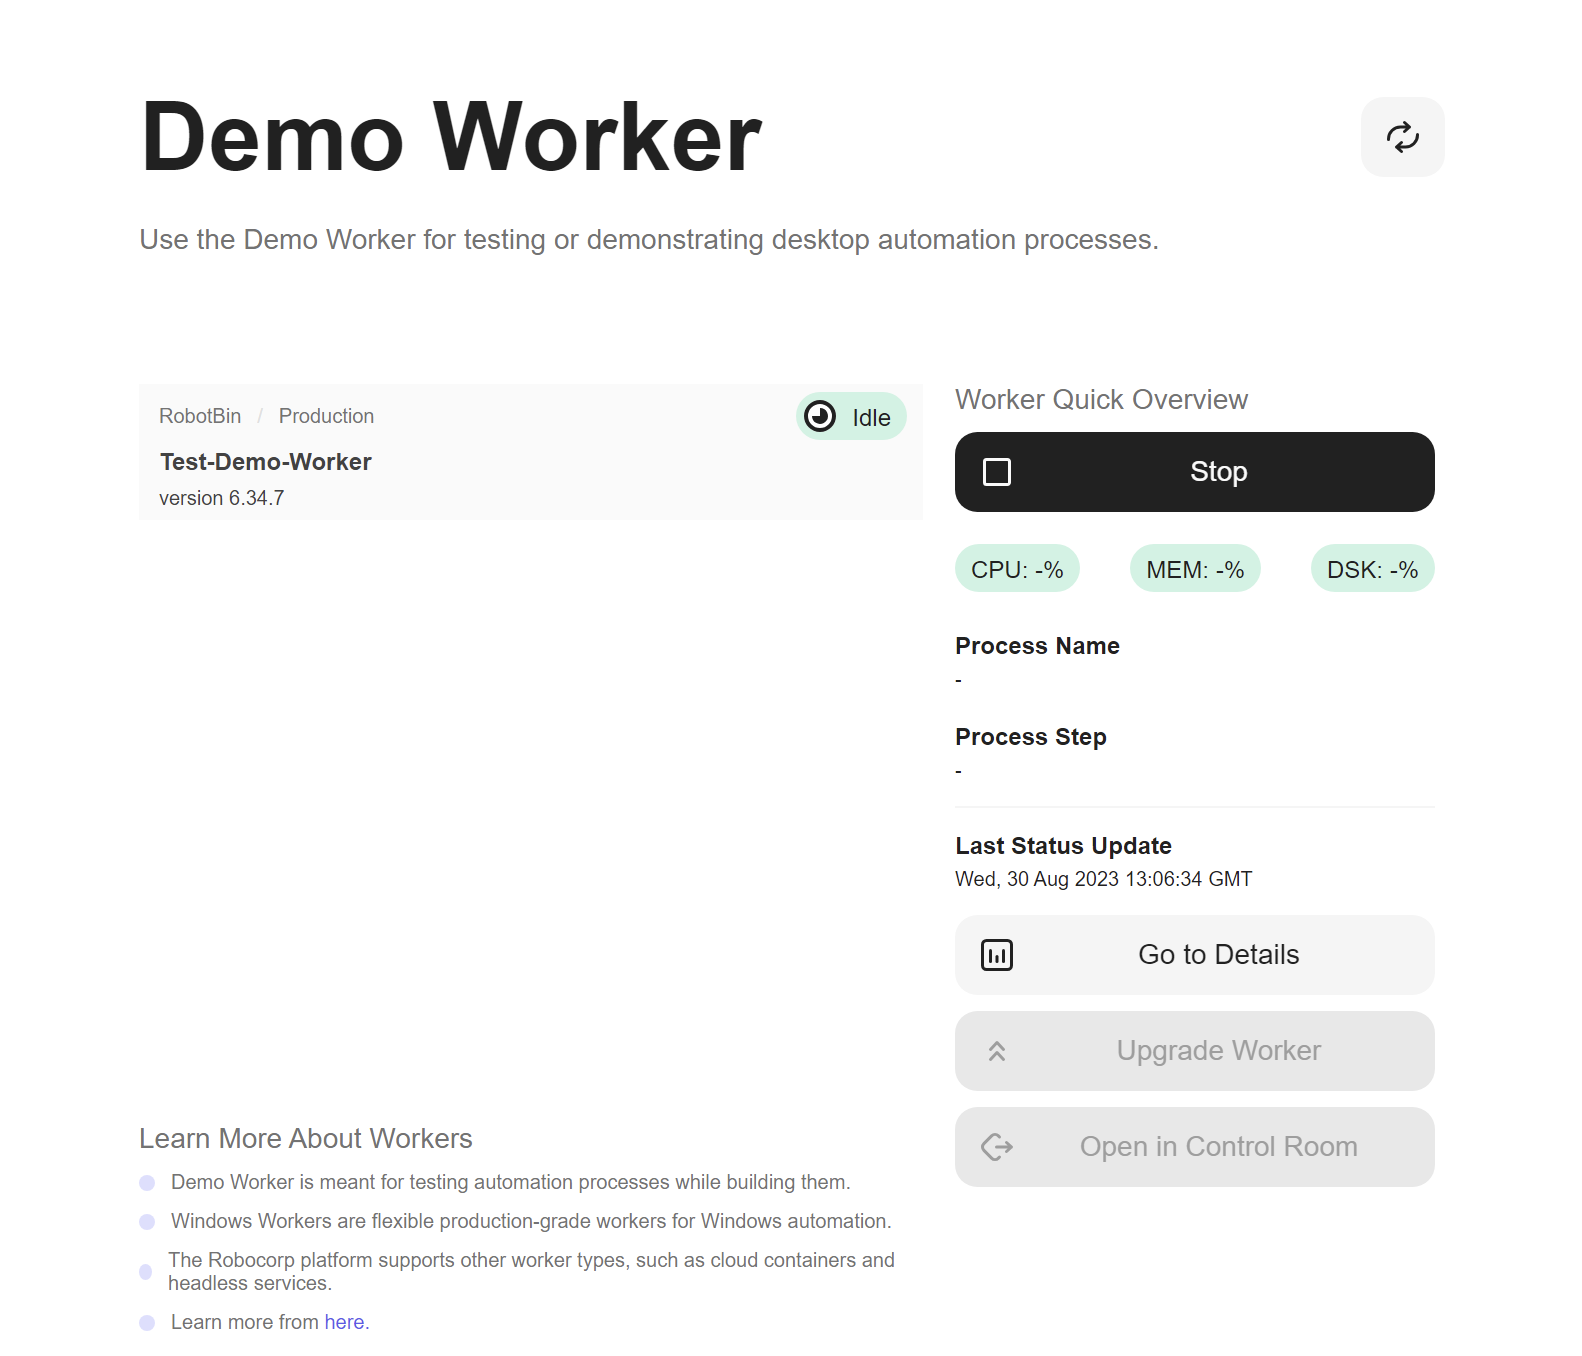
The Quick Overview section will provide you with additional information about the Worker and with the possibility of controlling it.
You can see the metrics (CPU, Memory, Disk) right off the bat, but also the process details if the Worker is currently executing a task.
You can Start, Stop, Upgrade Worker directly from there.
You can always navigate to Worker Details when you desire to do so. Or directly navigate to Control Room and see the Worker there.
Demo Worker
To add a new Demo Worker, click on the New Worker button to open up a dedicated dialog.
Inside the dialog you will need to provide the Link Token. The necessary token can be found in Control Room following this path:
- Access your dedicated Robocorp Control Room (possible URL: https://cloud.robocorp.com/)
- Make sure you select the right Organization and the right Workspace
- With the left side menu, navigate to the Unattended option where you'll find the Workers
- On the right central panel, you'll find the Linked Self-Hosted Workers section
- Click on Link Worker
- A dialog should show up giving you a unique token to use when linking the worker
- Copy to clipboard
Coming back to Setup Utility you'll have to paste the token in the Link Token field.
Afterwards, you can add a Worker Name.
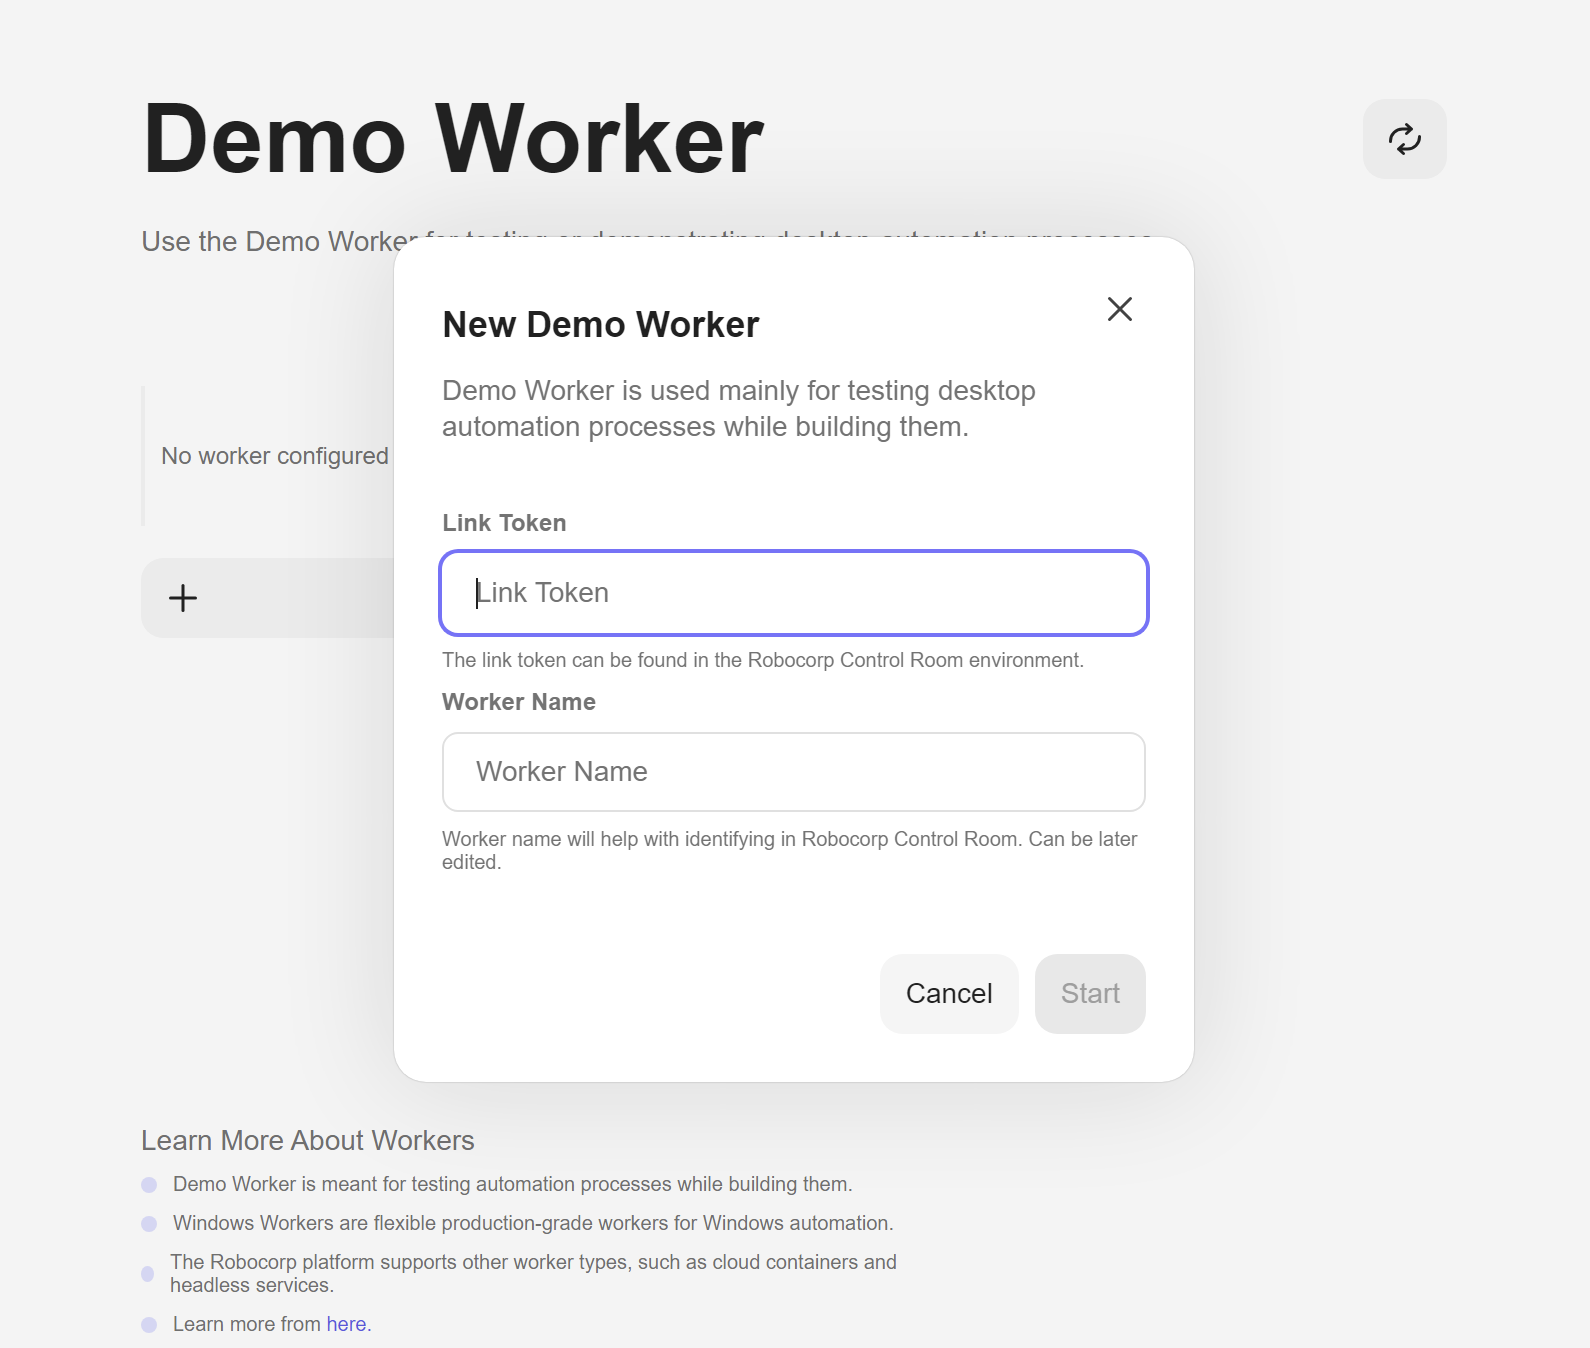
Once you have all of fields filled in, you can Start the process.
Setup Utility will download the worker (the executable needed), will verify the download and the correct execution of the worker, will initialize the worker (a process in which the worker downloads and sets up the needed tools) and will link the Demo Worker to Control Room.
If everything works fine, you will be guided to the Worker Details page.
Once linked, the Demo Worker will be visible in the Linked Self-Hosted Workers section in Control Room with an Offline status.
Windows Workers
With Setup Utility you will be able to manage a series of Windows Workers dedicated for your automation tasks. The Windows Workers are the appropriate option for setting up production ready environments.
Prerequisites
⚠️ Windows Workers are supported only on Windows OS.
Setting up a Windows Worker (as the Demo Worker) will heavily depend on the state of the current environment. Setup Utility runs the diagnostic checks in order to determine if the environment is suitable for remote execution of tasks. You can always quickly validate your environment.
As seen in the above diagram, it is highly recommended that you validate the environment before going through Worker Management.
If environment has warnings in the diagnostic checks, make sure you go through them in search of something critical.
In case of failures, we don't recommend setting up a Windows Worker. You might get into complicated situations that would require expert intervention.
⚠️ Before proceeding with the Windows Worker setup, please make sure you have done an end-to-end validation of the environment by running from Control Room a automation task with the help of the Demo Worker.
Add a new worker
To add a new Windows Worker, click on the New Windows Worker button to open up a dedicated dialog.
Adding a new Windows Worker is an easy multi-step process. Setup Utility will guide you through it all.
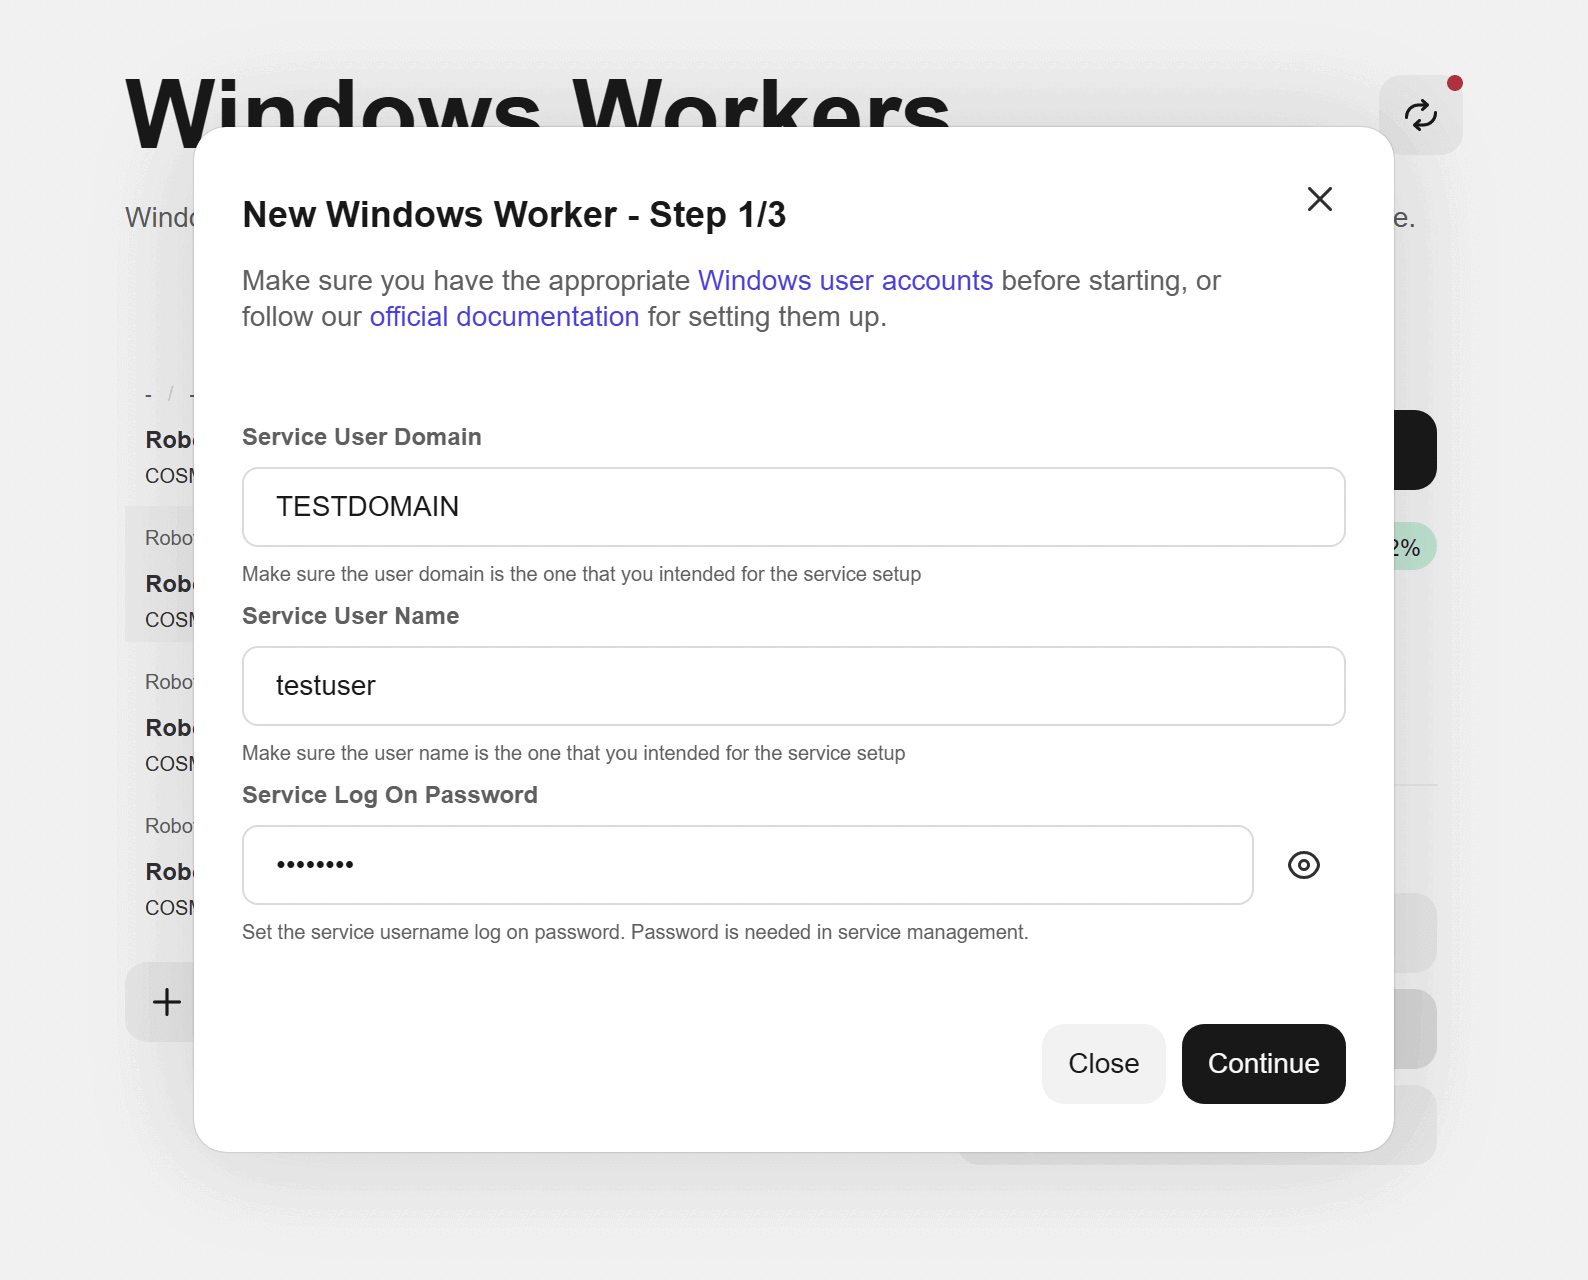
Step 1 - Specify the dedicated local user account
Make sure you have the necessary user account set up. Every worker needs a dedicated local user account. Using different accounts for different workers provides a series of benefits, but the one that stands out the most is the ability to create RDP connections without perturbing other workers' executions.
Please make sure you know the correct password for each user you create.
For more information, read about what unattended automations are and how to find the right worker setup.
You can easily open the Windows User Manager from Setup Utility or open the official documentation with the links provided in the application.
Setup Utility will detect the current user and fill in the details for you, but make sure you have the correct local user domain and correct local user name set up in the dialog.
Provide the correct Service User Domain, Service User Name & Service User Password in the dialog form in order to proceed. You will be able to get back to this step if needed.
Do not worry. The Service User Password is not saved anywhere on disk, it is only kept in the internal memory of Setup Utility. You can remove it anytime from
Worker Details > Menu Button > Clear Temp Passwordor by quitting Setup Utility.
Step 2 - Link the worker to Control Room
Inside the dialog you will need to provide the Link Token. The necessary token can be found in Control Room following this path:
- Access your dedicated Robocorp Control Room (possible URL: https://cloud.robocorp.com/)
- Make sure you select the right Organization and the right Workspace
- With the left side menu, navigate to the Unattended option where you'll find the Workers
- On the right central panel, you'll find the Linked Self-Hosted Workers section
- Click on Link Worker
- A dialog should show up giving you a unique token to use when linking the worker
- Copy to clipboard
Coming back to Setup Utility you'll have to paste the token in the Link Token field.
Afterwards, you can add a Service Name. There is also a suggestion in case you need it.
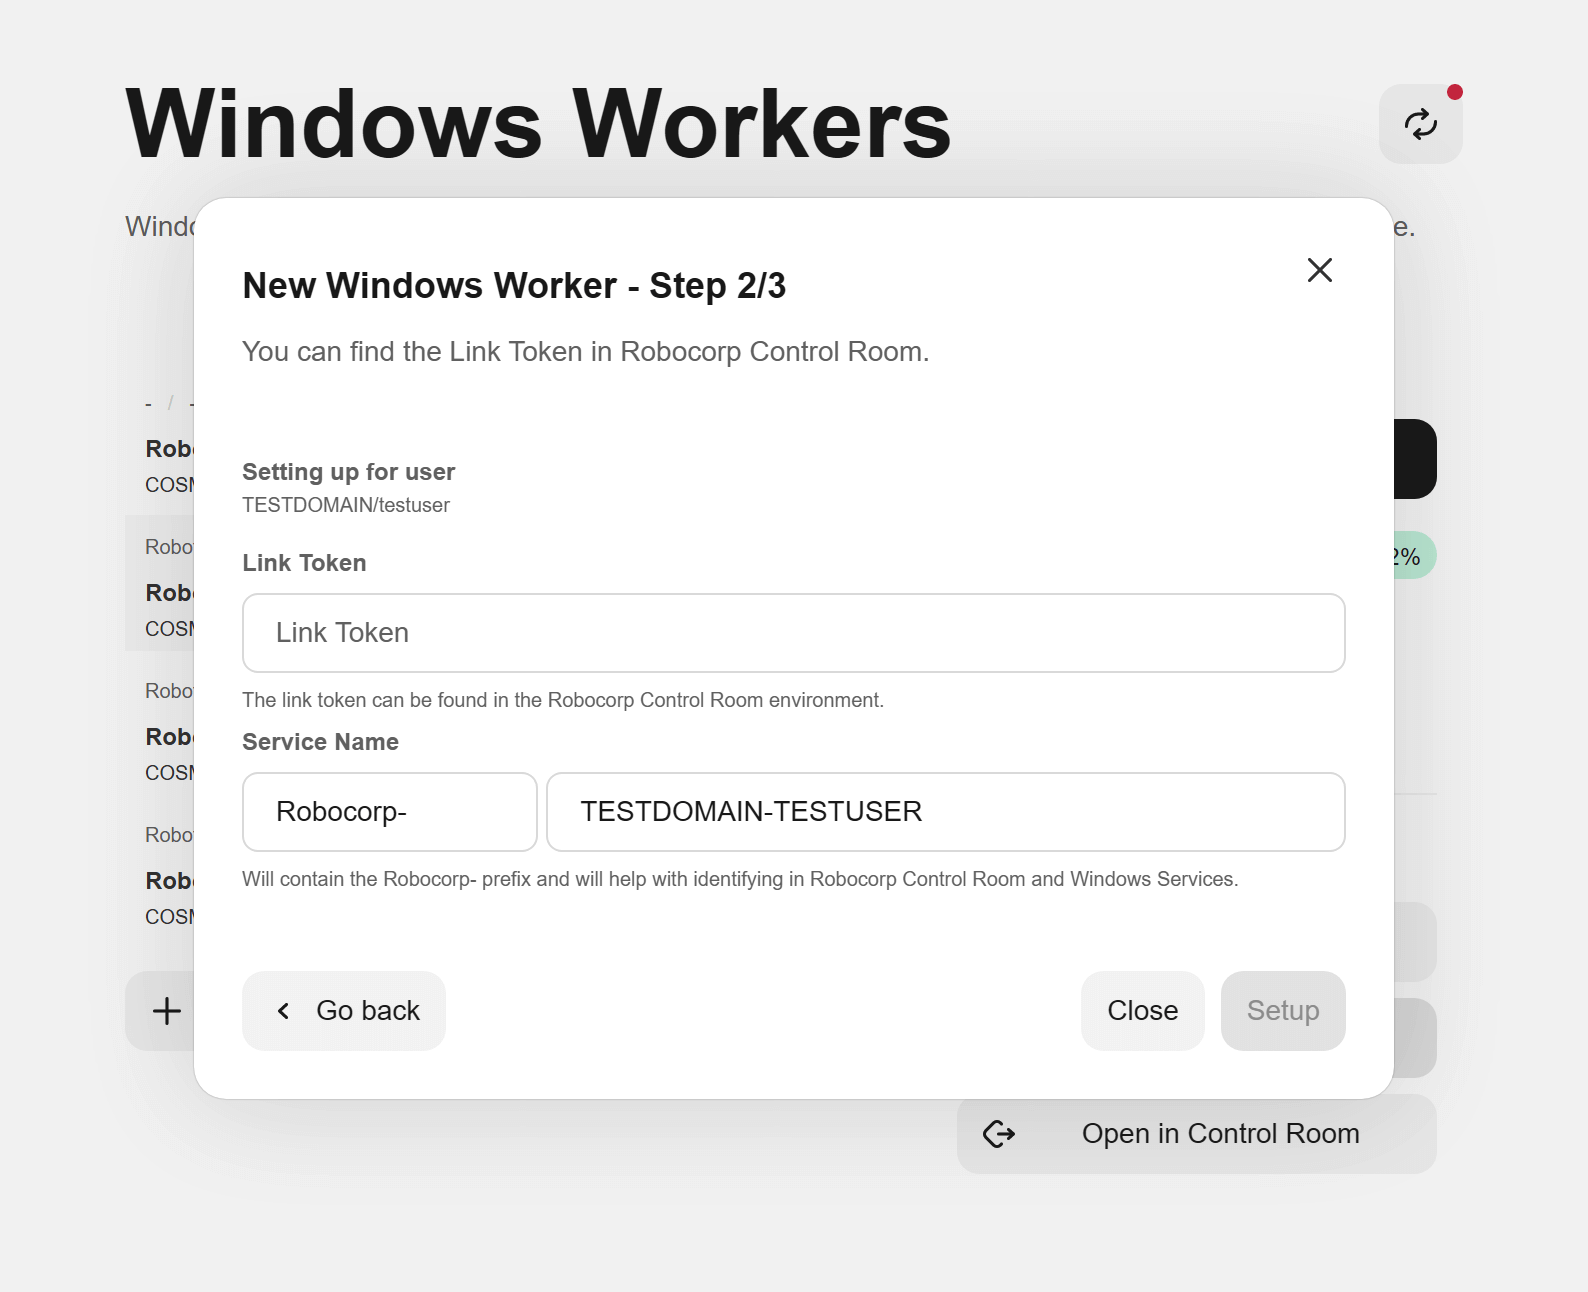
You can go back and make any corrections needed to the input fields before continuing!
Once you have all of fields filled in, you can Setup the Windows Worker.
Setup Utility will download the service helper (the executable needed), will verify the download and will install the worker, will validate the correct execution of the worker and, finally, it will link the Windows Worker to Control Room.
Throughout the process you might get asked by the system if you would permit the process to continue with dedicated permissions. Setting up the Windows Worker needs administrator permissions as it is a process that adds a new operating system service and enables access for the mentioned user to that service and other such facilities.
Please allow the process to continue by answering
YESto all operating system dialogs that might alert you.
Once linked, the Demo Worker will be visible in the Linked Self-Hosted Workers section in Control Room with an OFFLINE status.
Step 3 - Get information about the newly added worker
If everything went well while setting up the worker, you'll reach this step.
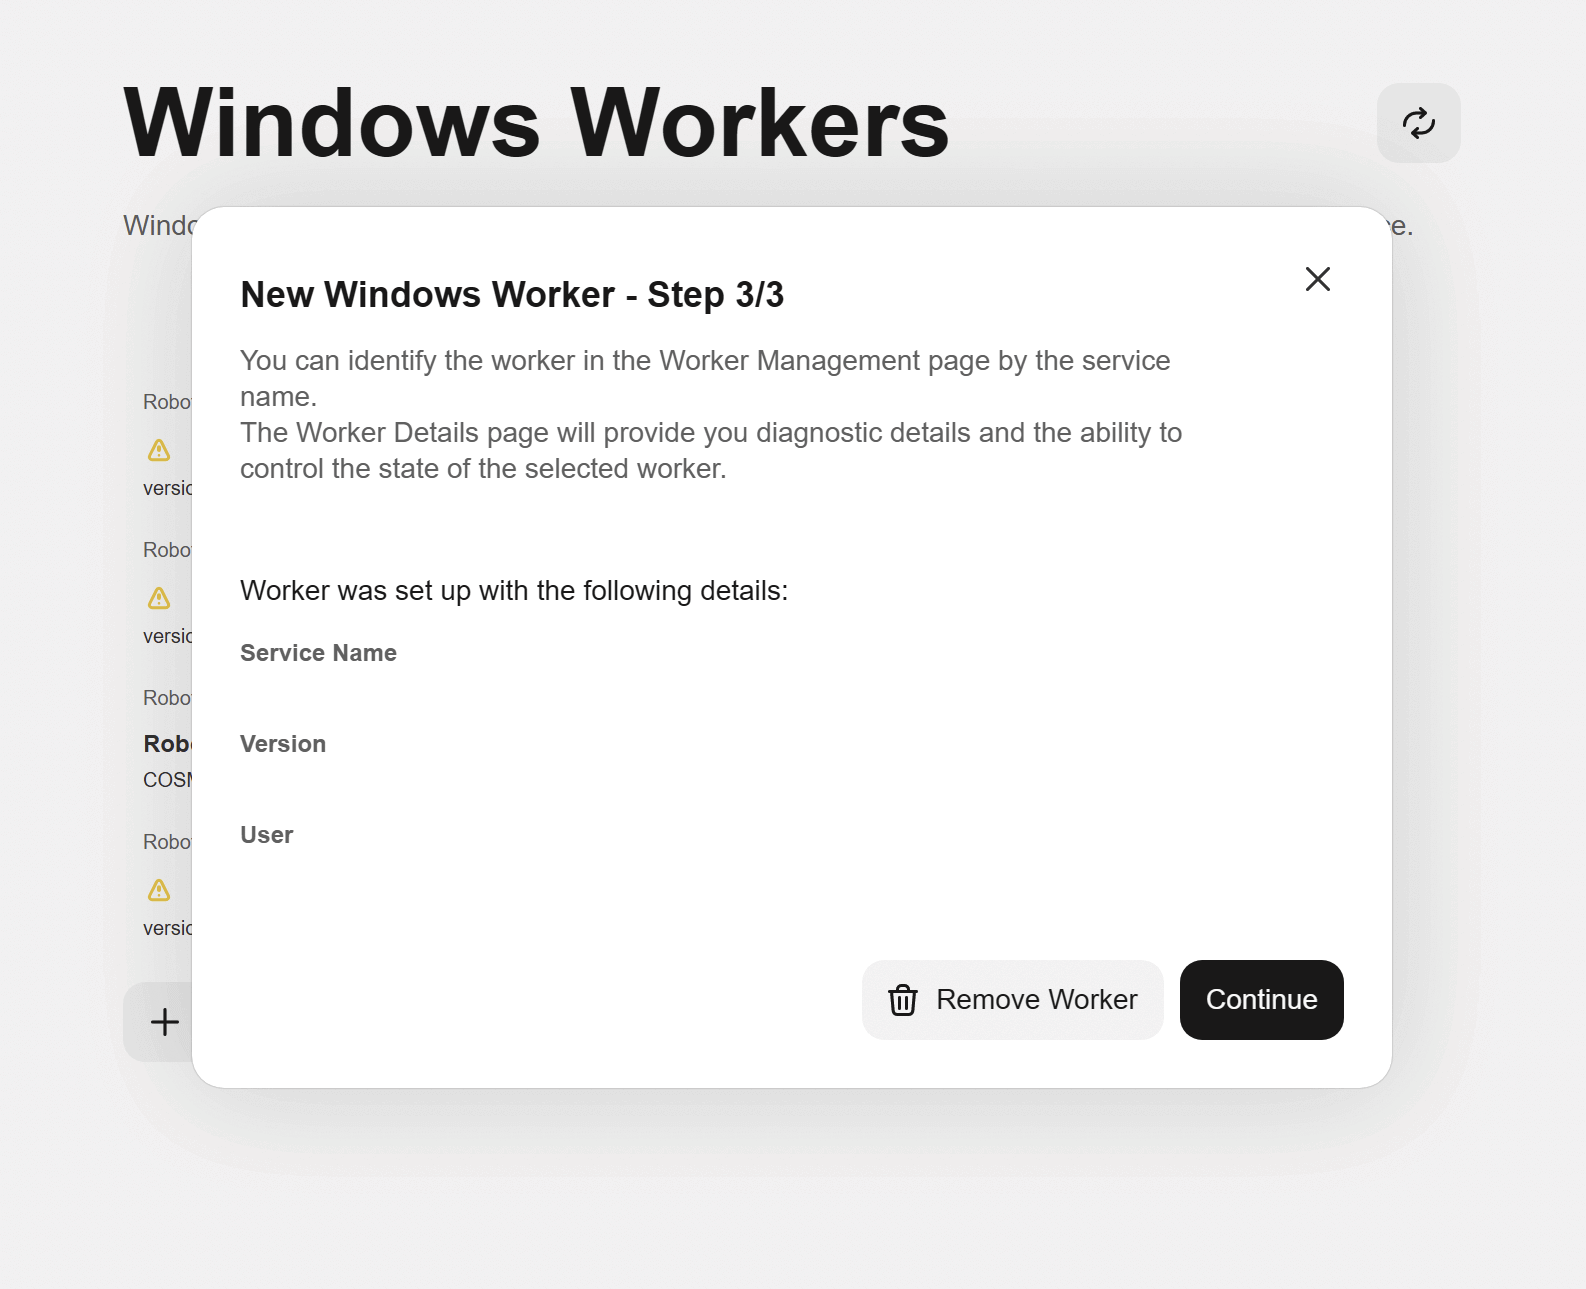
There is a short guide on how you can identify the newly added worker and the worker details.
If everything is fine, you will Continue to the Worker Details page.
🚀 You are good to go!
Worker Details
When it comes to the workers, Setup Utility will monitor their execution and will keep you informed throughout the process.
You can now Start the worker.
Once started, you will always have the possibility to Stop the execution.
⚠️ Quitting the Setup Utility application will stop the Demo Worker. The Windows Workers will still continue execution as operating system services. They are also persistent - if the device is restarted, the Worker will restart as well.
The Worker will have different States of execution.
| Worker Details OFFLINE | Worker Details IDLE | Worker Details BUSY |
|---|---|---|
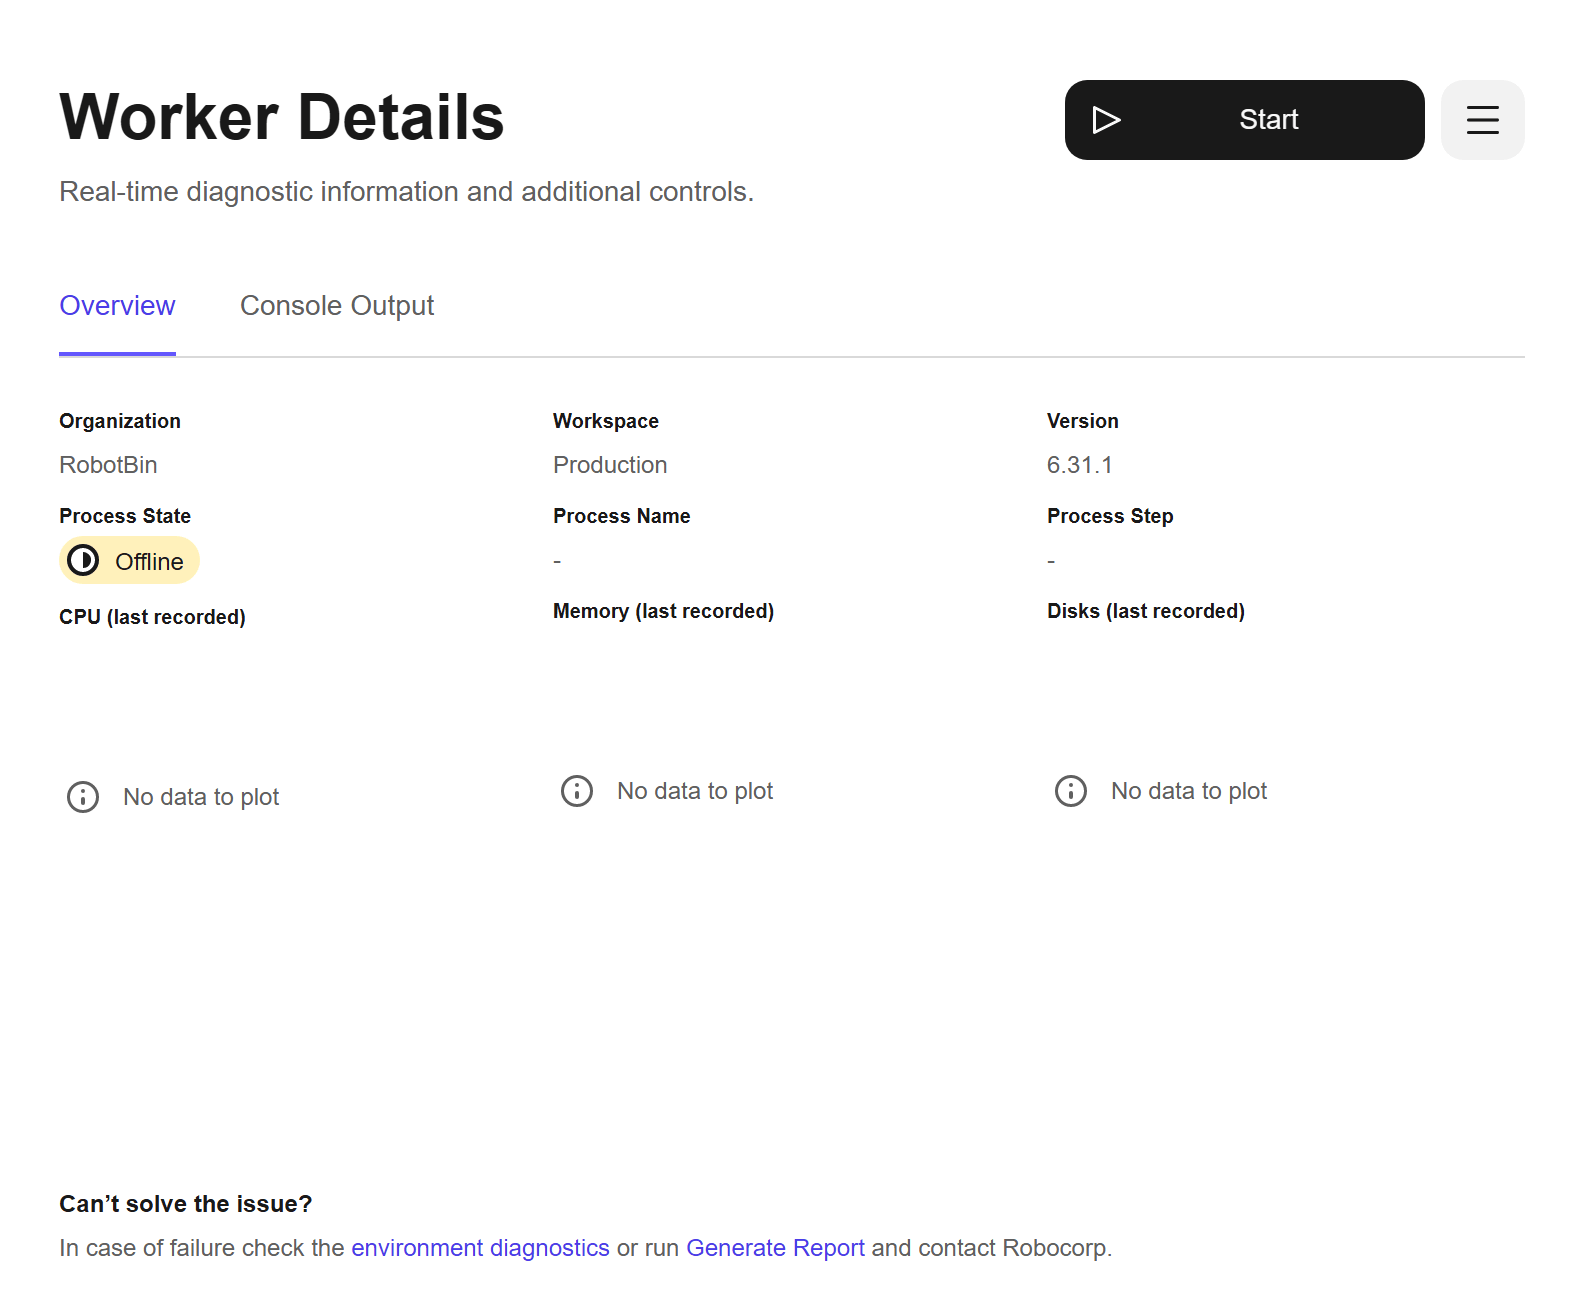 |  |  |
- while OFFLINE, the Worker is not currently running and not capable of receiving tasks
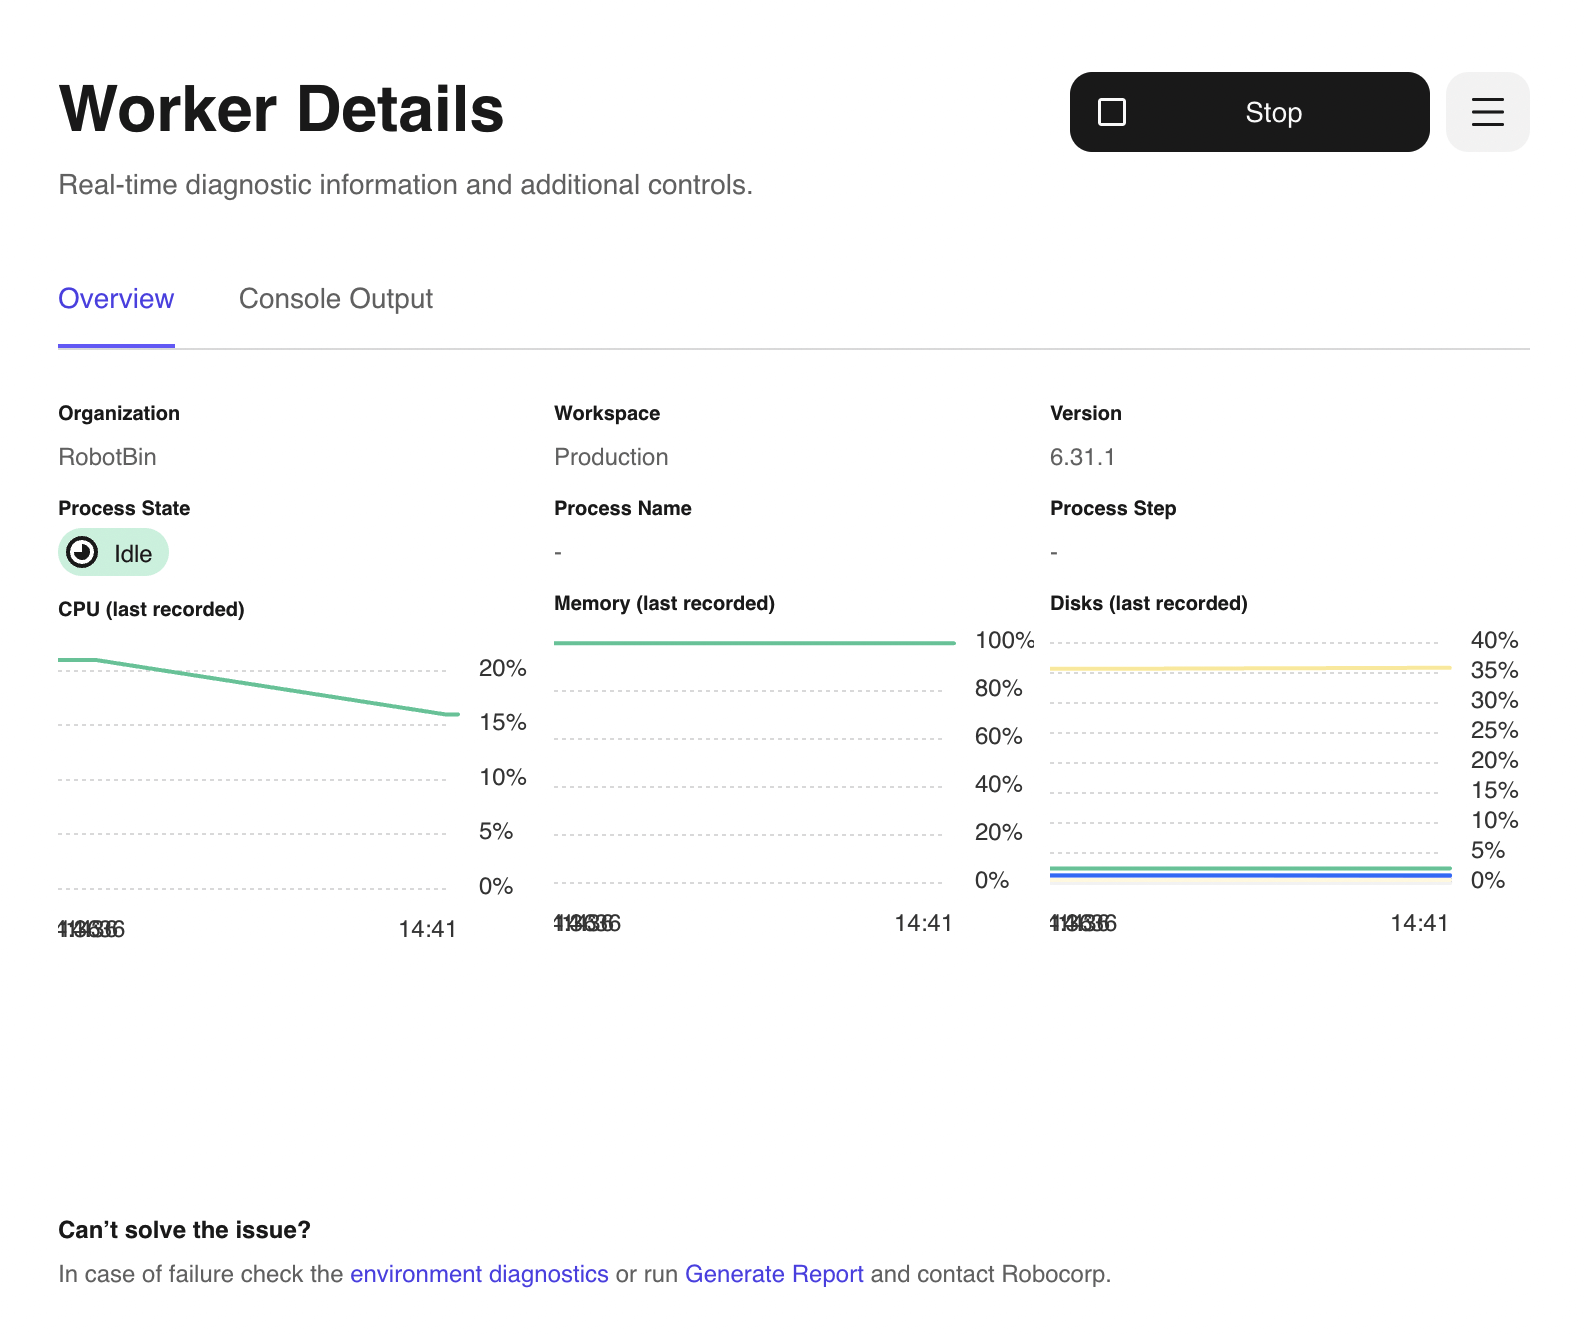
- while IDLE, the Worker is currently running and is waiting on tasks & processes to be assigned to it
- while BUSY, the Worker is executing the task assigned to it
You can follow the execution by inspecting the Console Output. As Windows Workers are set up as Windows Services, the console output is not always available, but we do gather it every chance we have.
If everything is working as expected, you can check the status of the worker in the Linked Self-Hosted Workers section in Control Room. If you started the Worker, the new status should be Idle. This means that the Windows Worker is now capable of receiving tasks.
For better control of the Windows Worker check the Menu from the Worker Details.
Remove Worker at any time. By unlinking, Setup Utility will break the connection with Control Room, but, for security reasons, will not delete the worker entry in Linked Self-Hosted Workers.
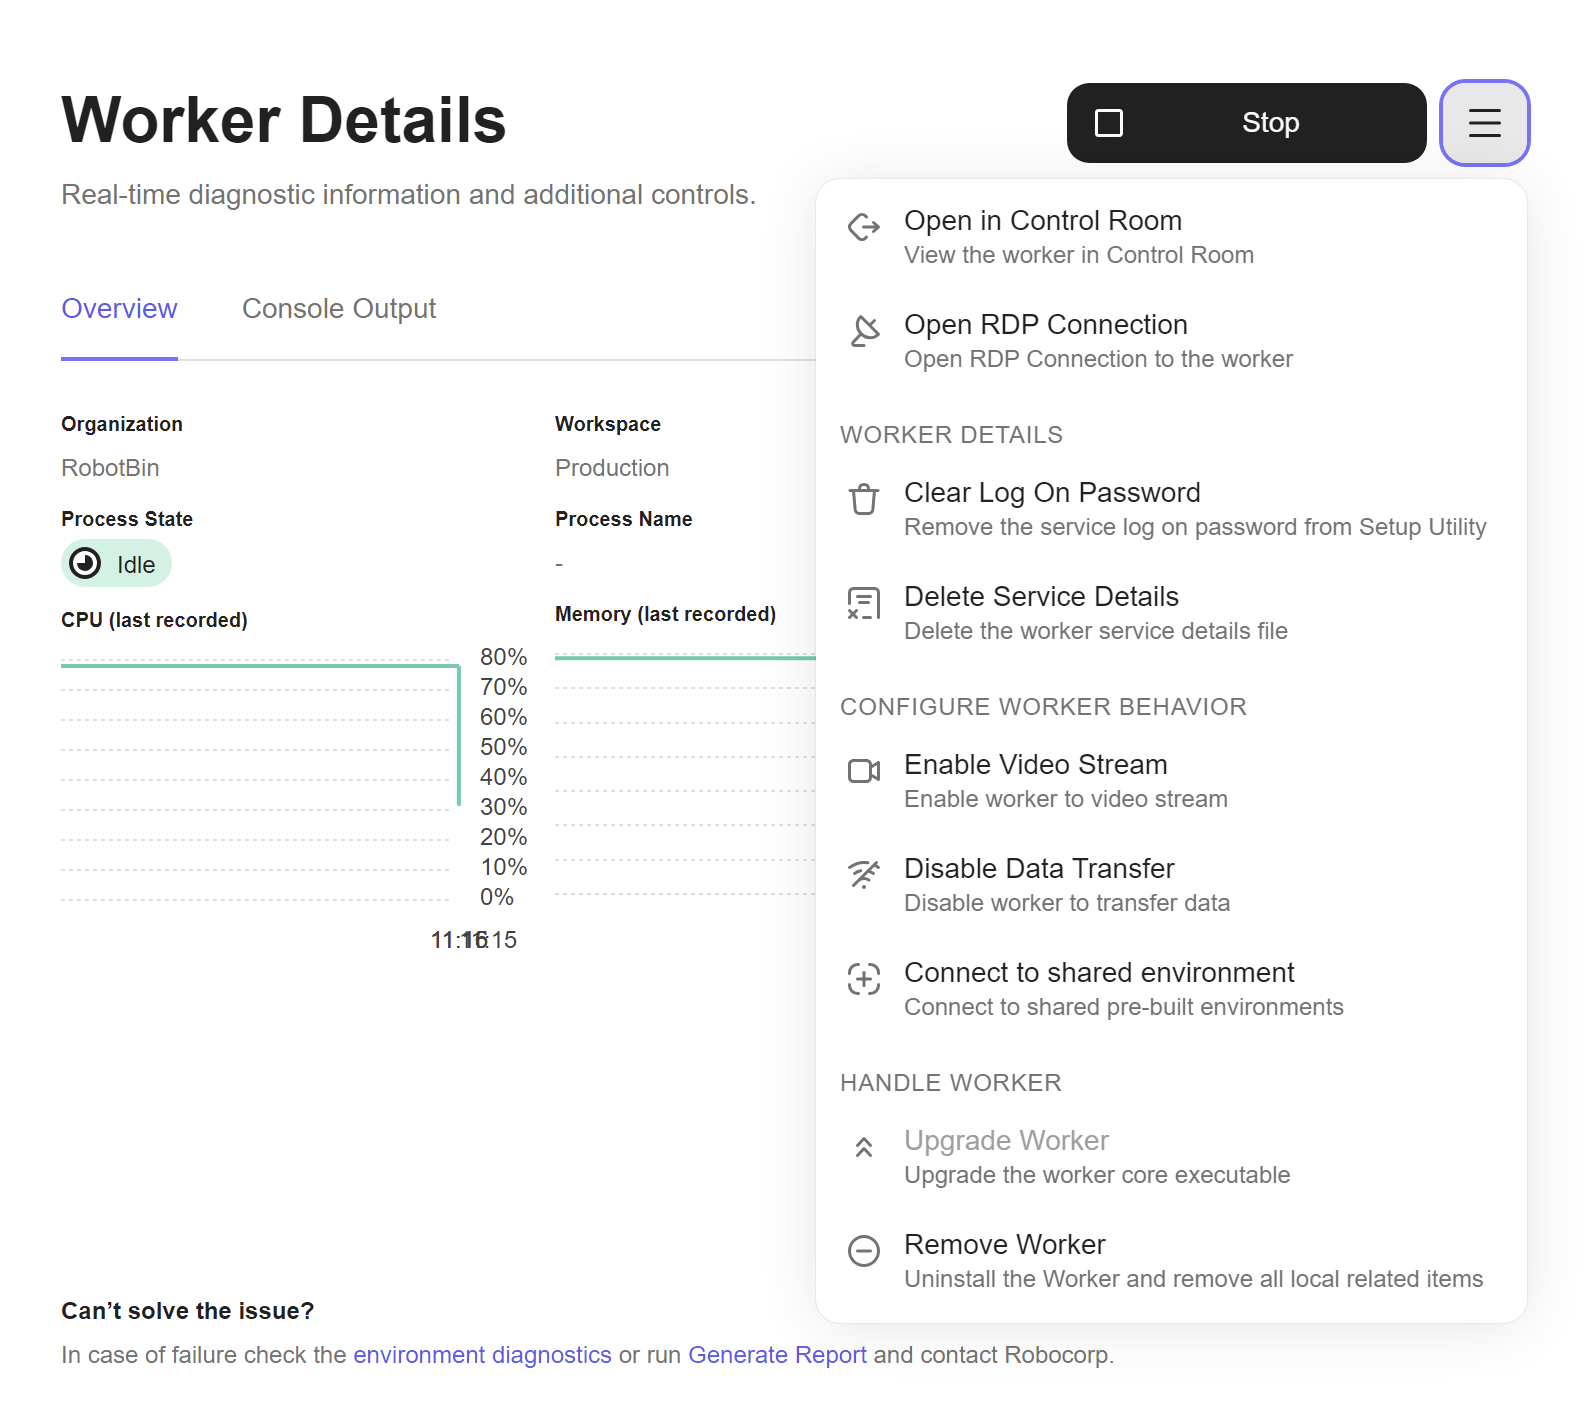
The Menu Button will help with additional actions for the Worker or user.
- Open in Control Room will directly take you to the Linked Worker in Control Room
- Open RDP Connection will attempt to open a RDP connection to the selected Worker
- Clear Log On Password will clear the temporarily saved Service Password from memory
- Delete Service Details will remove all relevant details about the service that will identify it against a specific domain, user and service name.Please be careful as this is a destructive operation.
- Enable Video Stream or Disable Video Stream will enable or disable the Worker's ability to send a video stream to Control Room
- Enable Data Transfer or Disable Data Transfer will enable or disable the Worker's ability to send data to Control Room
- Connect to shared environment or Revoke shared environment will connect the Worker or revoke Worker's connection to the Globally shared environment
- Upgrade Worker will provide you the ability to upgrade the current worker to a newer version
- Remove Worker will uninstall Worker and remove all relevant details
Note: Enabling/Disabling Video Stream/Data Transfer will require restarting the Worker in order to have the intended effect
Miscellaneous
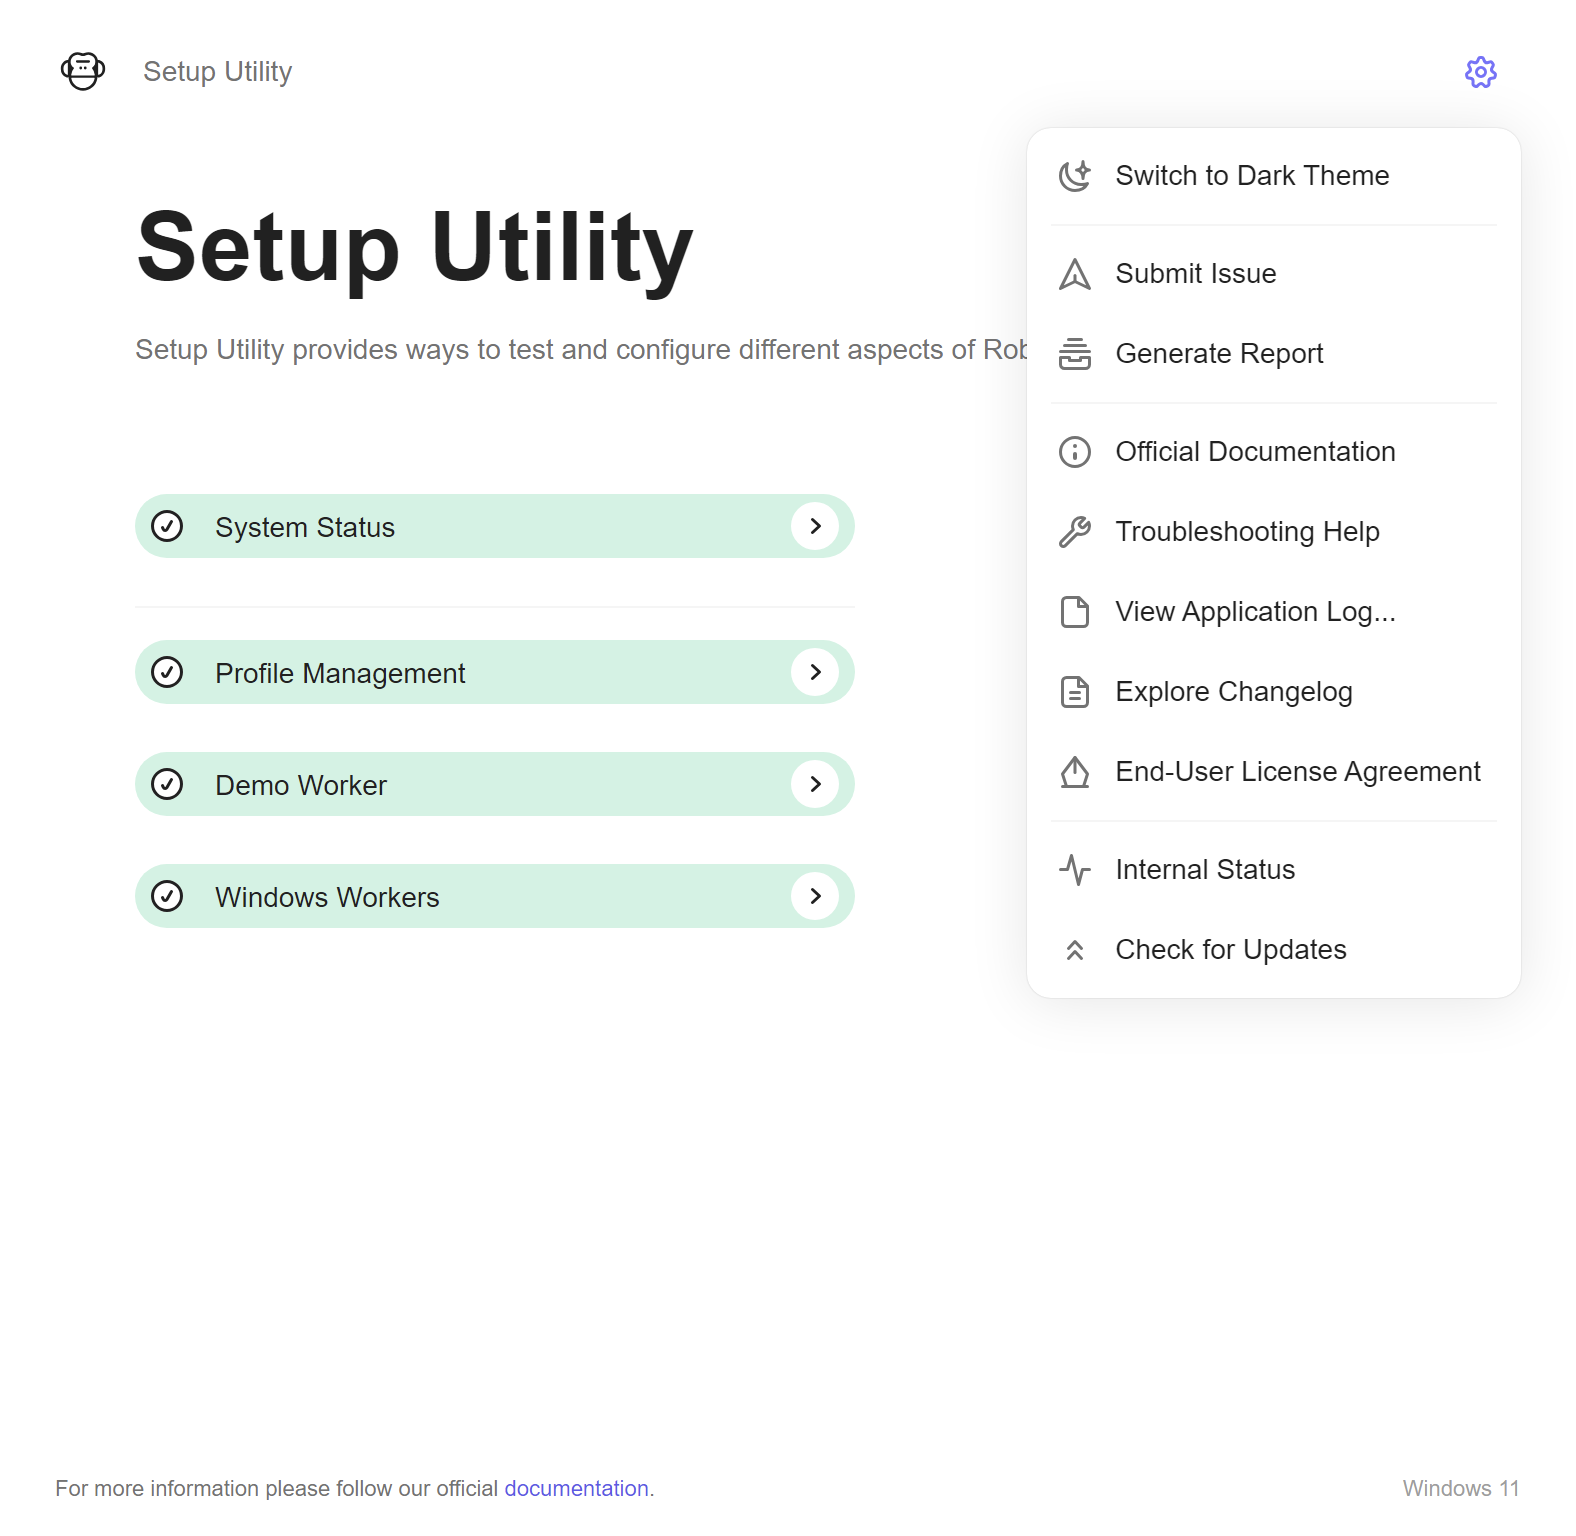
The Settings Button
You can find the Settings Button on every page of Setup Utility.
It provides you with a menu showing different options directly related to the application itself, like Check for Updates, Generate Report or Switch theme..., and indirectly related as Troubleshooting Help or Explore Changelog. These options will help with the application but they will also provide you with external sources of information.
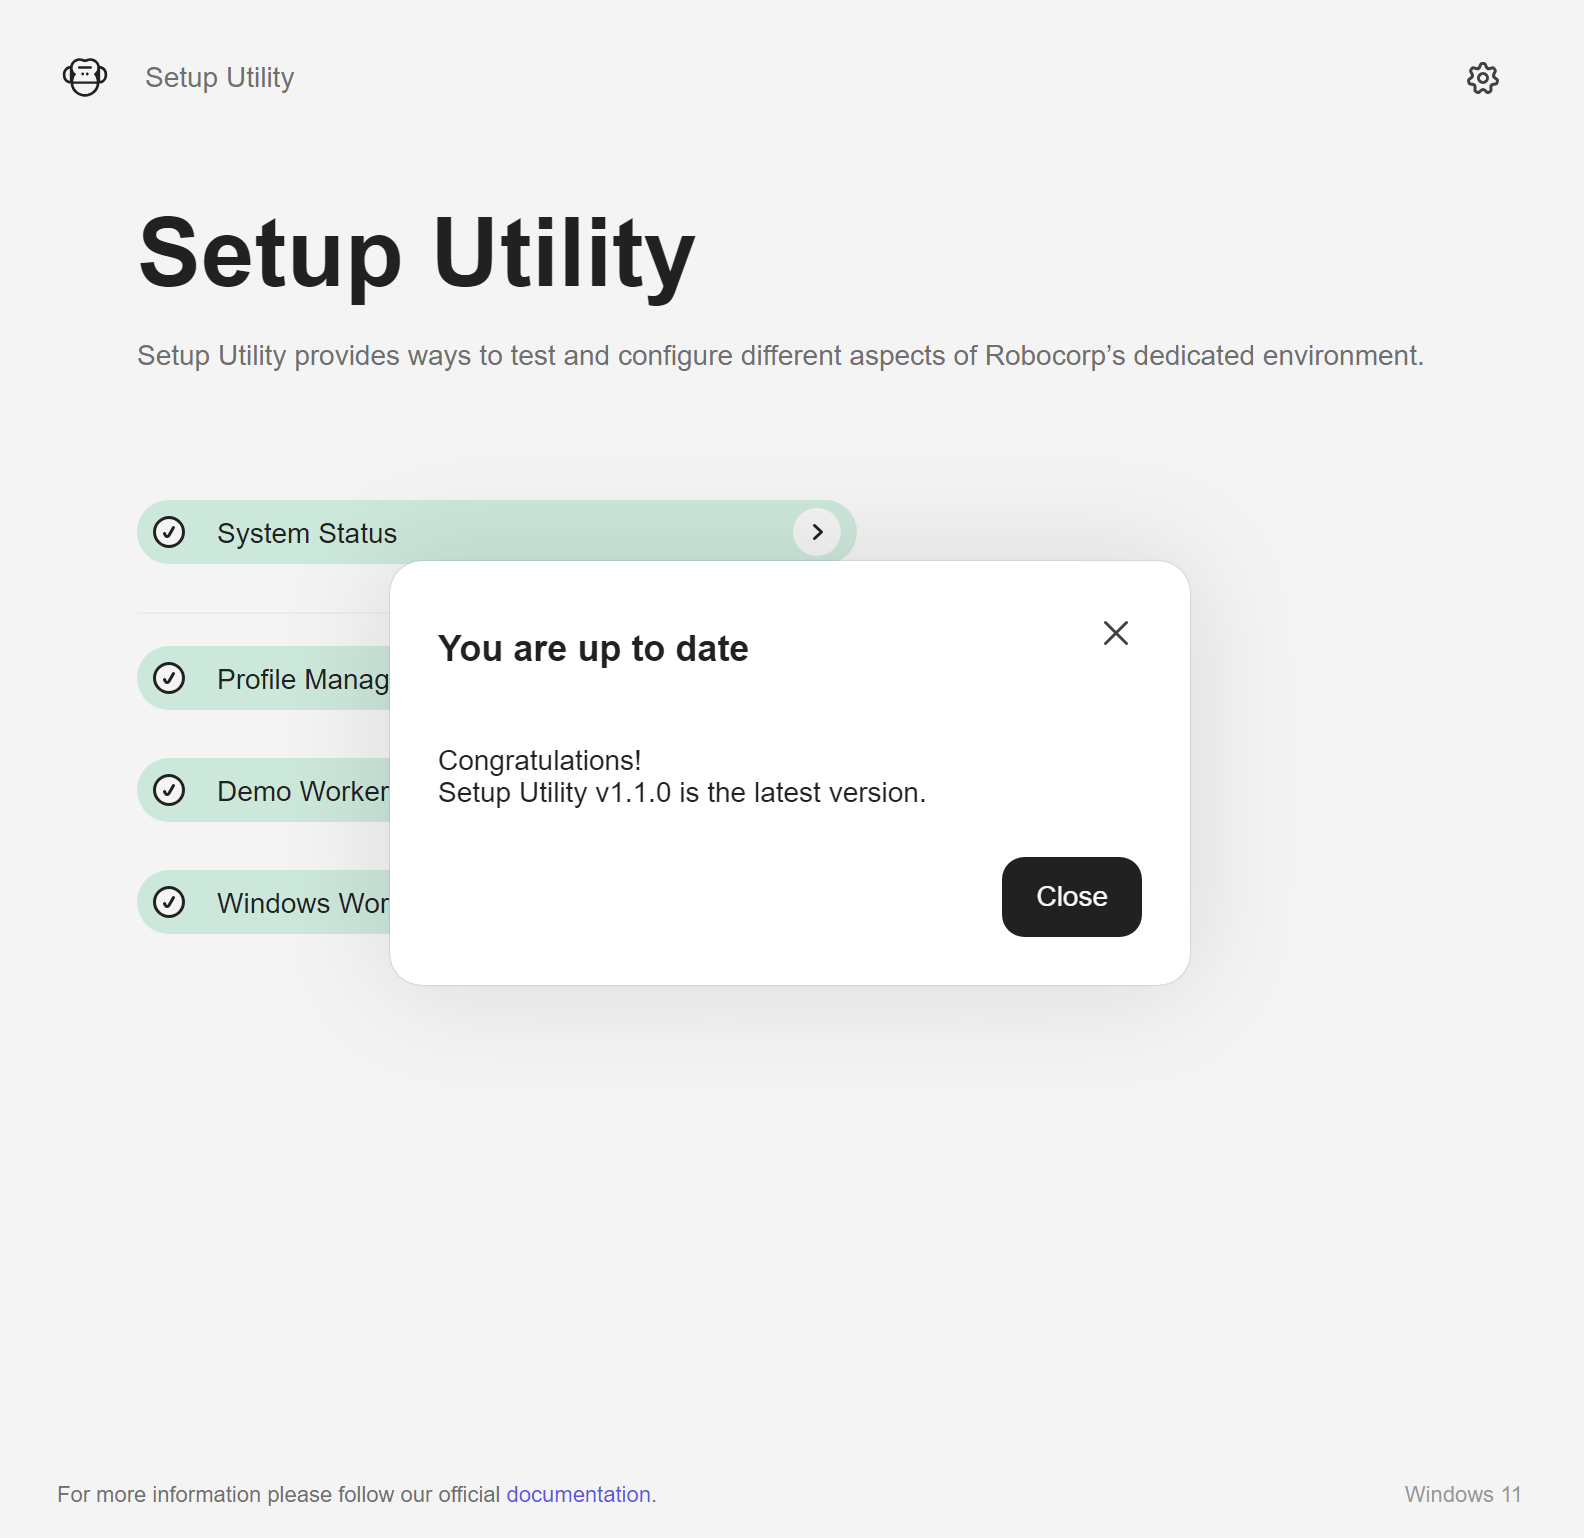
Checking for Updates
Setup Utility has an auto-update mechanism that checks to see if you are running the latest version of the application. If a new version is detected, a pop-up will show up asking you if you would like to do the update.
Within the menu of the Settings Button you can always manually Check for Updates.
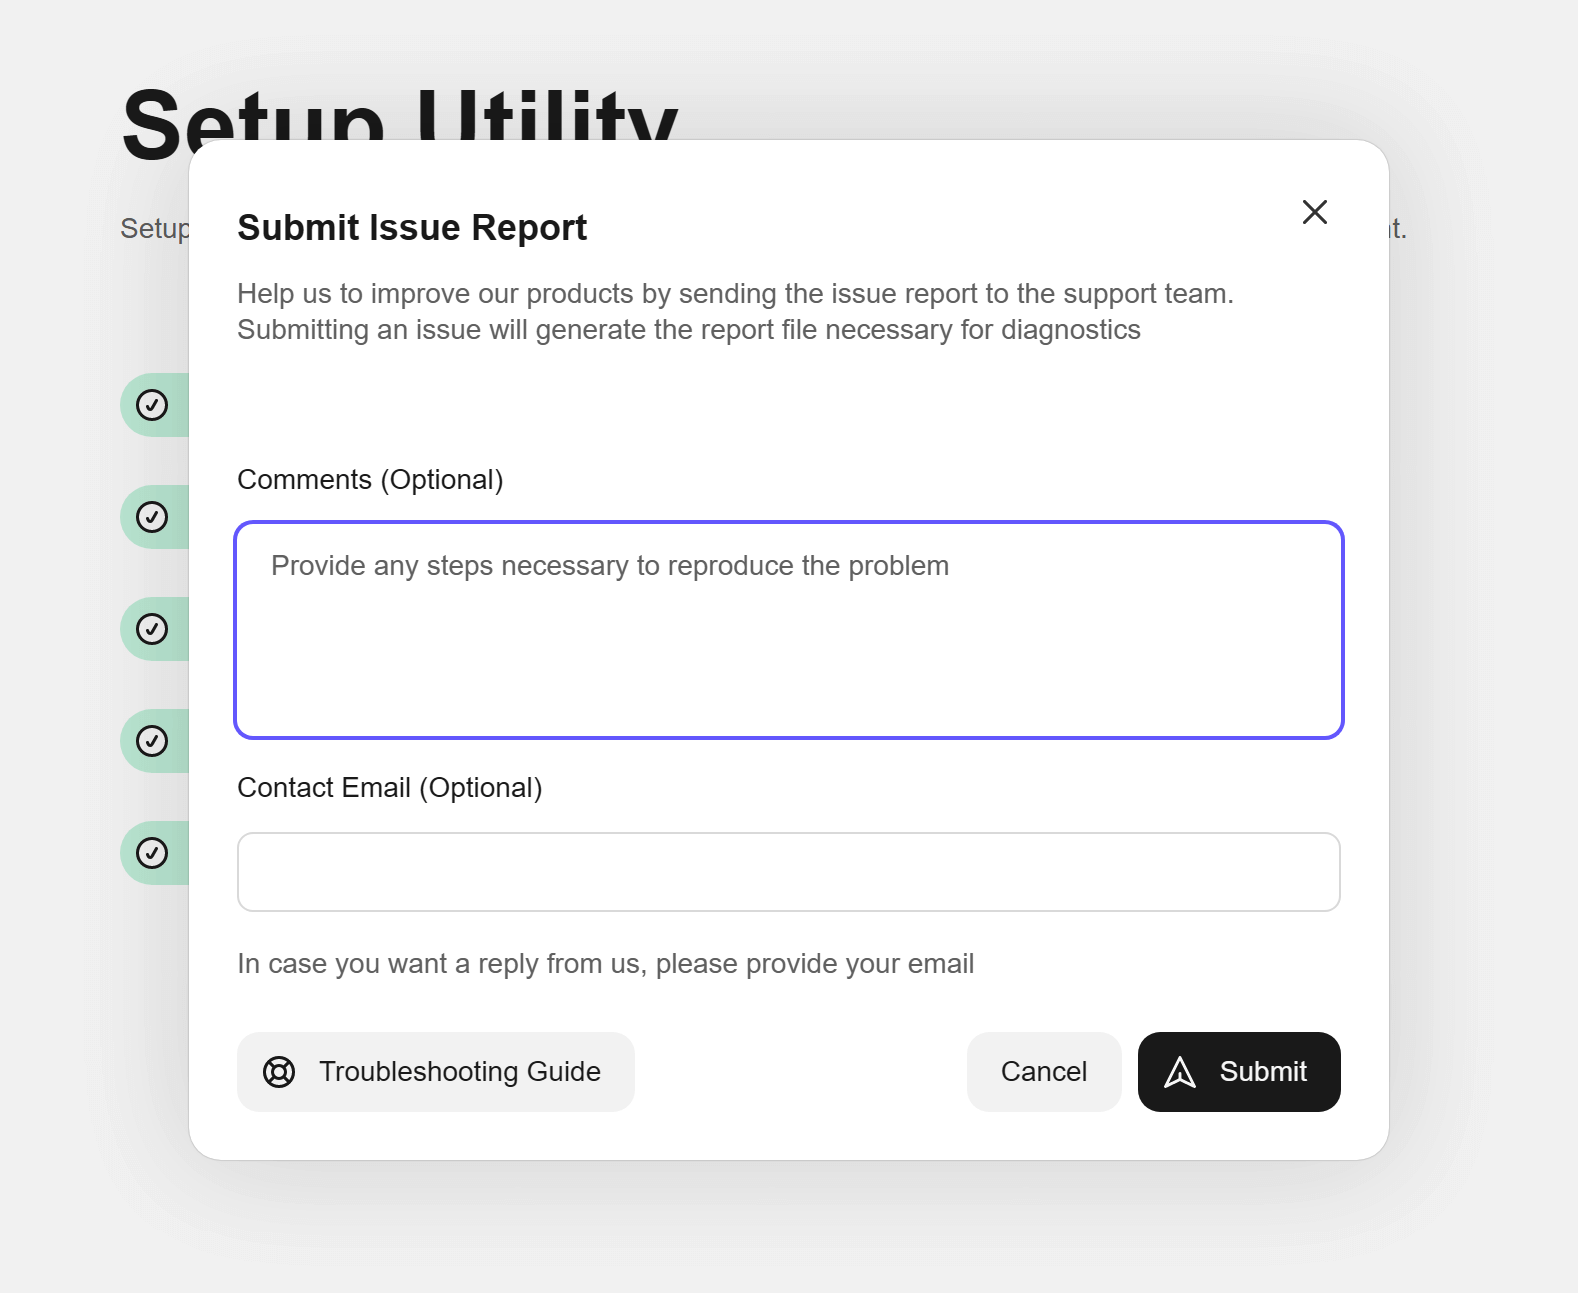
Submit Issue
If you ever find yourself in times of trouble, you can always Submit your Issue to Robocorp. We encourage you to do that and we are deeply thankful for your feedback.
You can always find Submit Issue in the Settings Button menu. If the submission fails for any kind of issues, you will be notified by Setup Utility.
Shared Environments
Setup Utility, with the help of RCC, offers you the possibility of setting up a pre-built environments workspace. This is done through the Holotree technology, that shares a specific workspace with all users on the device and offers.
What is Holotree (Shared Holotree)? Shared holotree is way to multiple users use same environment blueprint in same machine, or even in different machines with same, once it is built or imported into hololib. You can find out more from here.
Enabling at Global level
First, you will need to enable the Shared Holotree (Shared Pre-built Environments) at a Global level.
Navigate to: System Status > Pre-Built Environments & Multiple Users and click on the Enable button.
⚠️ This is only available with the Administrator's permissions.
Connecting or Revoking the Shared Environment
A Worker is the one that will connect or revoke connection to the Shared Environment.
To access this Worker's ability, you'll need to navigate to: Windows Workers > [Select Worker] > Go To Details > Worker Details Menu.
In the menu you'll recognize options to Connect or Revoke depending on the connection state:
| Connect to Shared Environment | Revoke Shared Environment |
|---|---|
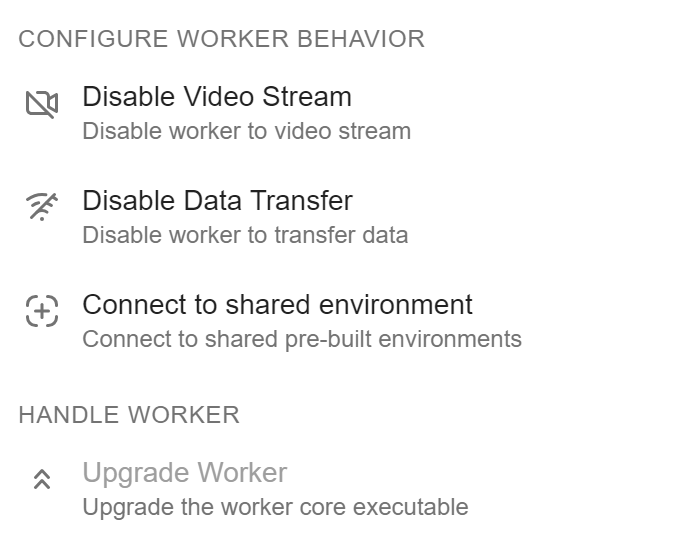 | 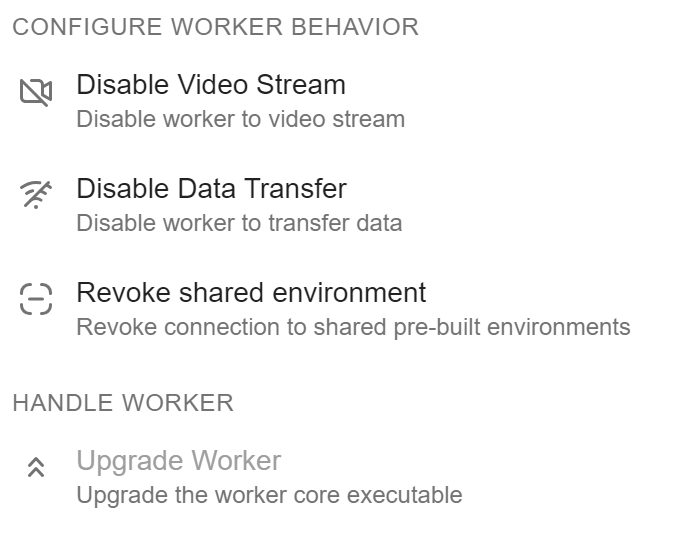 |
⚠️ Once the worker configuration is changed, you might need to restart the Worker for it to establish connection.
Because this is a dedicated ability of the Worker itself and is part of the Worker Details Menu, it is under a protected layer of security as to reach this configuration you'll need to know the Worker account details.